Getting Started
Welcome to RapidFacto! This guide will walk you through the initial setup steps to configure your system. Follow these steps in order to set up the essential components before you start using the system.
Initial Setup Steps
Before you can start using RapidFacto for your daily operations, you need to configure the following components:
- Raw Materials
- Packing Materials
- Products
- Suppliers
Let's go through each step in detail.
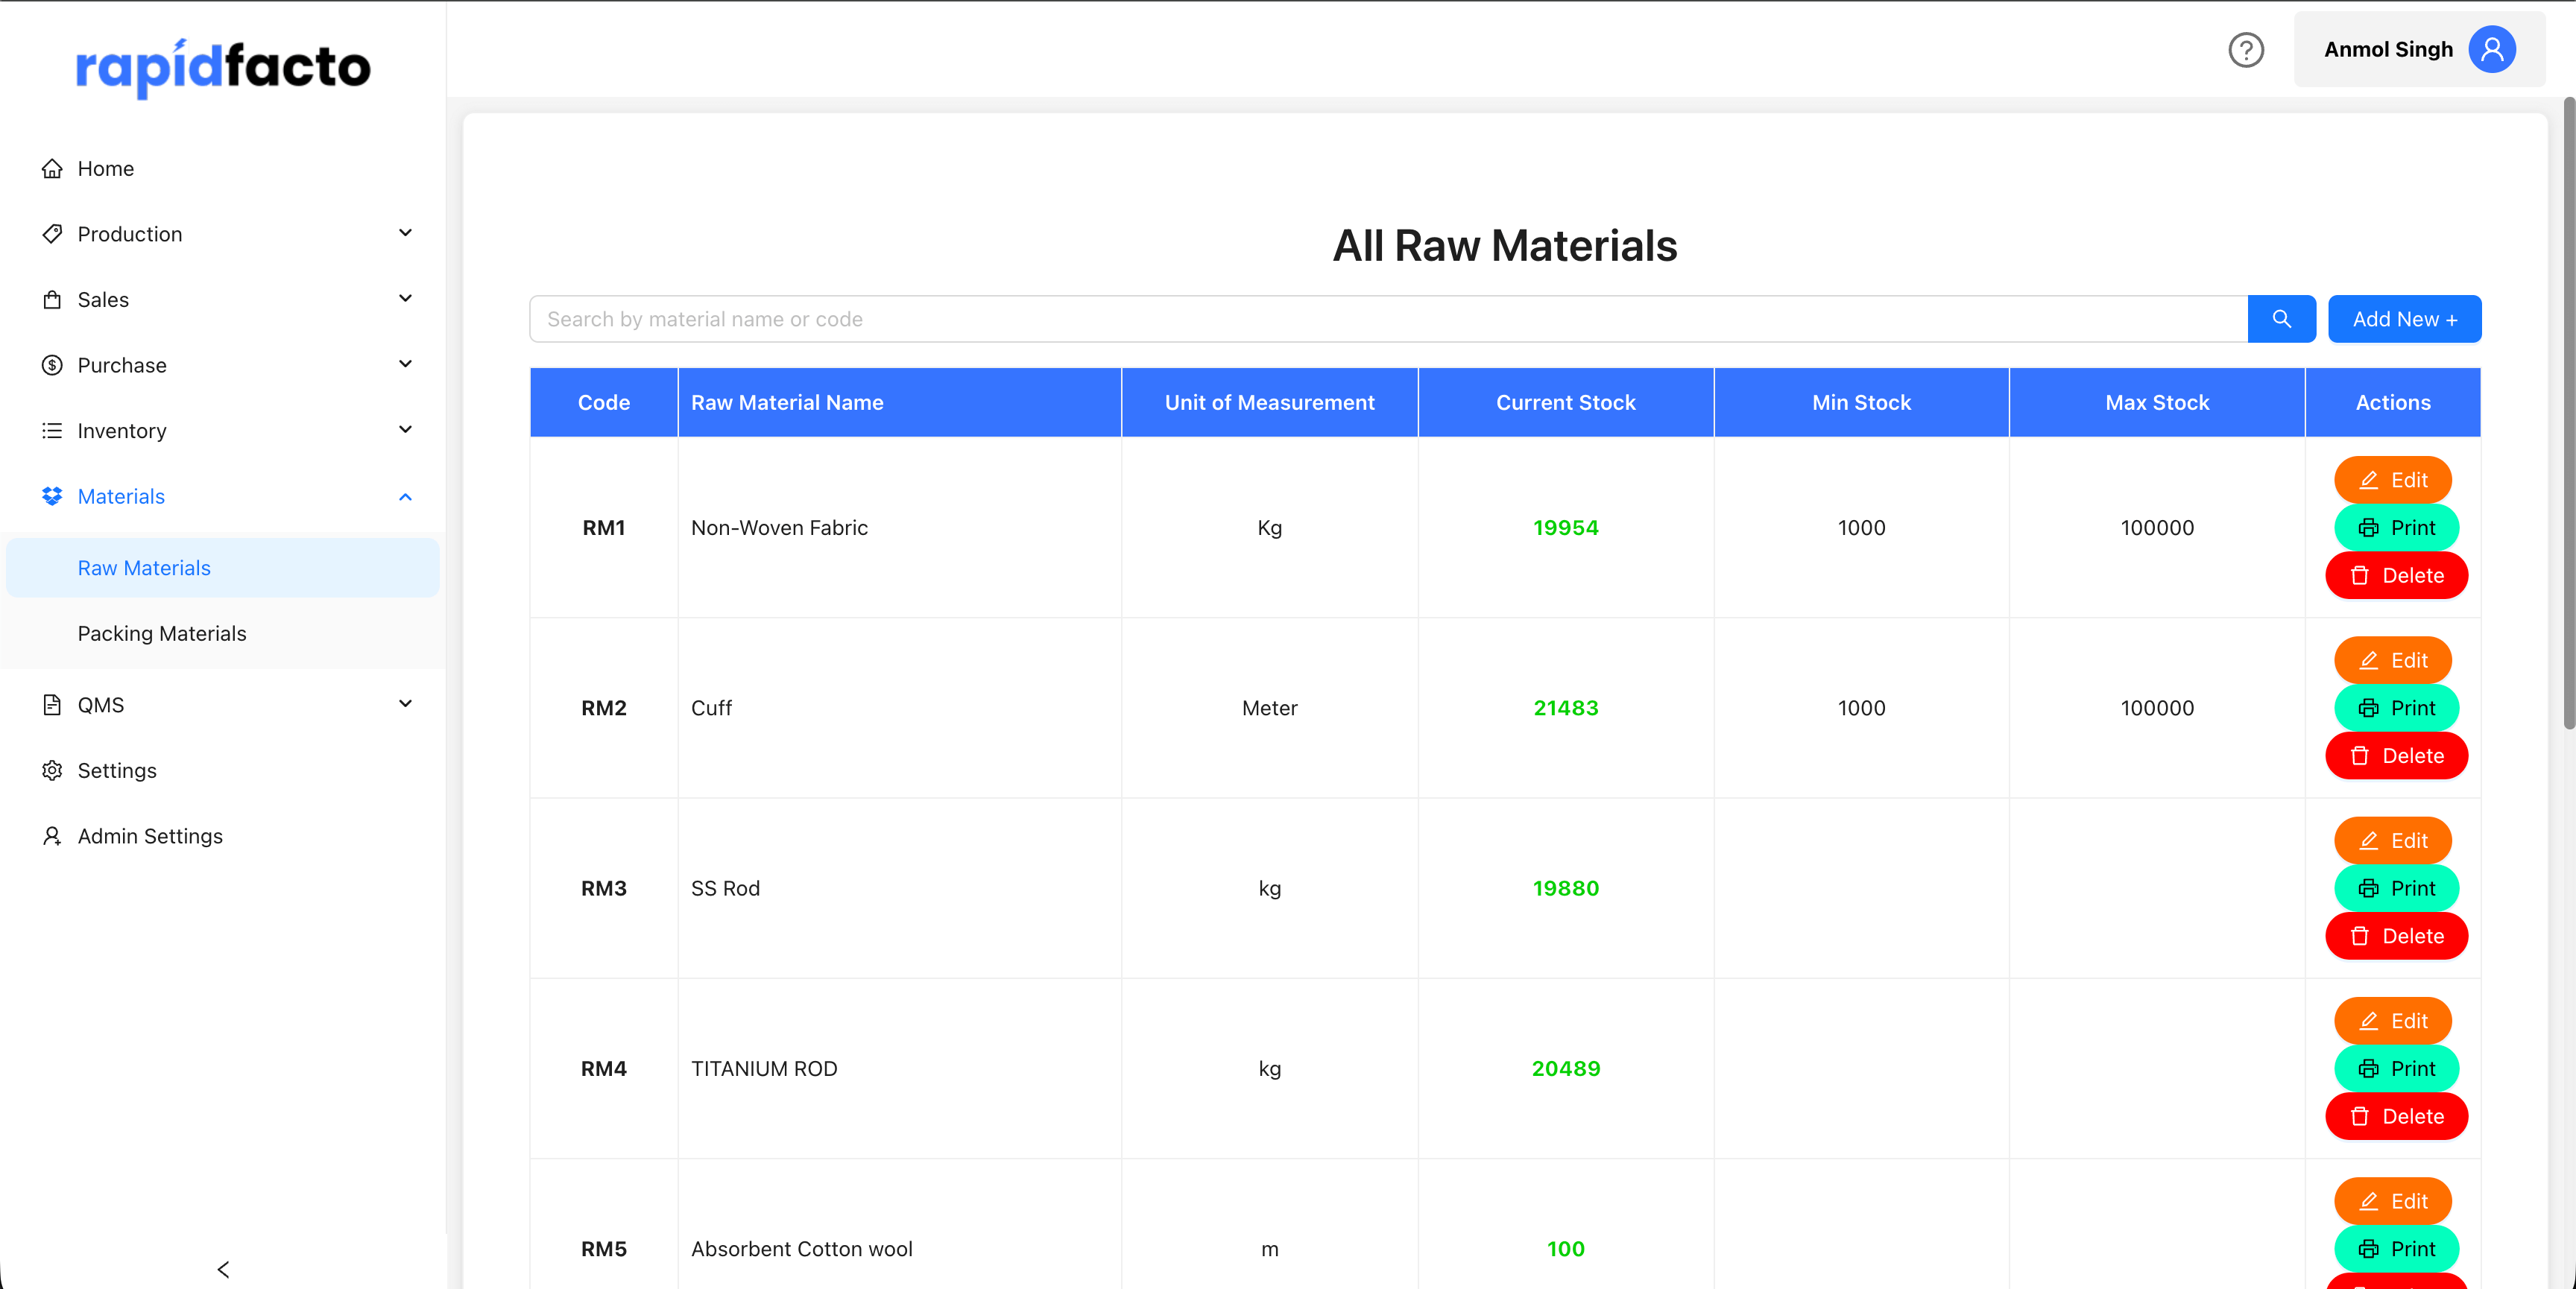
Step 1: Configuring Raw Materials
Raw materials are the basic components used in your manufacturing process. You need to add raw materials with their specifications before you can use them in production.
Adding a Raw Material
-
Navigate to Materials → Raw Materials from the main menu
-
Click the Add Raw Material button (or similar action button)
-
Fill in the raw material details:
- Material Name: Enter the name of the raw material
- Material Code: Either enter a code manually or click the Auto Generate button to automatically generate a unique code
- Unit of Measurement: Select the unit (e.g., kg, g, L, mL)
- Min Stock: Enter the minimum stock level
- Max Stock: Enter the maximum stock level
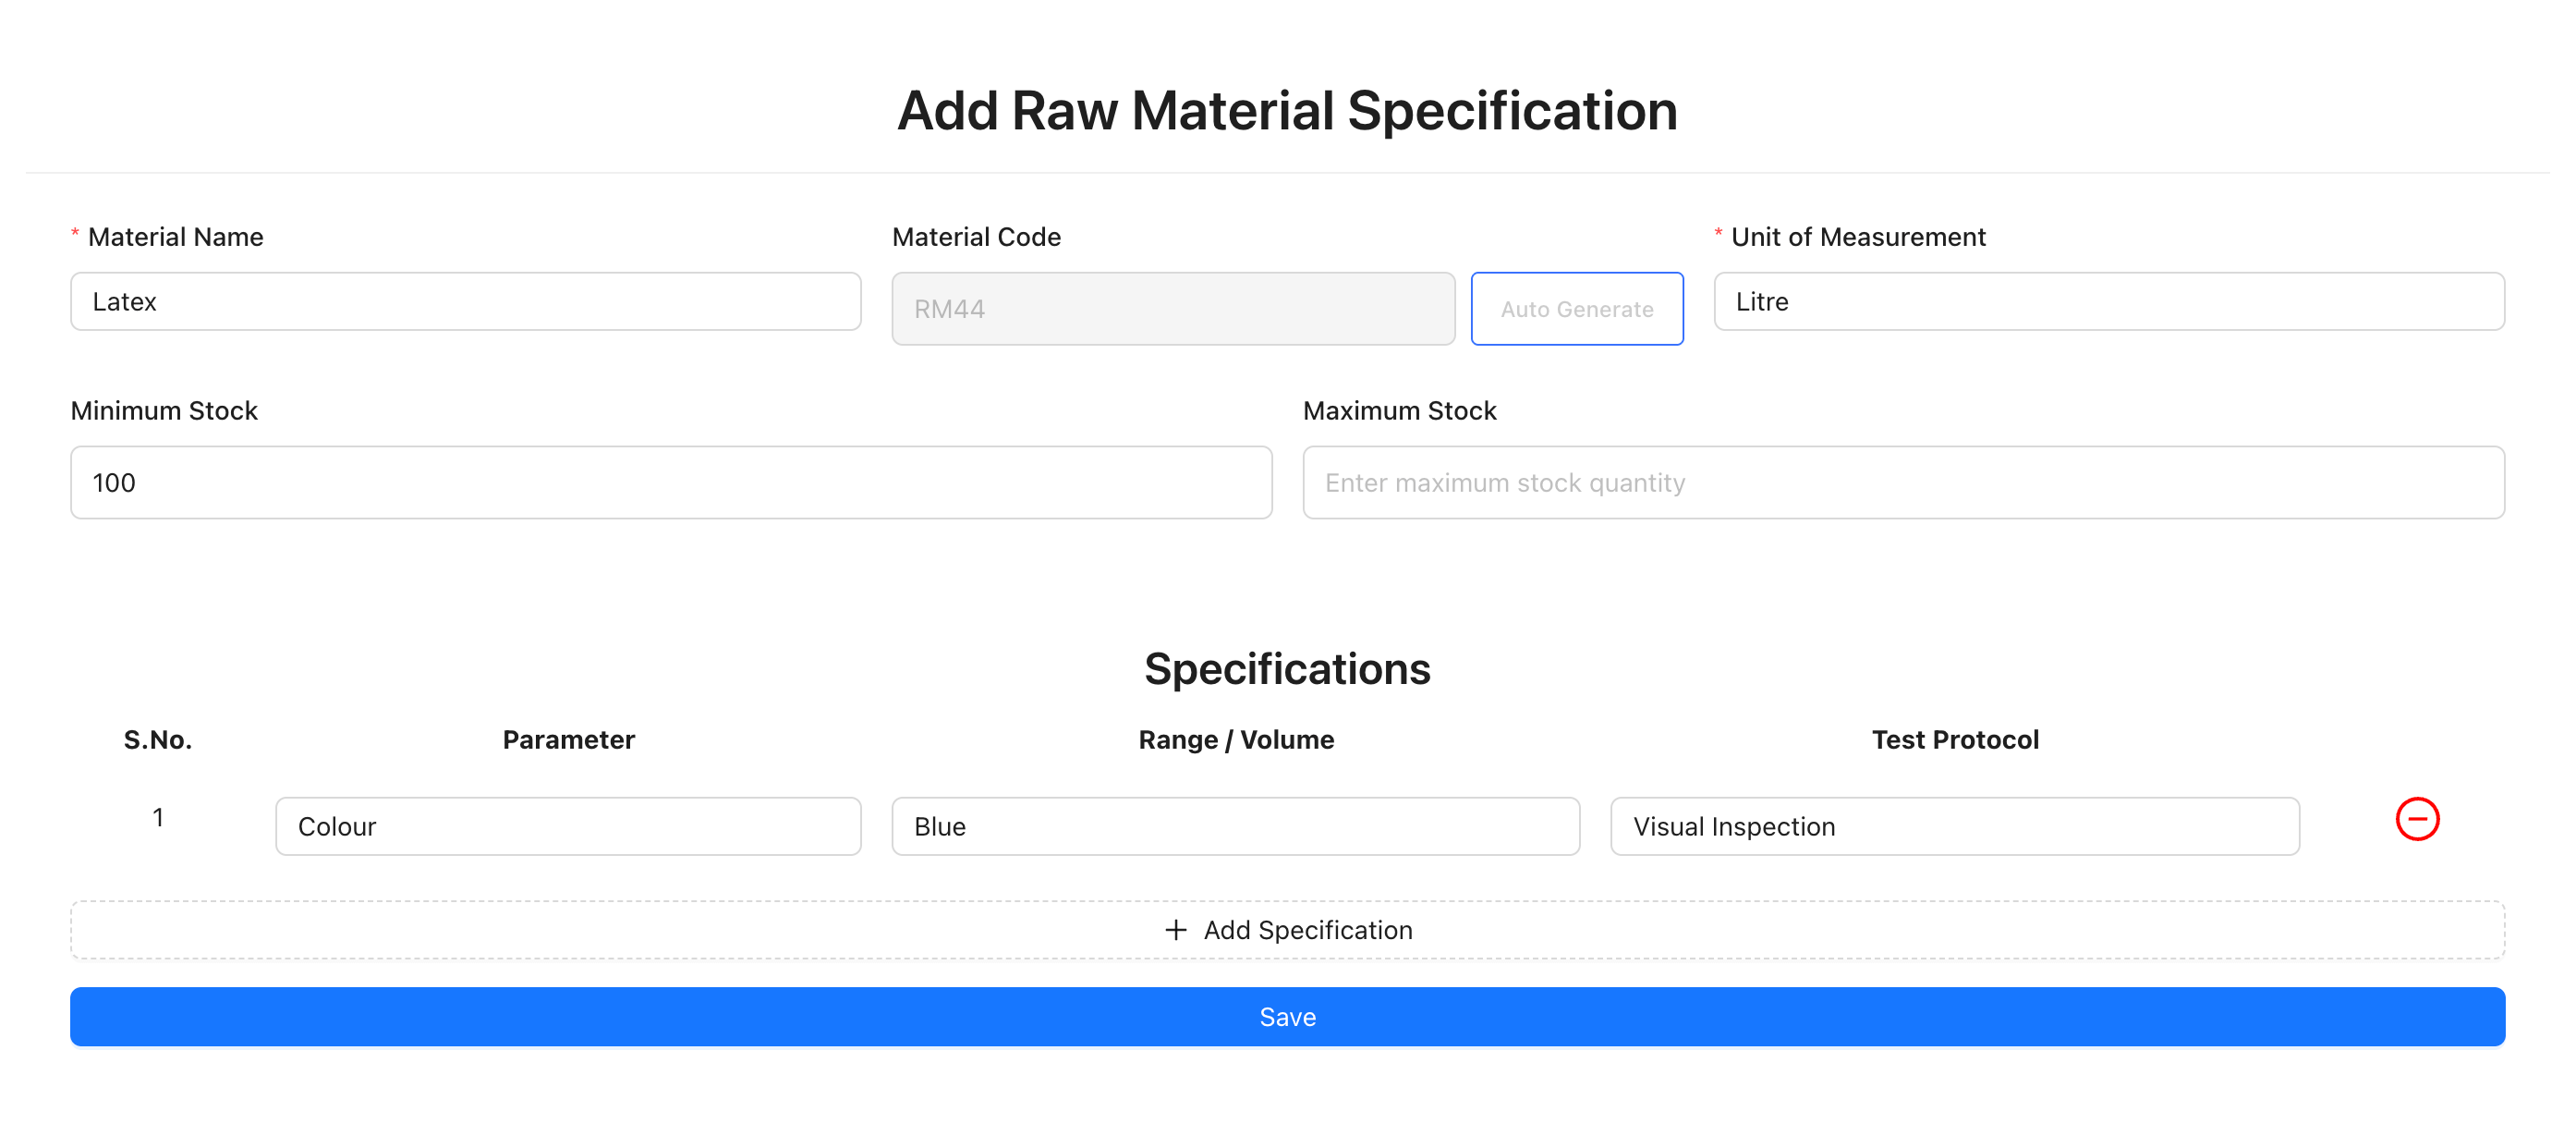
Adding Specifications
For each raw material, you can add specifications that define quality parameters:
-
In the specifications section (shown in the form above), click the + Add button (or Plus icon) to add a new specification
-
For each specification, enter:
- Parameter: The name of the quality parameter
- Volume/Range: The acceptable range or value
- Test Protocol: The testing method or protocol used
-
You can add multiple specifications by clicking + Add for each additional parameter
-
To remove a specification, click the Delete icon (minus circle) next to it
-
Once all details are filled, click the Submit or Save button at the bottom of the form to create the raw material
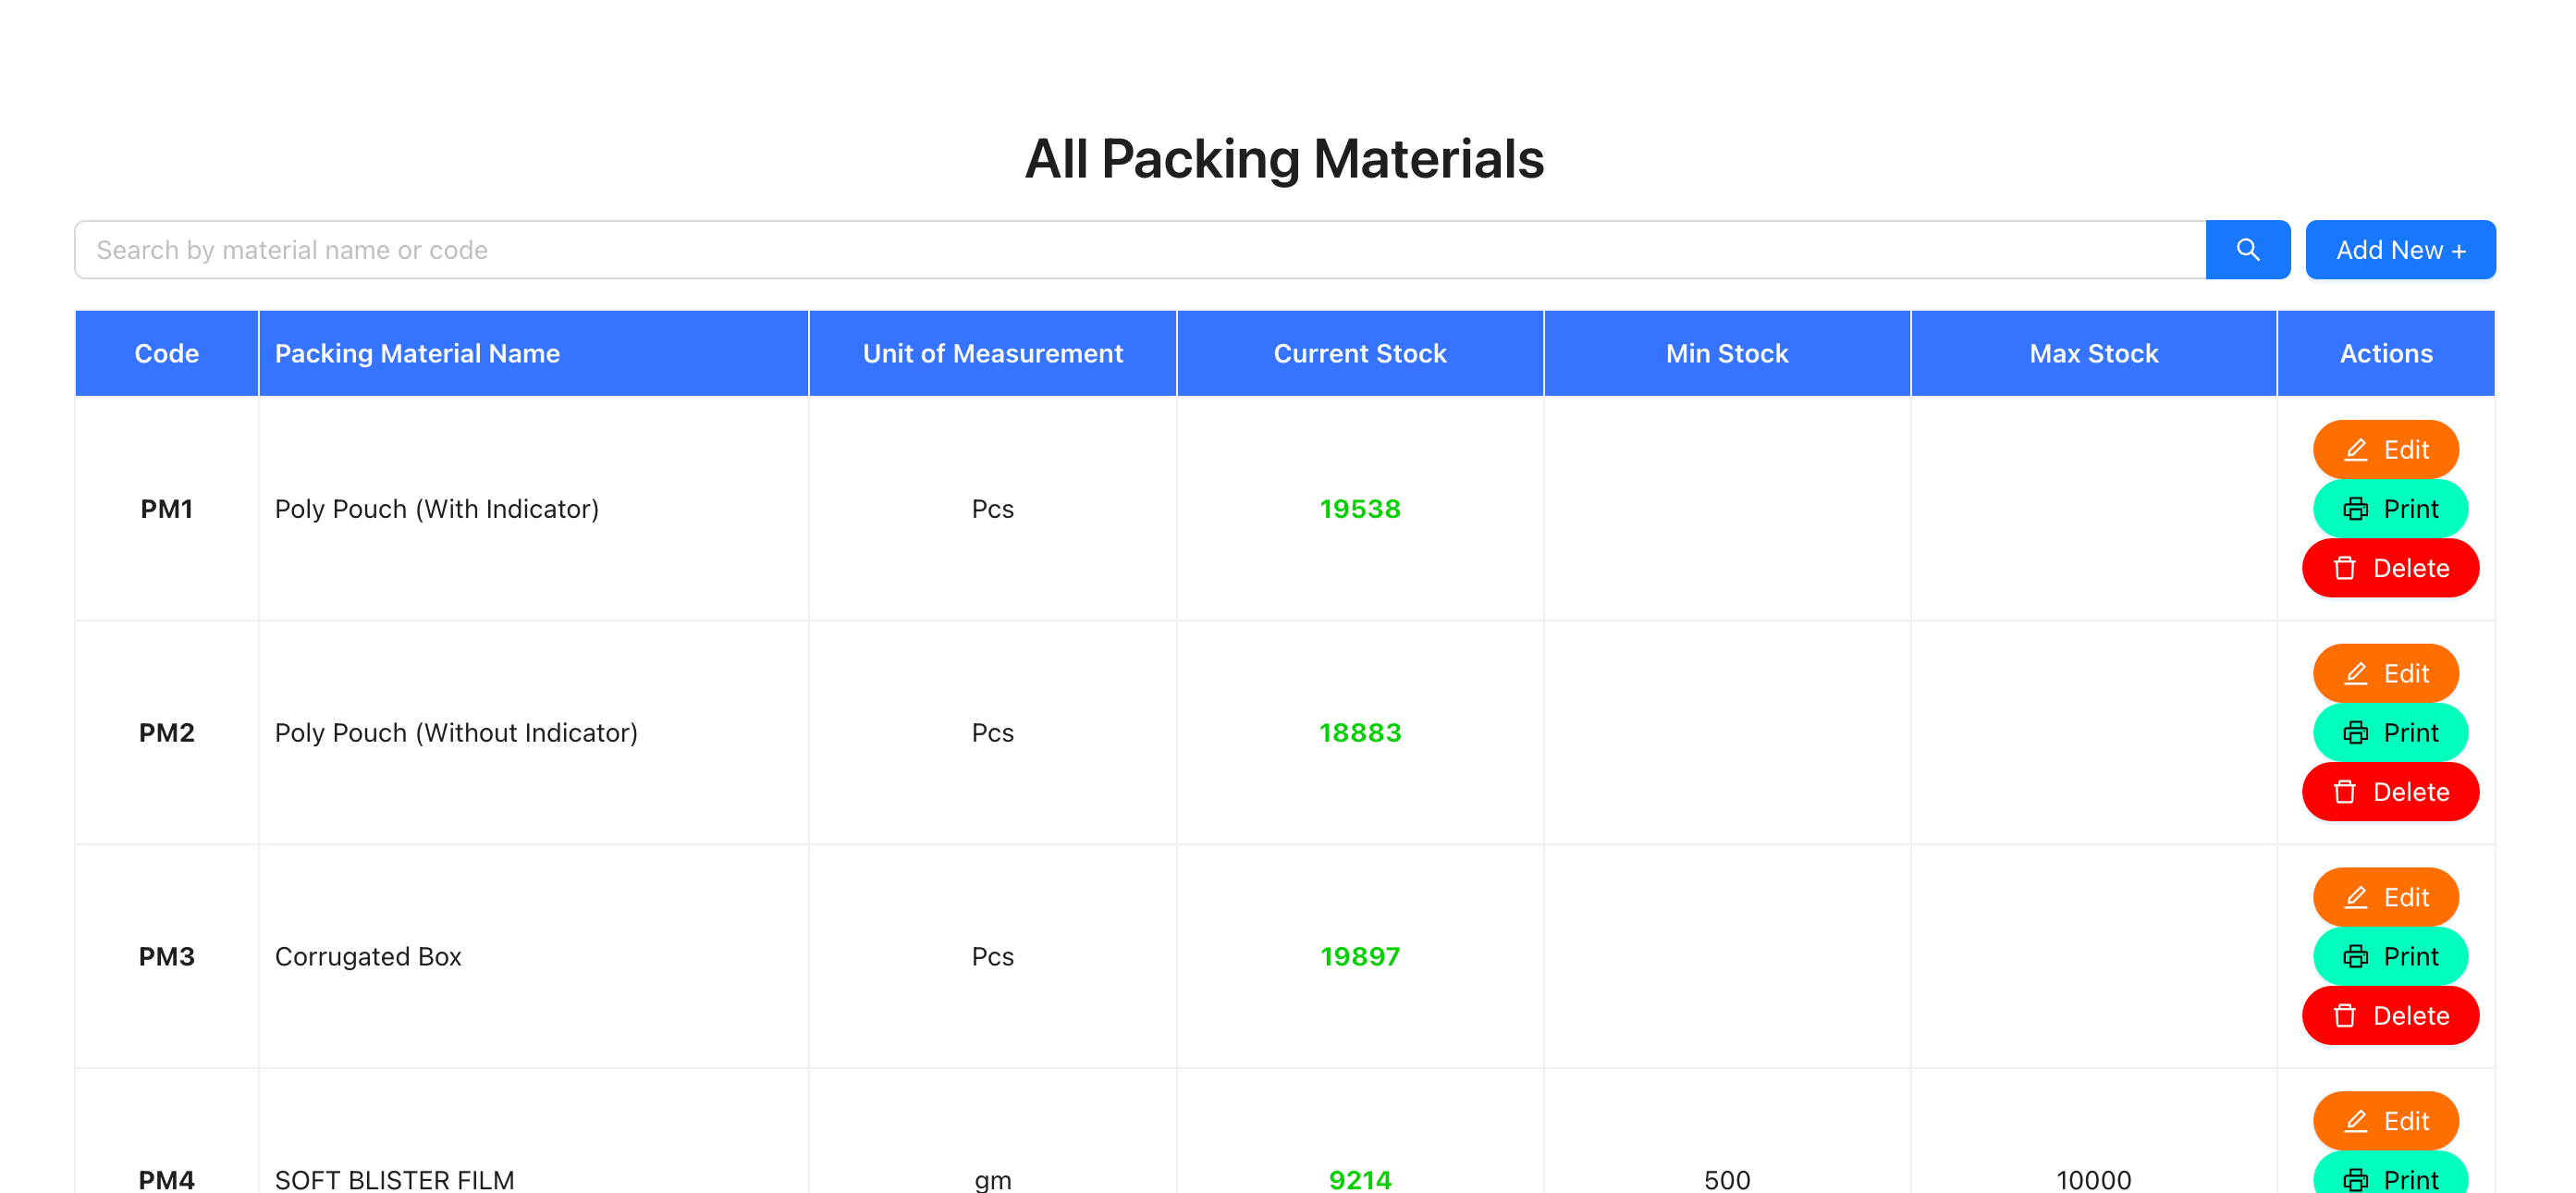
Step 2: Configuring Packing Materials
Packing materials are used to package your finished products. Similar to raw materials, you need to configure them with specifications.
Adding a Packing Material
-
Navigate to Materials → Packing Materials from the main menu
-
Click the Add Packing Material button
-
Fill in the packing material details:
- Material Name: Enter the name of the packing material
- Material Code: Either enter a code manually or click the Auto Generate button
- Unit of Measurement: Select the appropriate unit
- Min Stock: Enter the minimum stock level
- Max Stock: Enter the maximum stock level
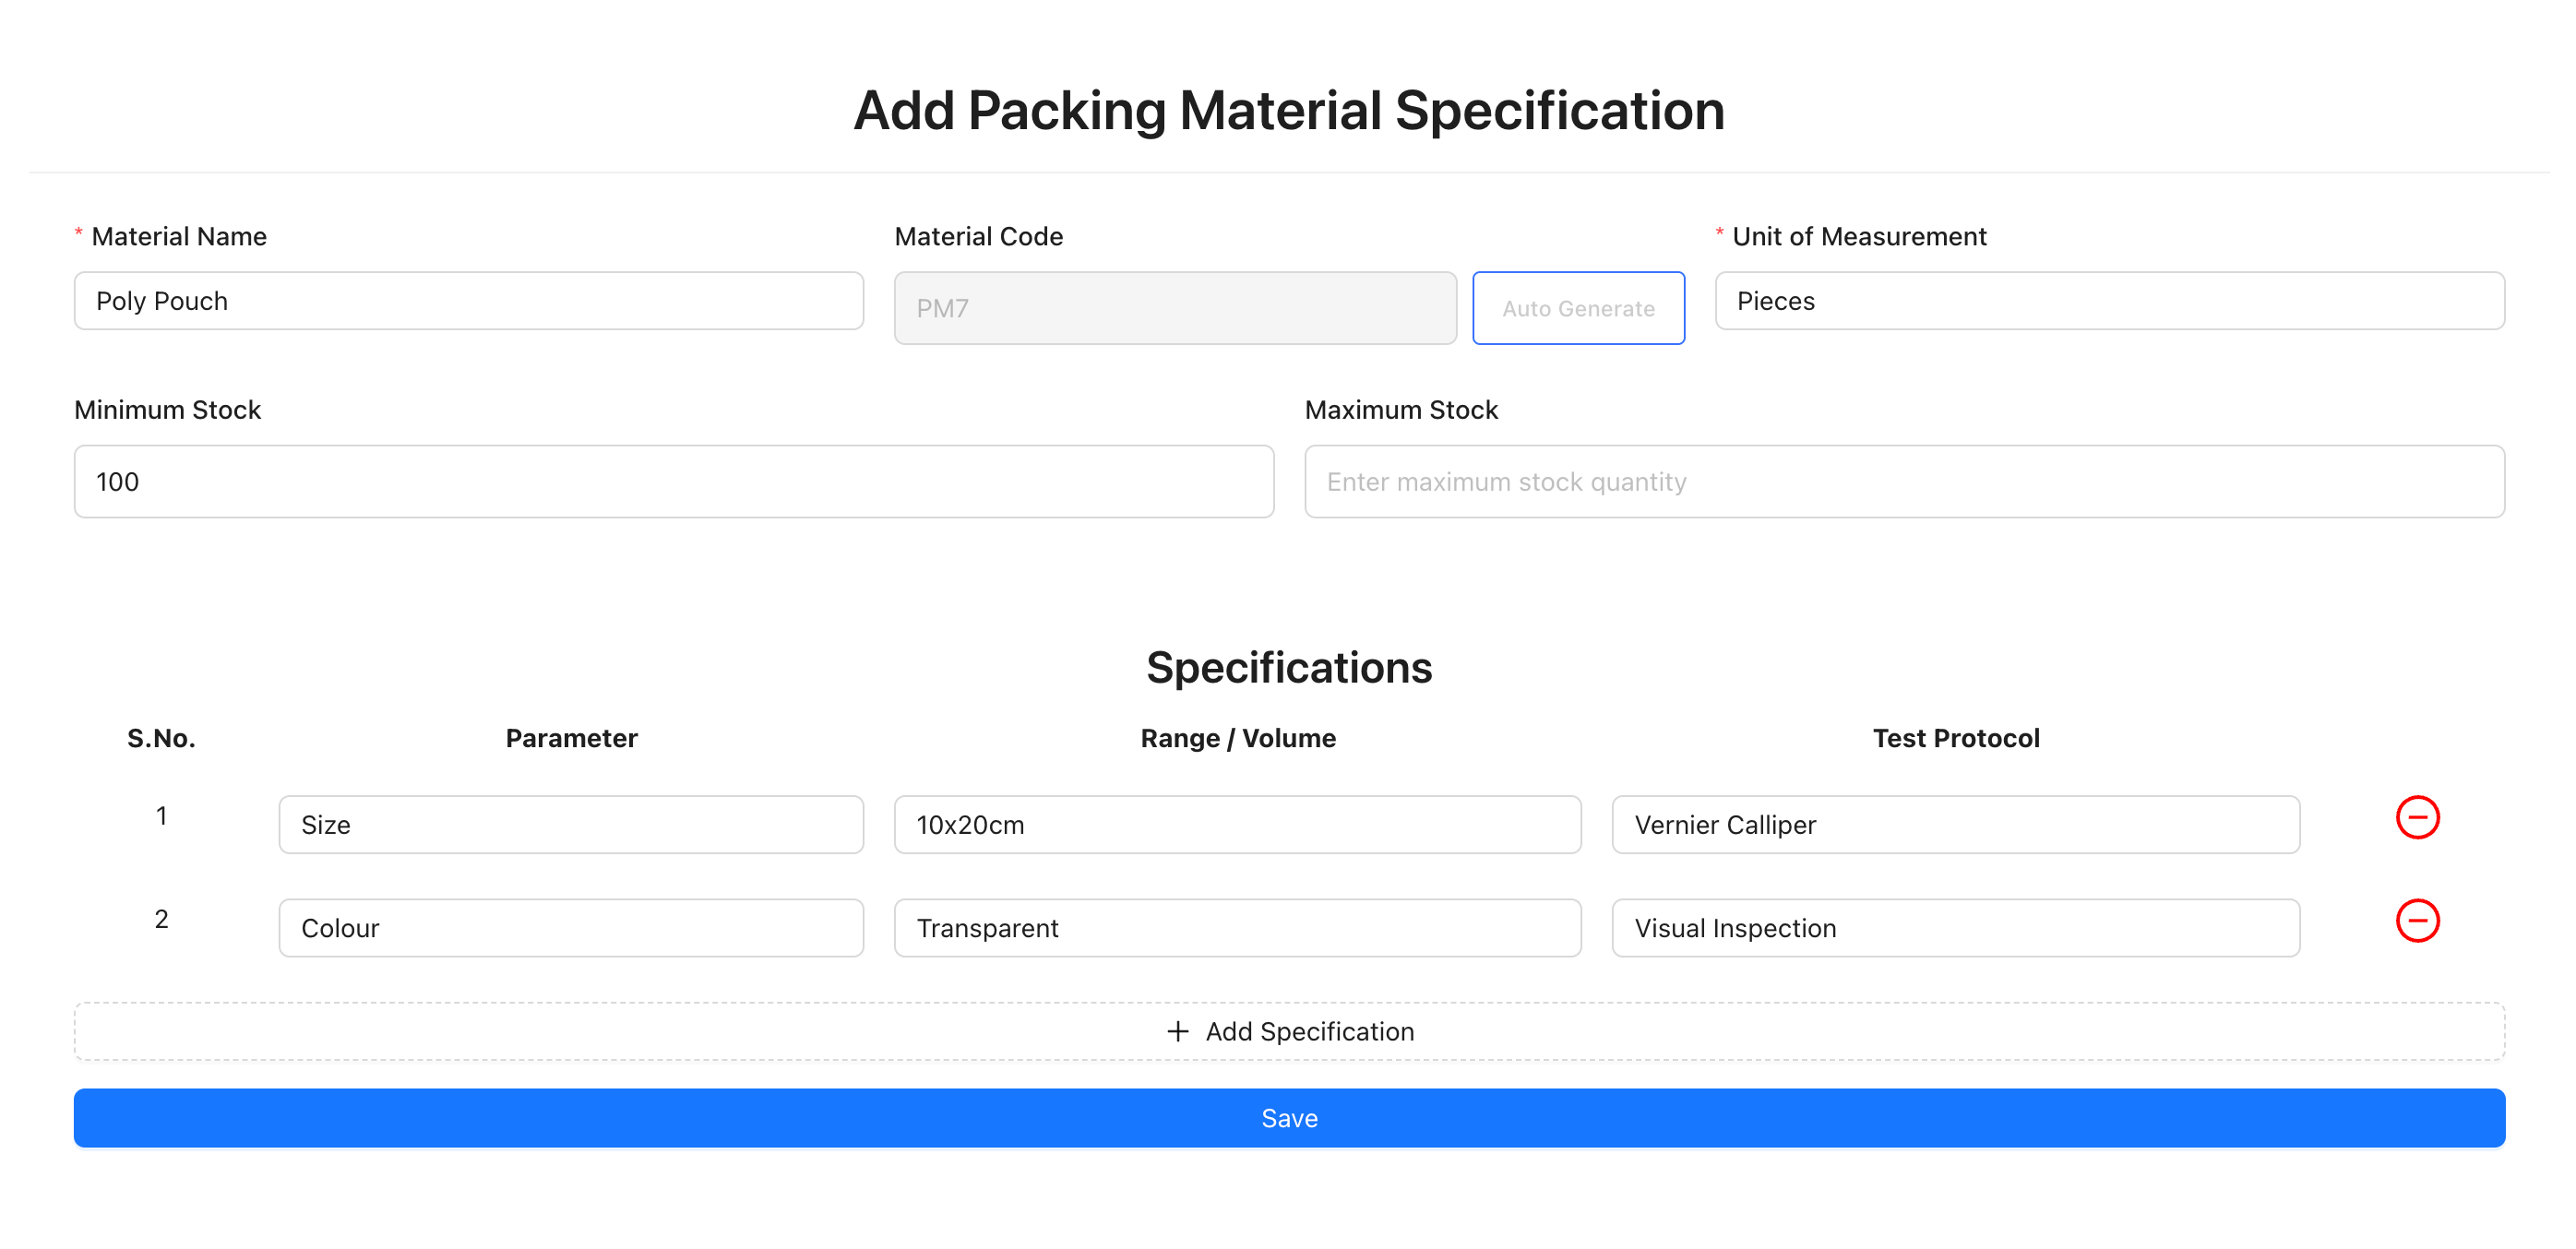
Adding Specifications
-
In the specifications section (shown in the form above), click the + Add button to add a new specification
-
Enter the specification details:
- Parameter: Quality parameter name
- Volume/Range: Acceptable range or value
- Test Protocol: Testing method
-
Add multiple specifications as needed
-
Click Submit or Save at the bottom of the form to create the packing material
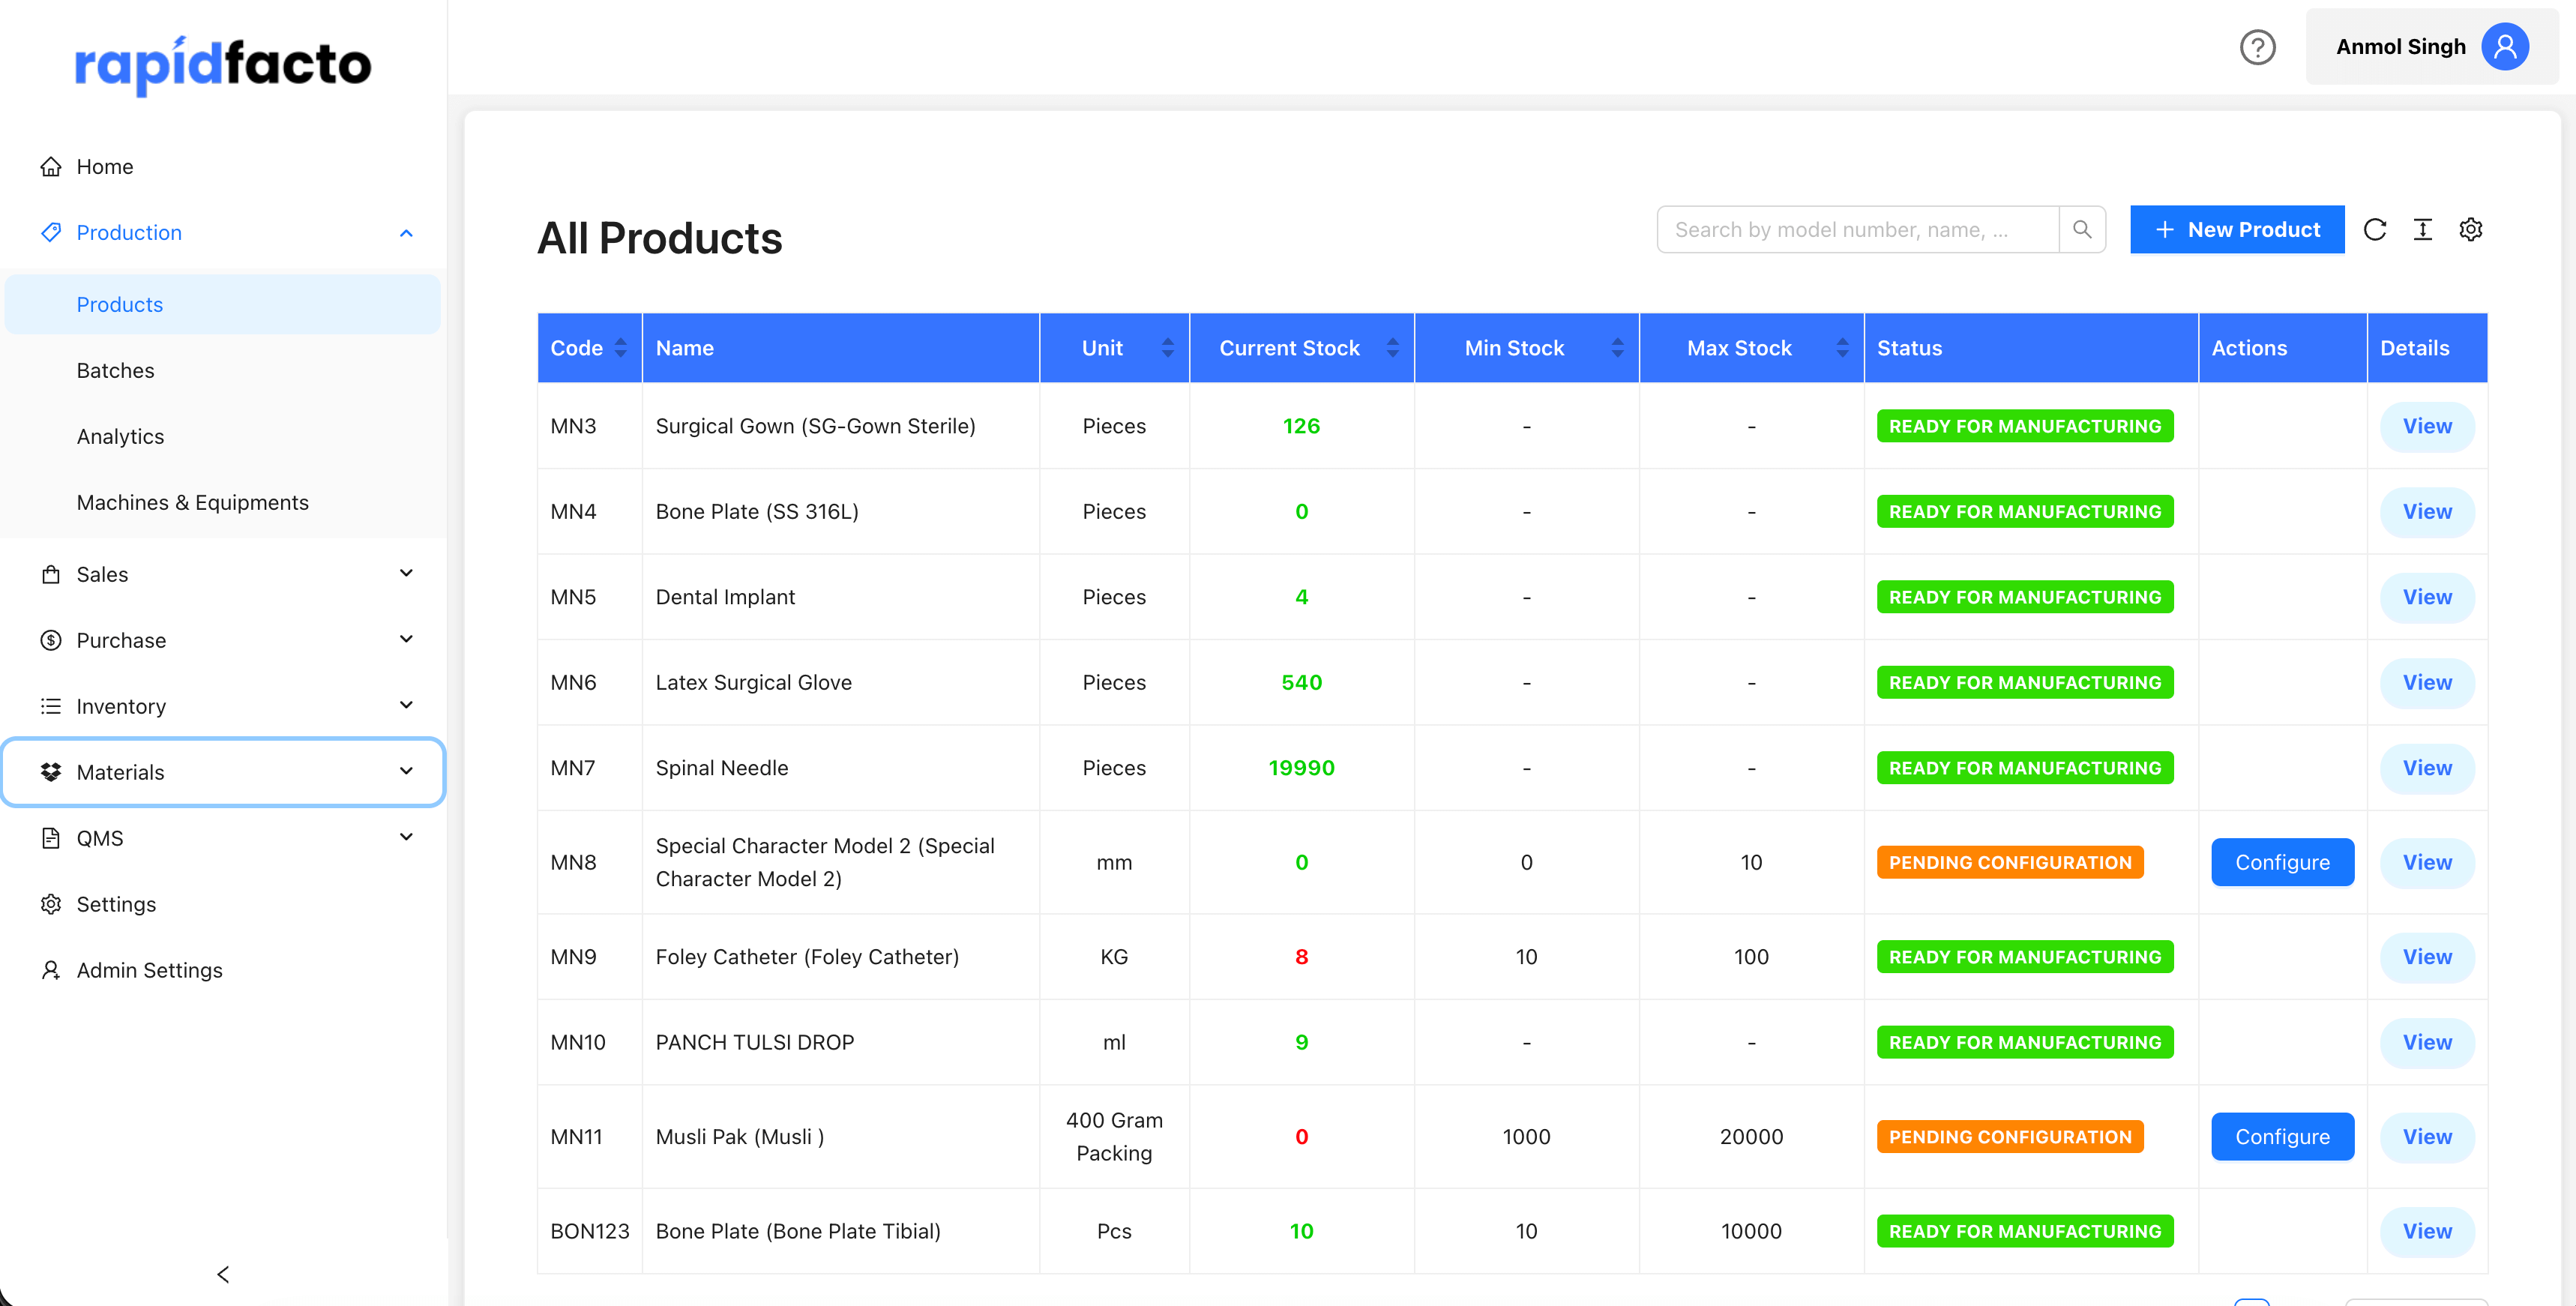
Step 3: Configuring Products
Products are the finished goods you manufacture. You need to create product models with their specifications and manufacturing requirements.
Creating a New Product
-
Navigate to Production → Products from the main menu
-
Click the New Product or Add Product button
-
Fill in the basic product information:
- Model Number: Either enter manually or click Auto Generate to create a unique model number
- Generic Name: Enter the generic name of the product
- Model Name: Enter the specific model name
- Drawing ID: Enter the drawing or design ID if applicable
- Price: Enter the product price
- Product Size: Enter the size specifications
- Description: Add a description of the product
- Unit of Measurement: Select the unit
- Min Stock: Minimum stock level
- Max Stock: Maximum stock level
- Sterile: Select Yes or No
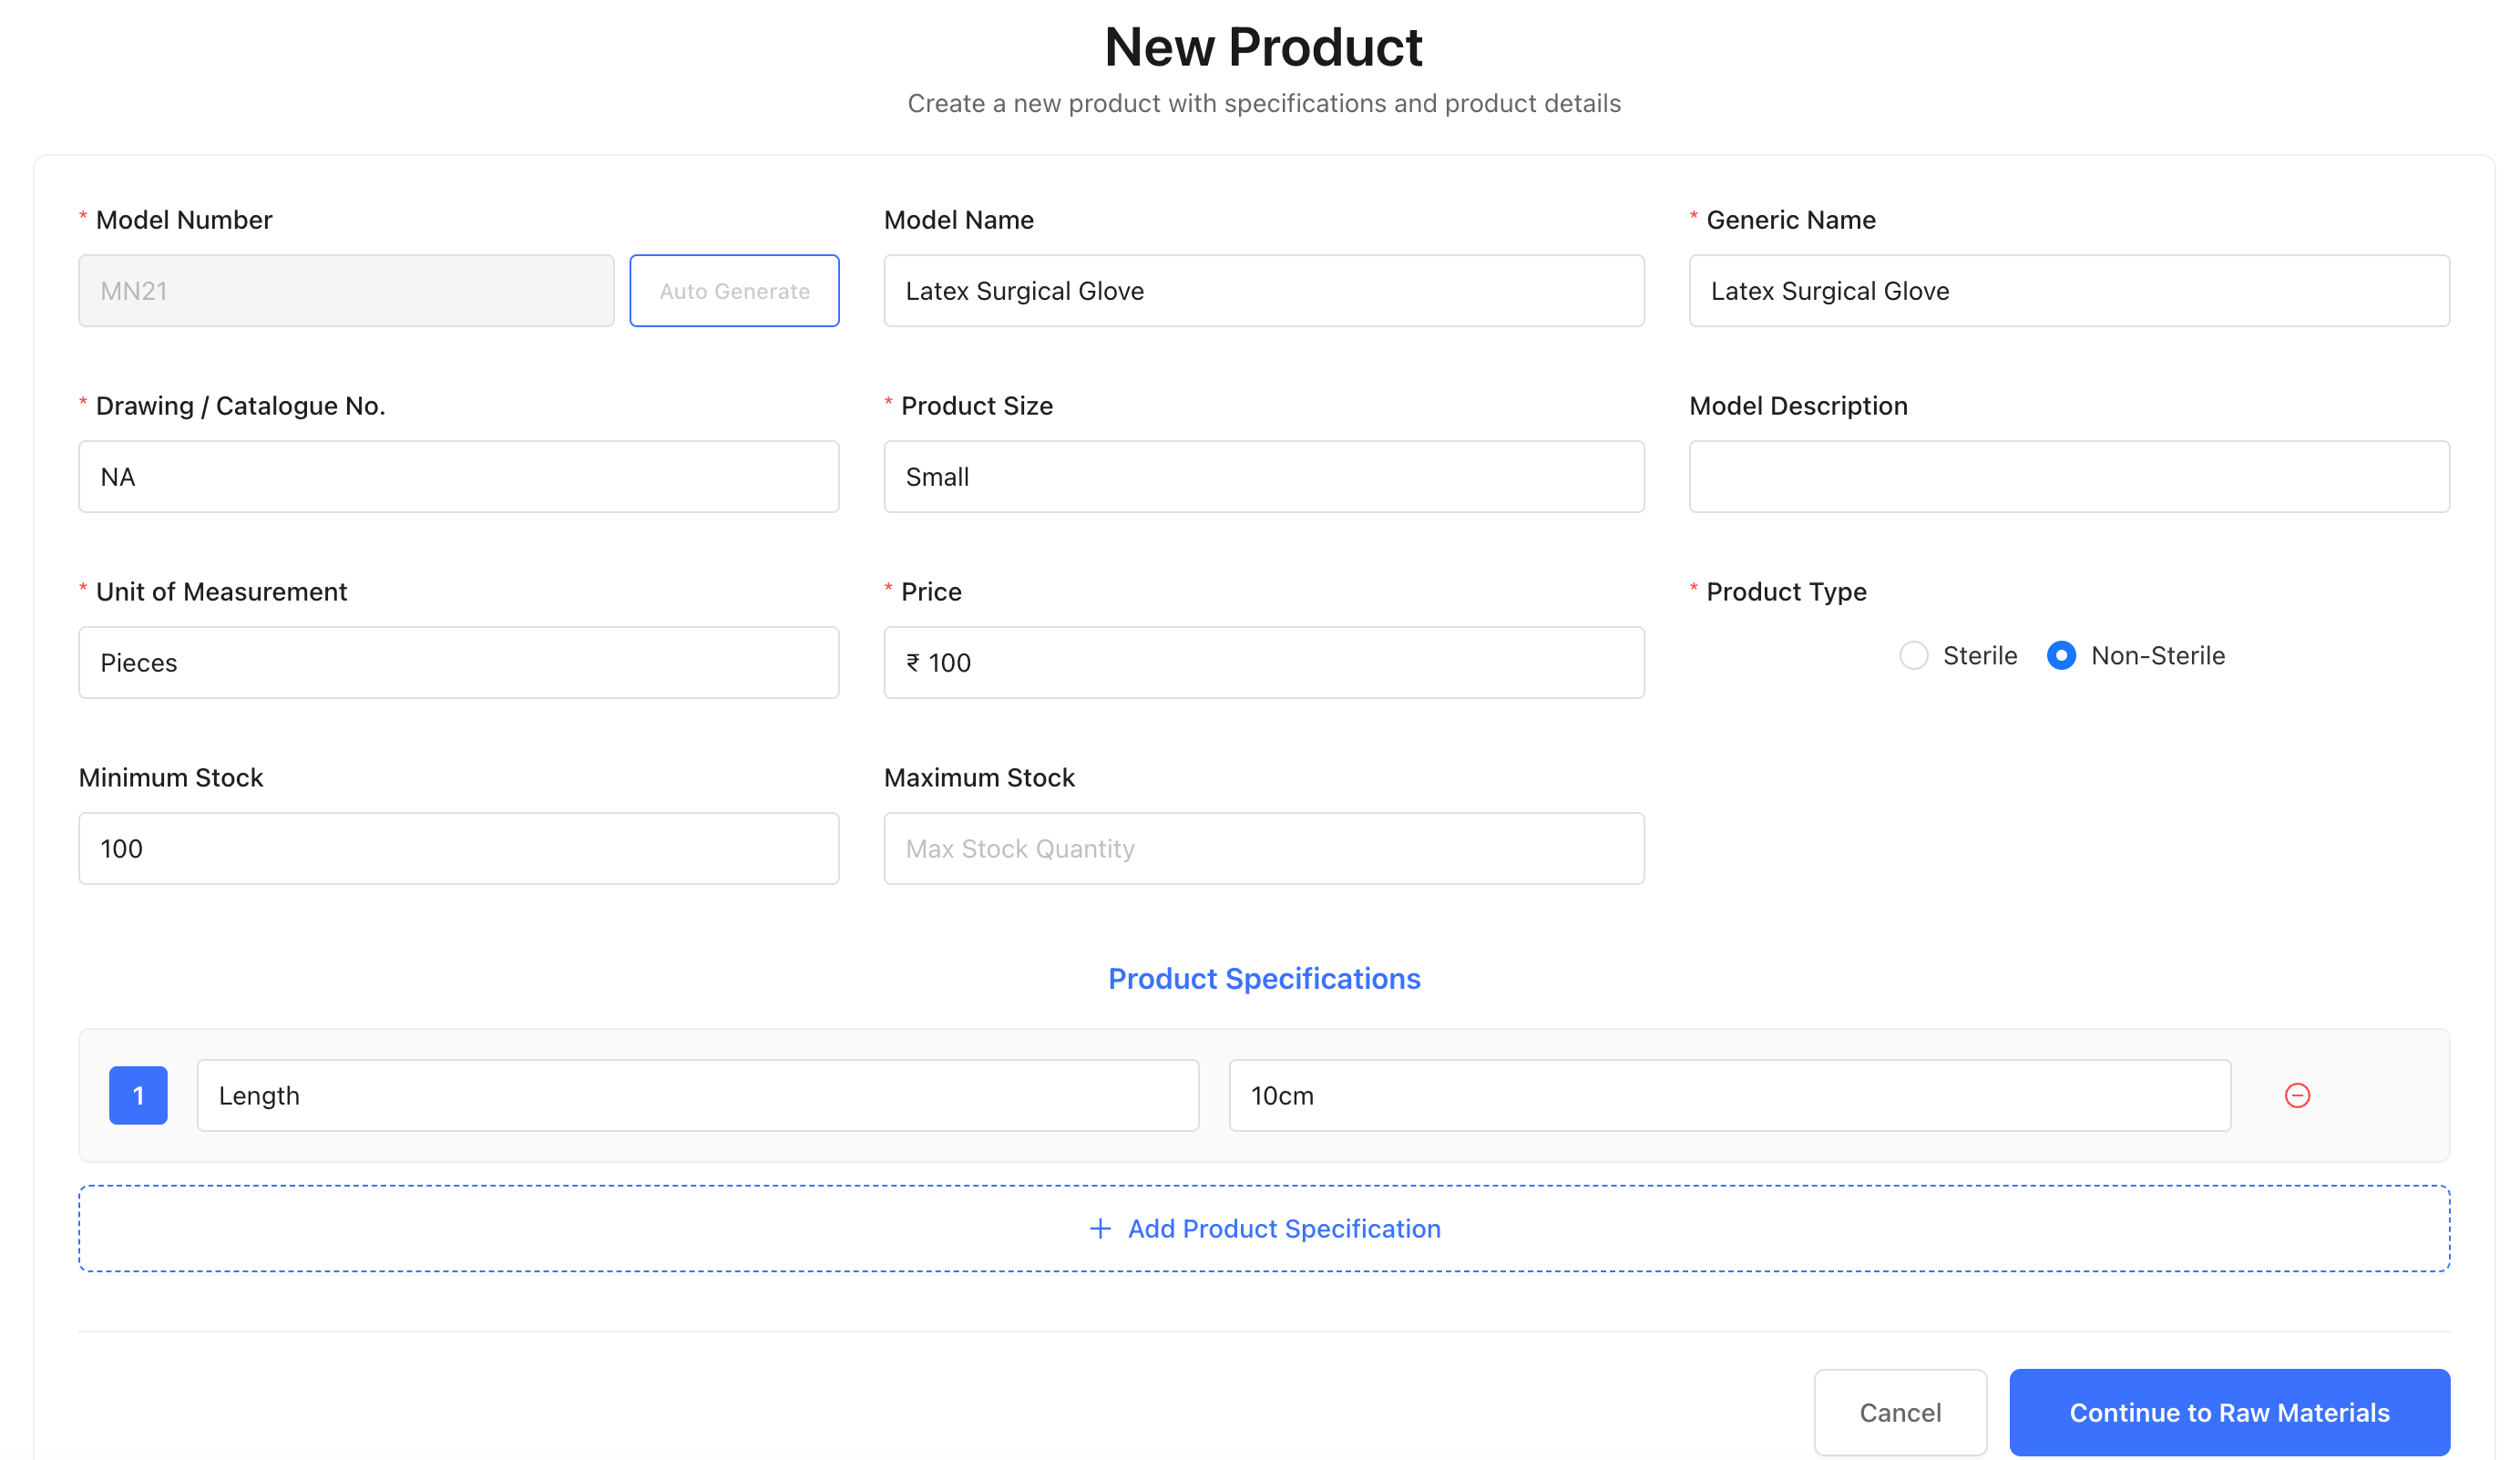
Adding Product Specifications
-
In the specifications section (shown in the product form above), click + Add to add a specification
-
Enter:
- Parameter: Quality parameter name
- Specification: The specification detail or requirement
- Test Protocol: Testing method (if applicable)
-
Add multiple specifications as needed
-
Click Next or Continue to proceed to the next step
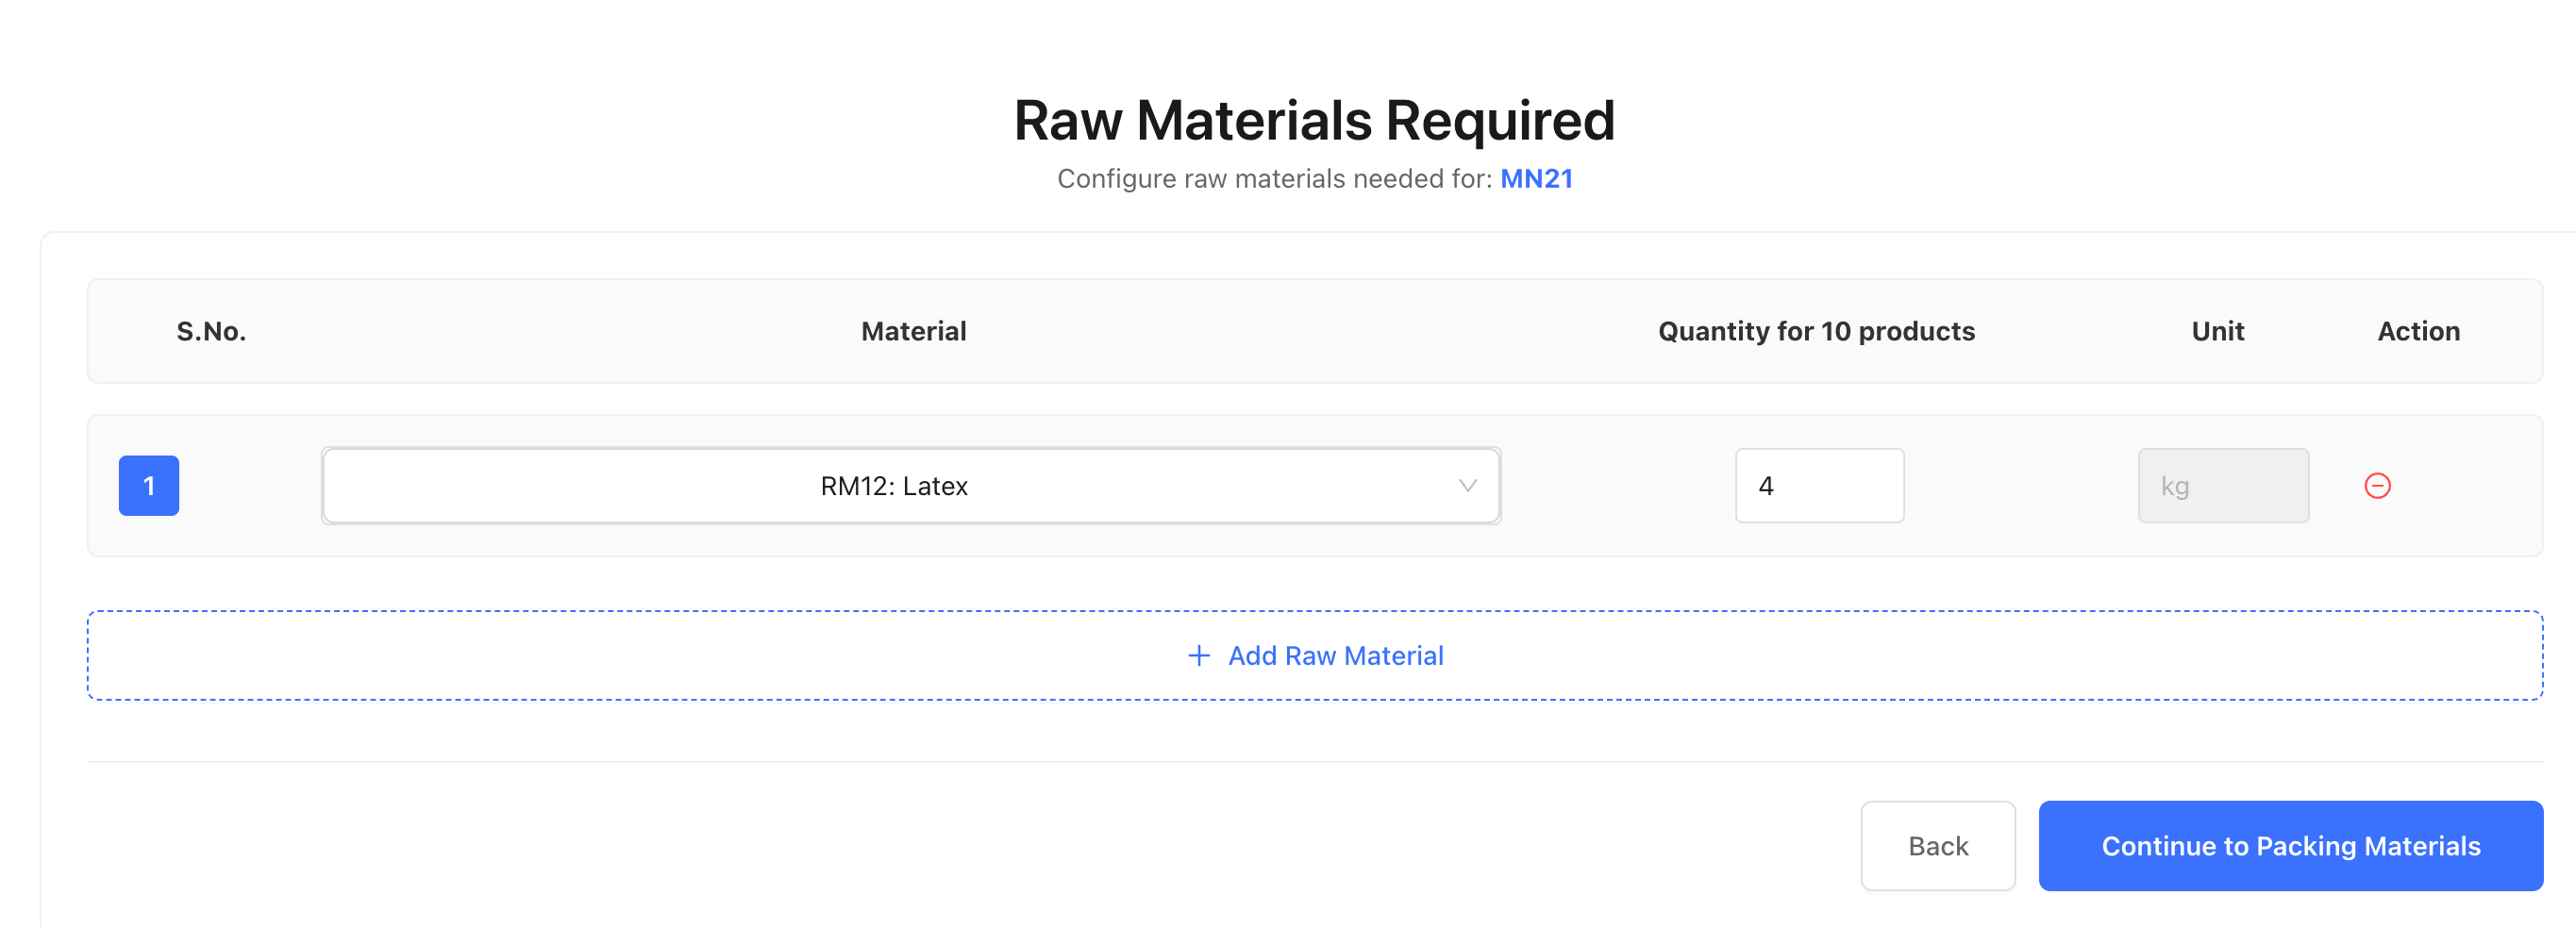
Adding Raw Materials to Product
After creating the product, you'll need to associate raw materials:
-
On the raw materials step, select the raw materials required for this product
-
Enter the quantity needed for each raw material
-
Click Next to continue
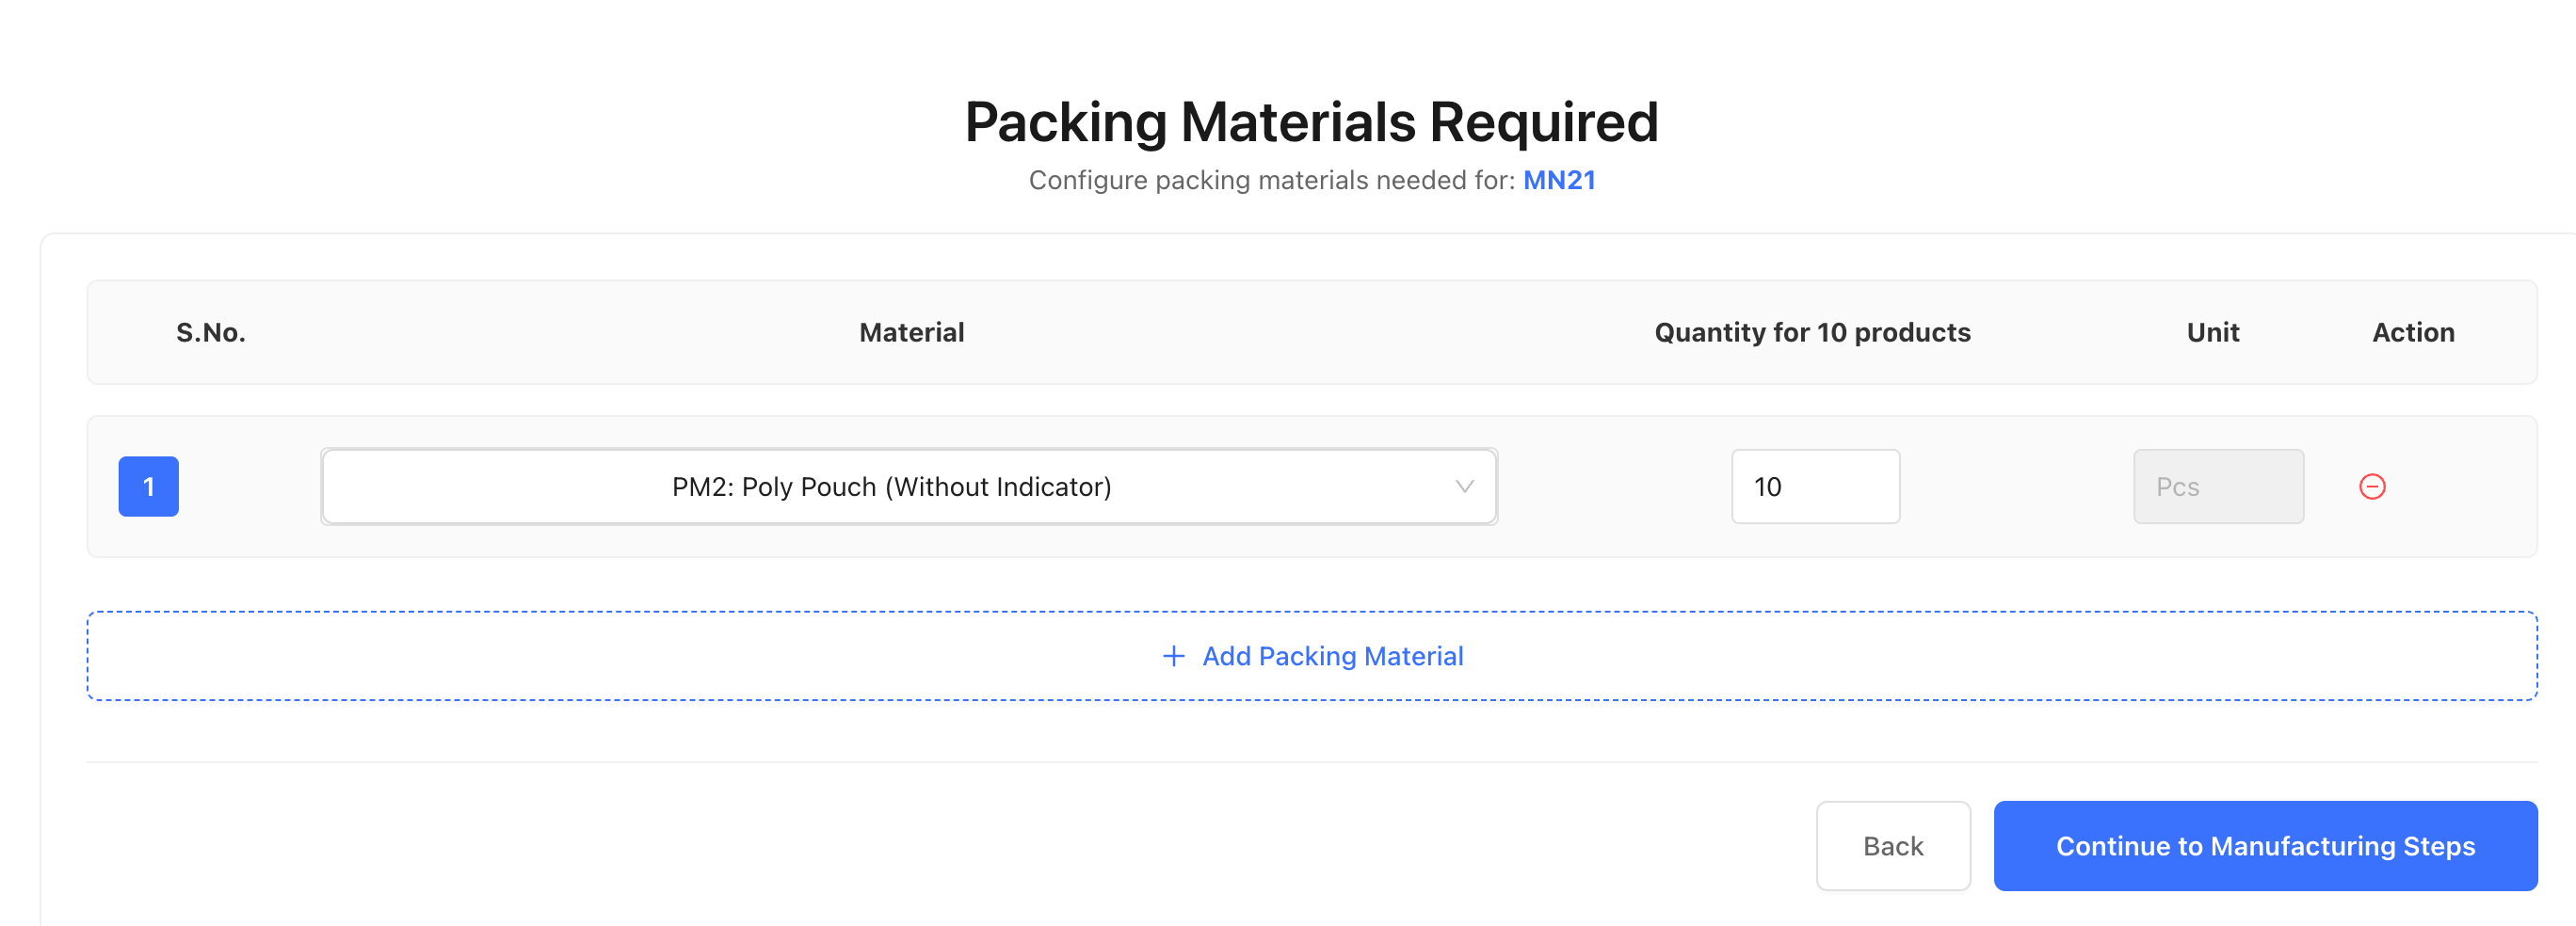
Adding Packing Materials to Product
-
On the packing materials step, select the packing materials needed
-
Enter quantities for each packing material
-
Click Next to continue
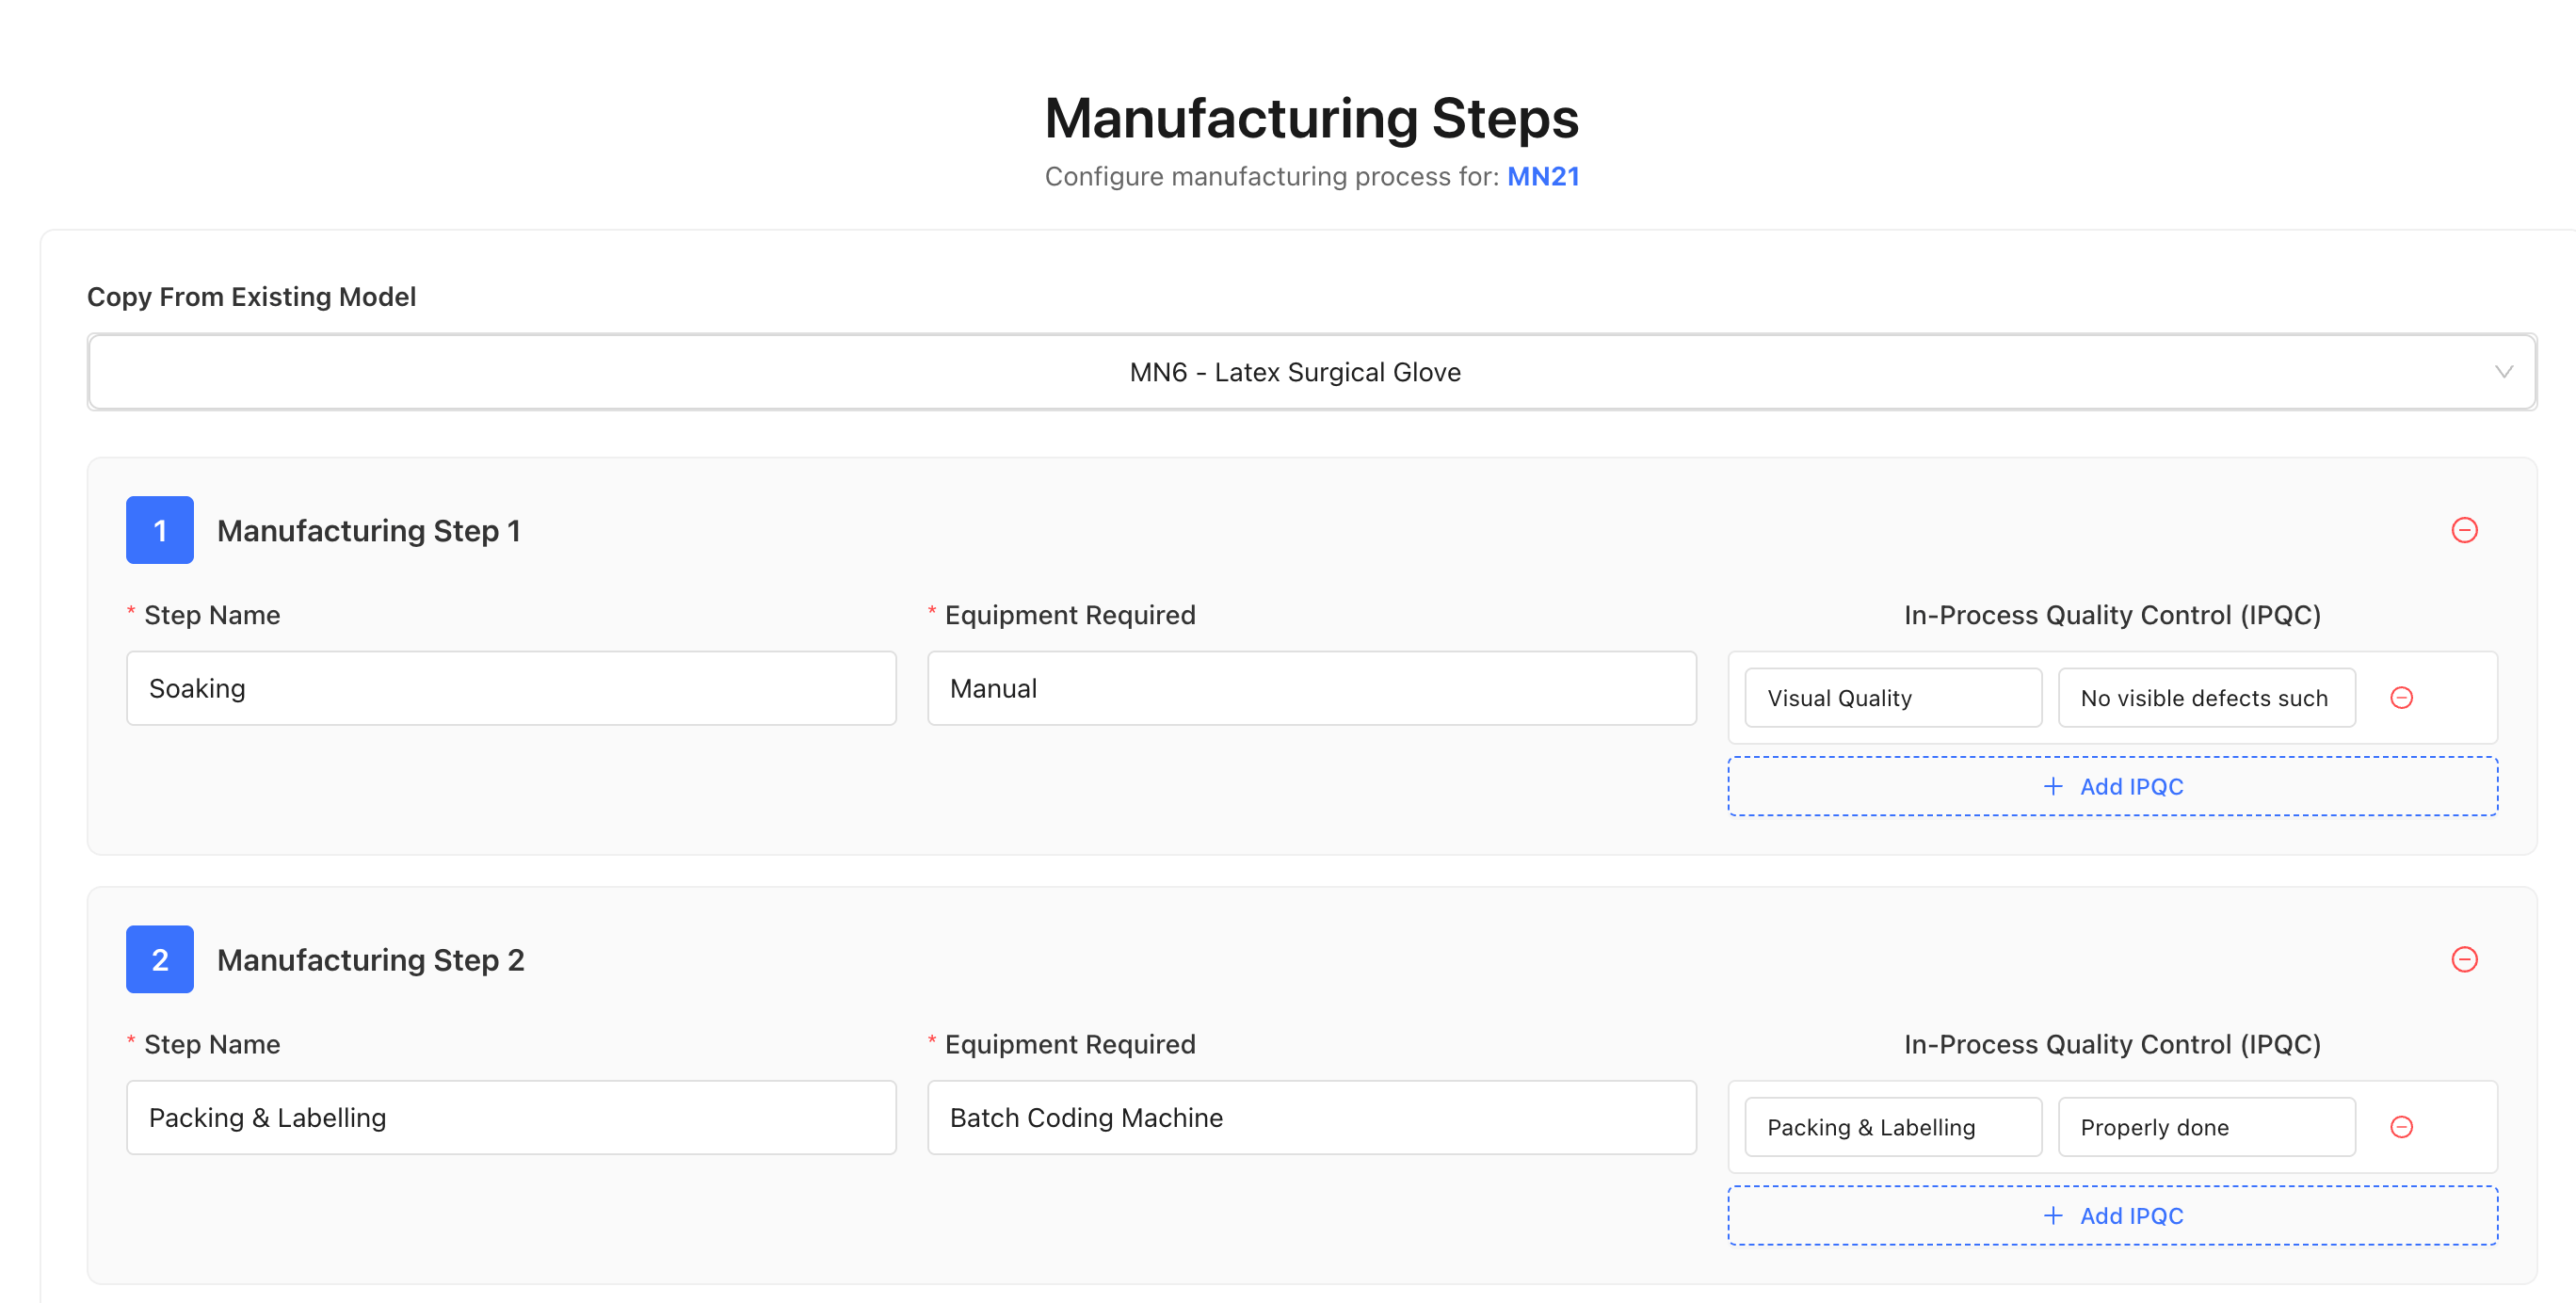
Adding Manufacturing Steps
-
Define the manufacturing steps required to produce the product
-
Add each step with its details
-
Click Next to continue
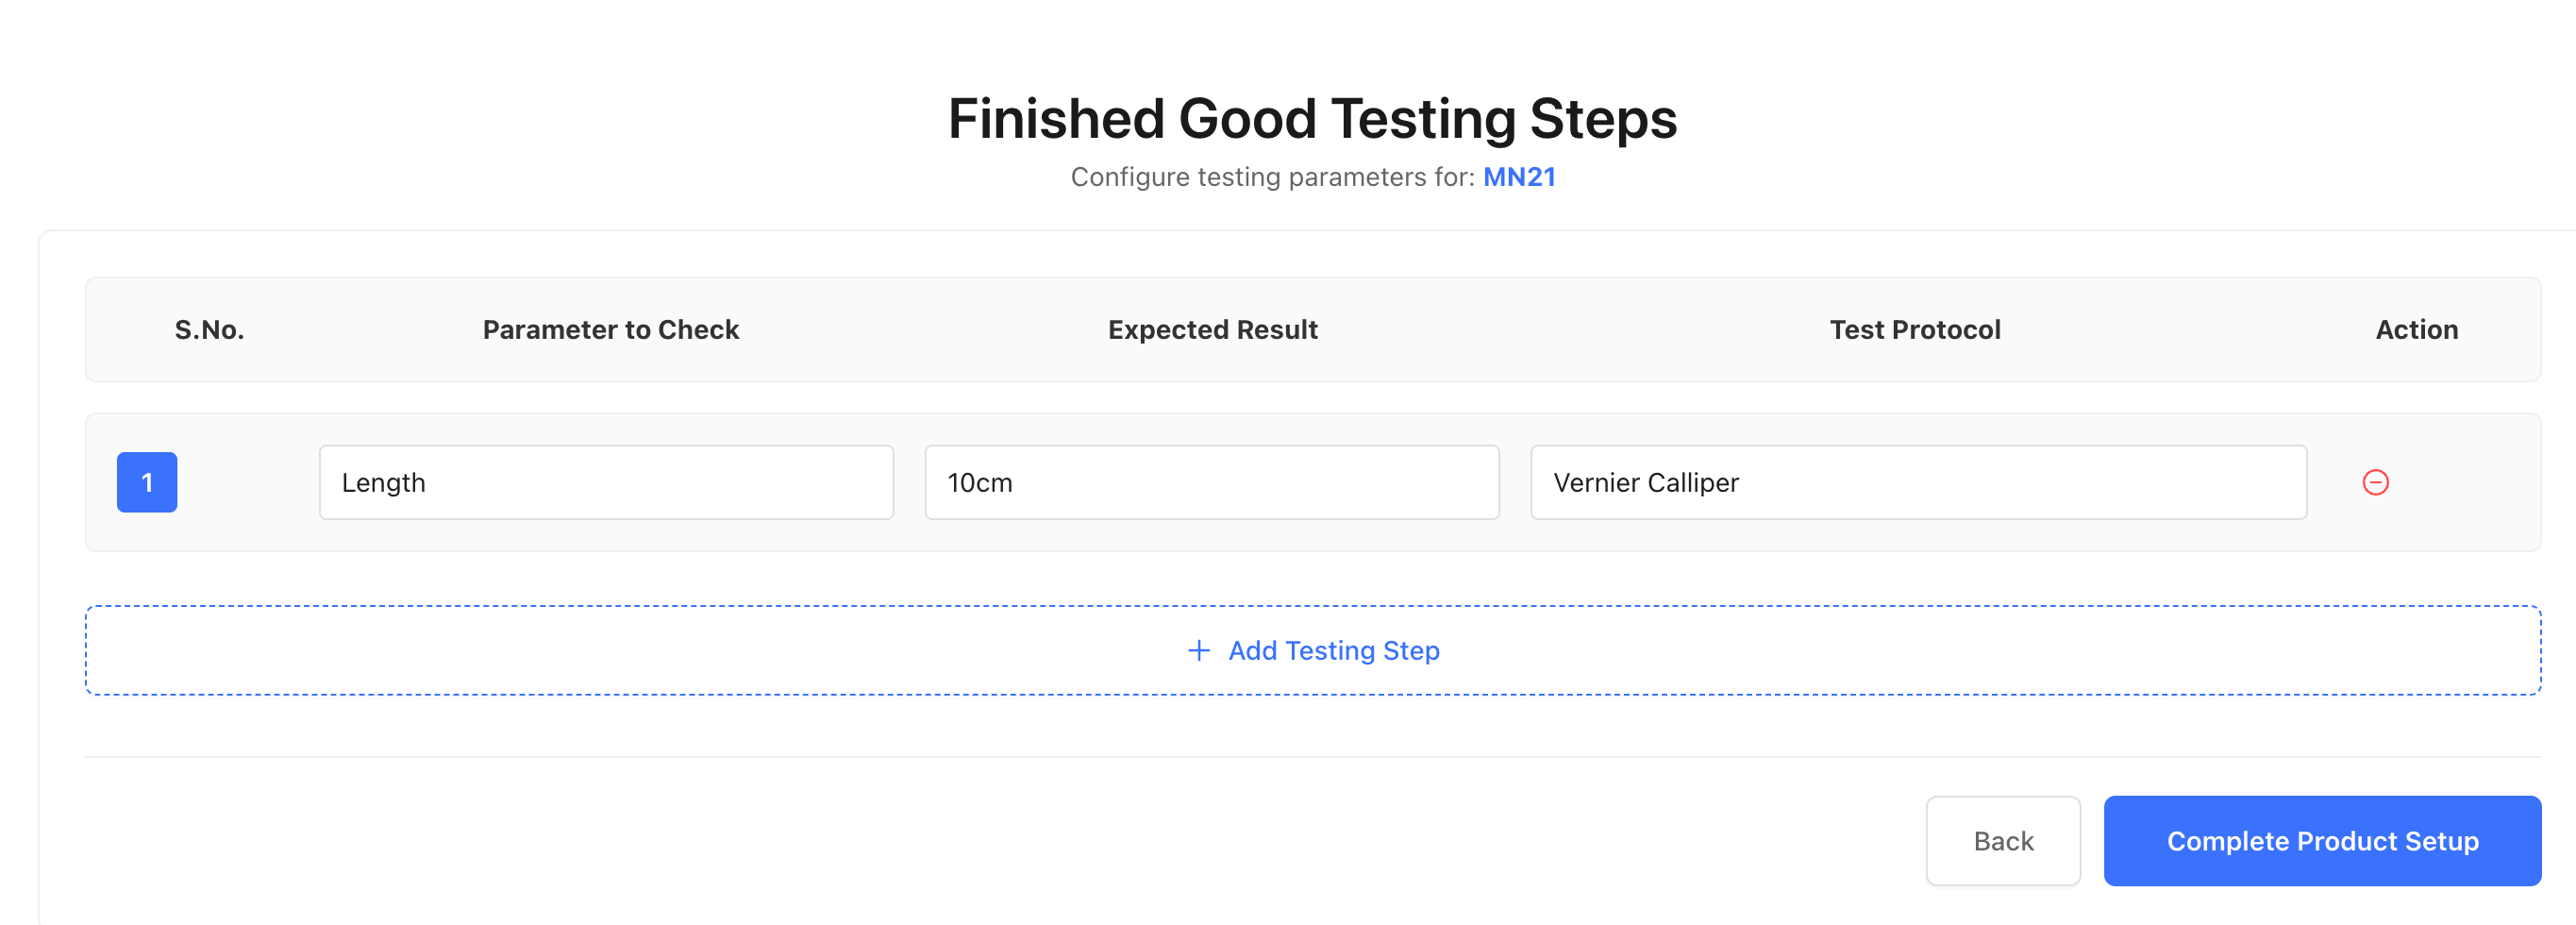
Adding Testing Steps
-
Define the testing or quality control steps
-
Add each testing requirement
-
Click Submit or Save to complete product creation
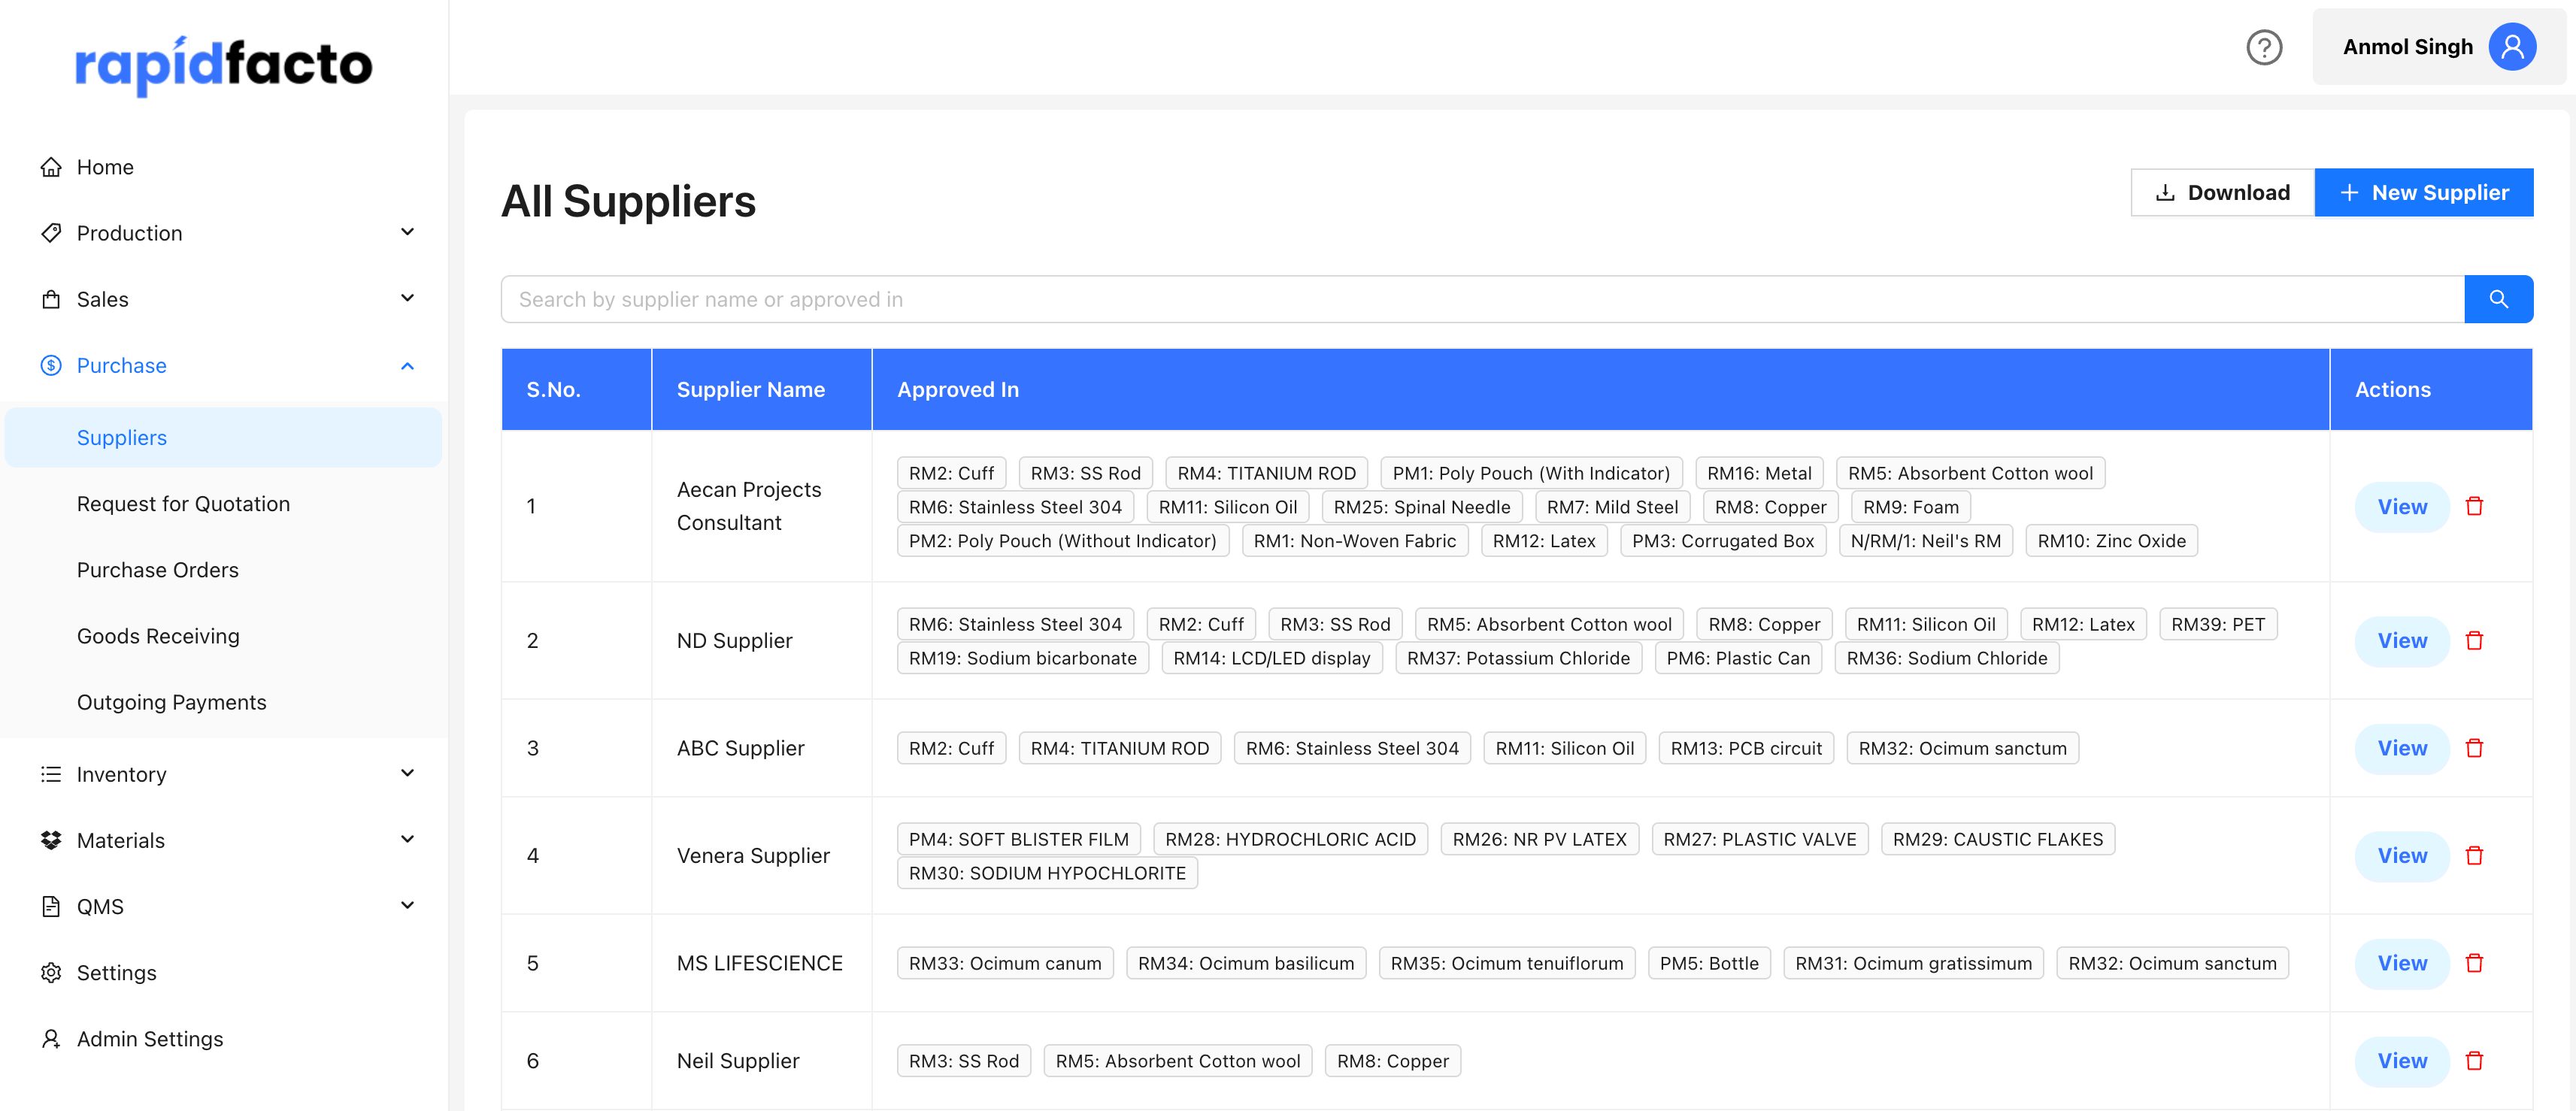
Step 4: Configuring Suppliers
Suppliers are vendors who provide raw materials and other components. You need to add supplier information before you can create purchase orders.
Adding a New Supplier
-
Navigate to Purchase → Suppliers from the main menu
-
Click the Add Supplier or New Supplier button
-
Fill in the supplier details:
- Name: Enter the supplier company name
- Address: Enter the supplier's address
- Phone No.: Enter the contact phone number
- Email ID: Enter the supplier's email address (optional)
- GST: Enter the GST number
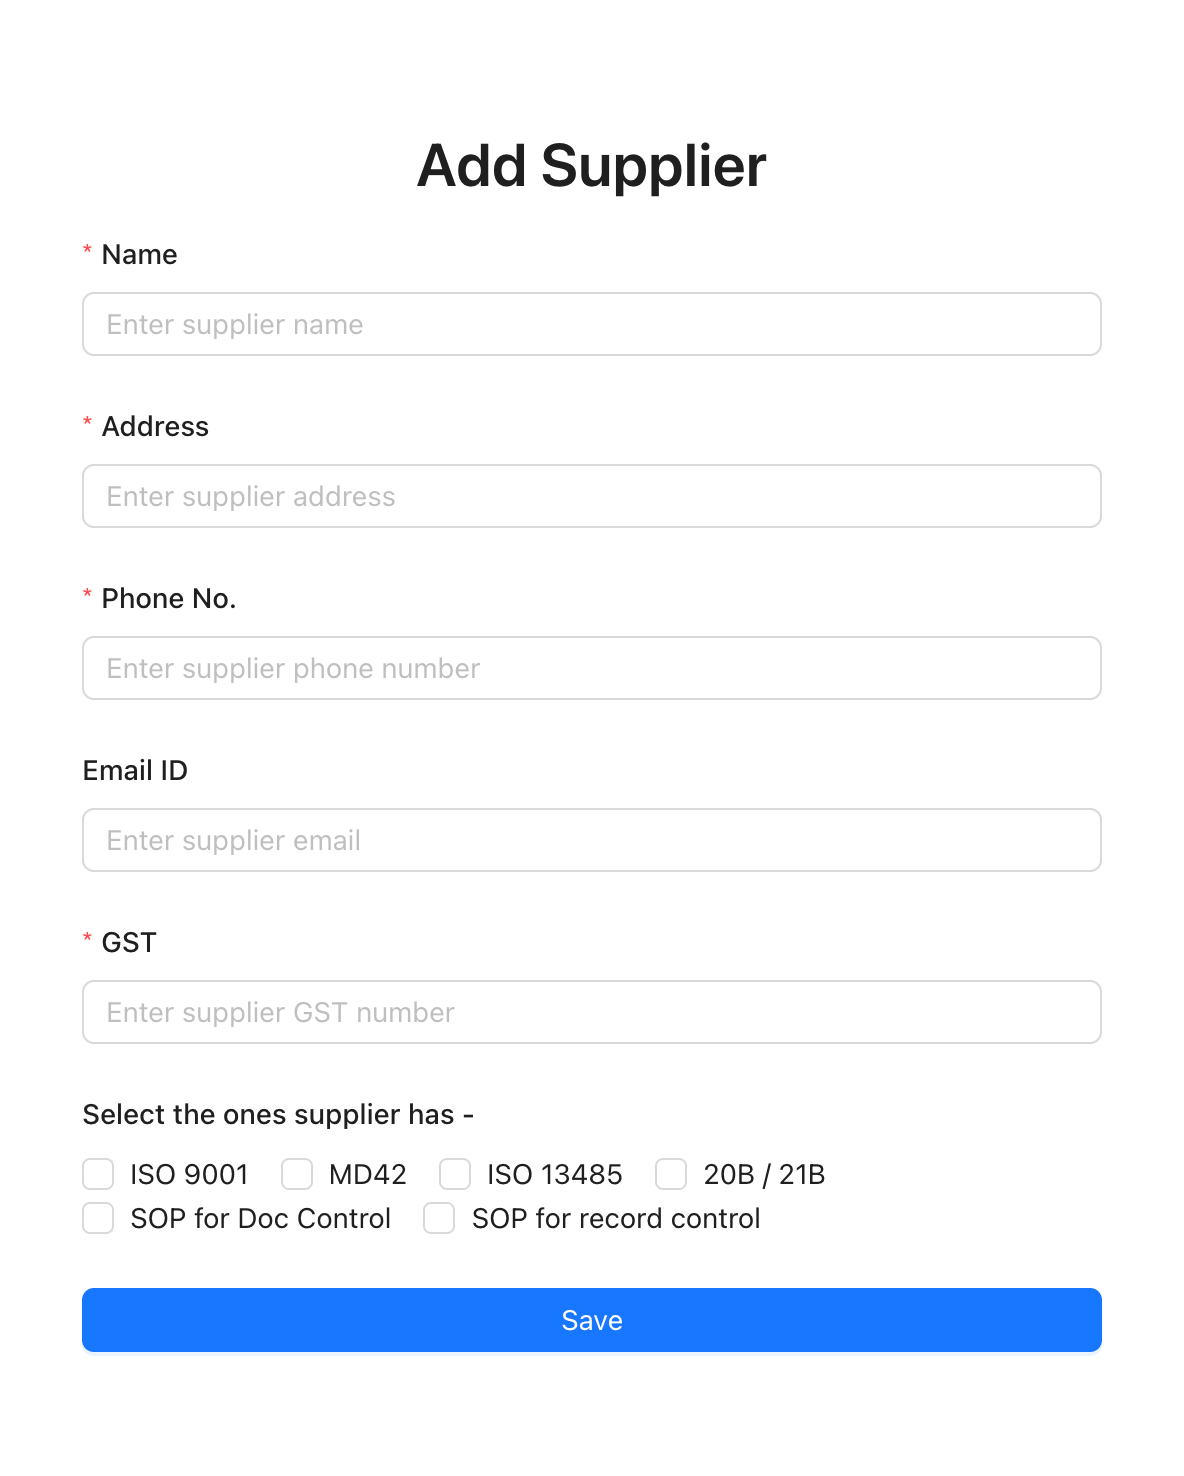
Selecting Supplier Qualifications
-
In the qualifications section (shown in the supplier form above), check the boxes for certifications the supplier has:
- ISO 9001
- MD42
- ISO 13485
- 20B / 21B
- SOP for Doc Control
- SOP for record control
-
Click Submit or Save at the bottom of the form to create the supplier
Note: After creating a supplier, you can edit approved materials by clicking the Edit Approved Materials button on the supplier details page.
Next Steps
Once you've completed these initial setup steps, you're ready to start using RapidFacto for:
- Creating purchase orders
- Receiving goods
- Creating production batches
- Managing inventory
- Using QMS features
For detailed information on each feature, refer to the respective sections in this documentation.