Purchase
The Purchase section allows you to manage the entire procurement process, from creating purchase orders to receiving and inspecting goods.
Overview
The purchase workflow in RapidFacto follows these steps:
- Create Purchase Order - Create a purchase order with materials from approved suppliers
- Create GRN (Goods Receiving Note) - Record received goods from a purchase order
- Inspect GRN Materials - Inspect received materials for quality and breakage
- Test GRN Materials - Perform quality testing on received materials
Let's go through each step in detail.
Step 1: Creating a Purchase Order
A Purchase Order (PO) is a document sent to a supplier to order materials. You can only create purchase orders for materials that have been approved for the selected supplier.
Creating a New Purchase Order
-
Navigate to Purchase → Purchase Orders from the main menu
-
Click the New Purchase Order button

-
Fill in the purchase order details:
- Supplier / Vendor: Select a supplier from the dropdown
- Currency: Select the currency for this purchase order (e.g., INR, USD, EUR)
- Delivery Address: Enter or modify the delivery address (defaults to company address)
- Create Outgoing Payment: Check this box if you want to automatically create an outgoing payment record
- Order Date: Select the order date (if your company is not in audit mode)
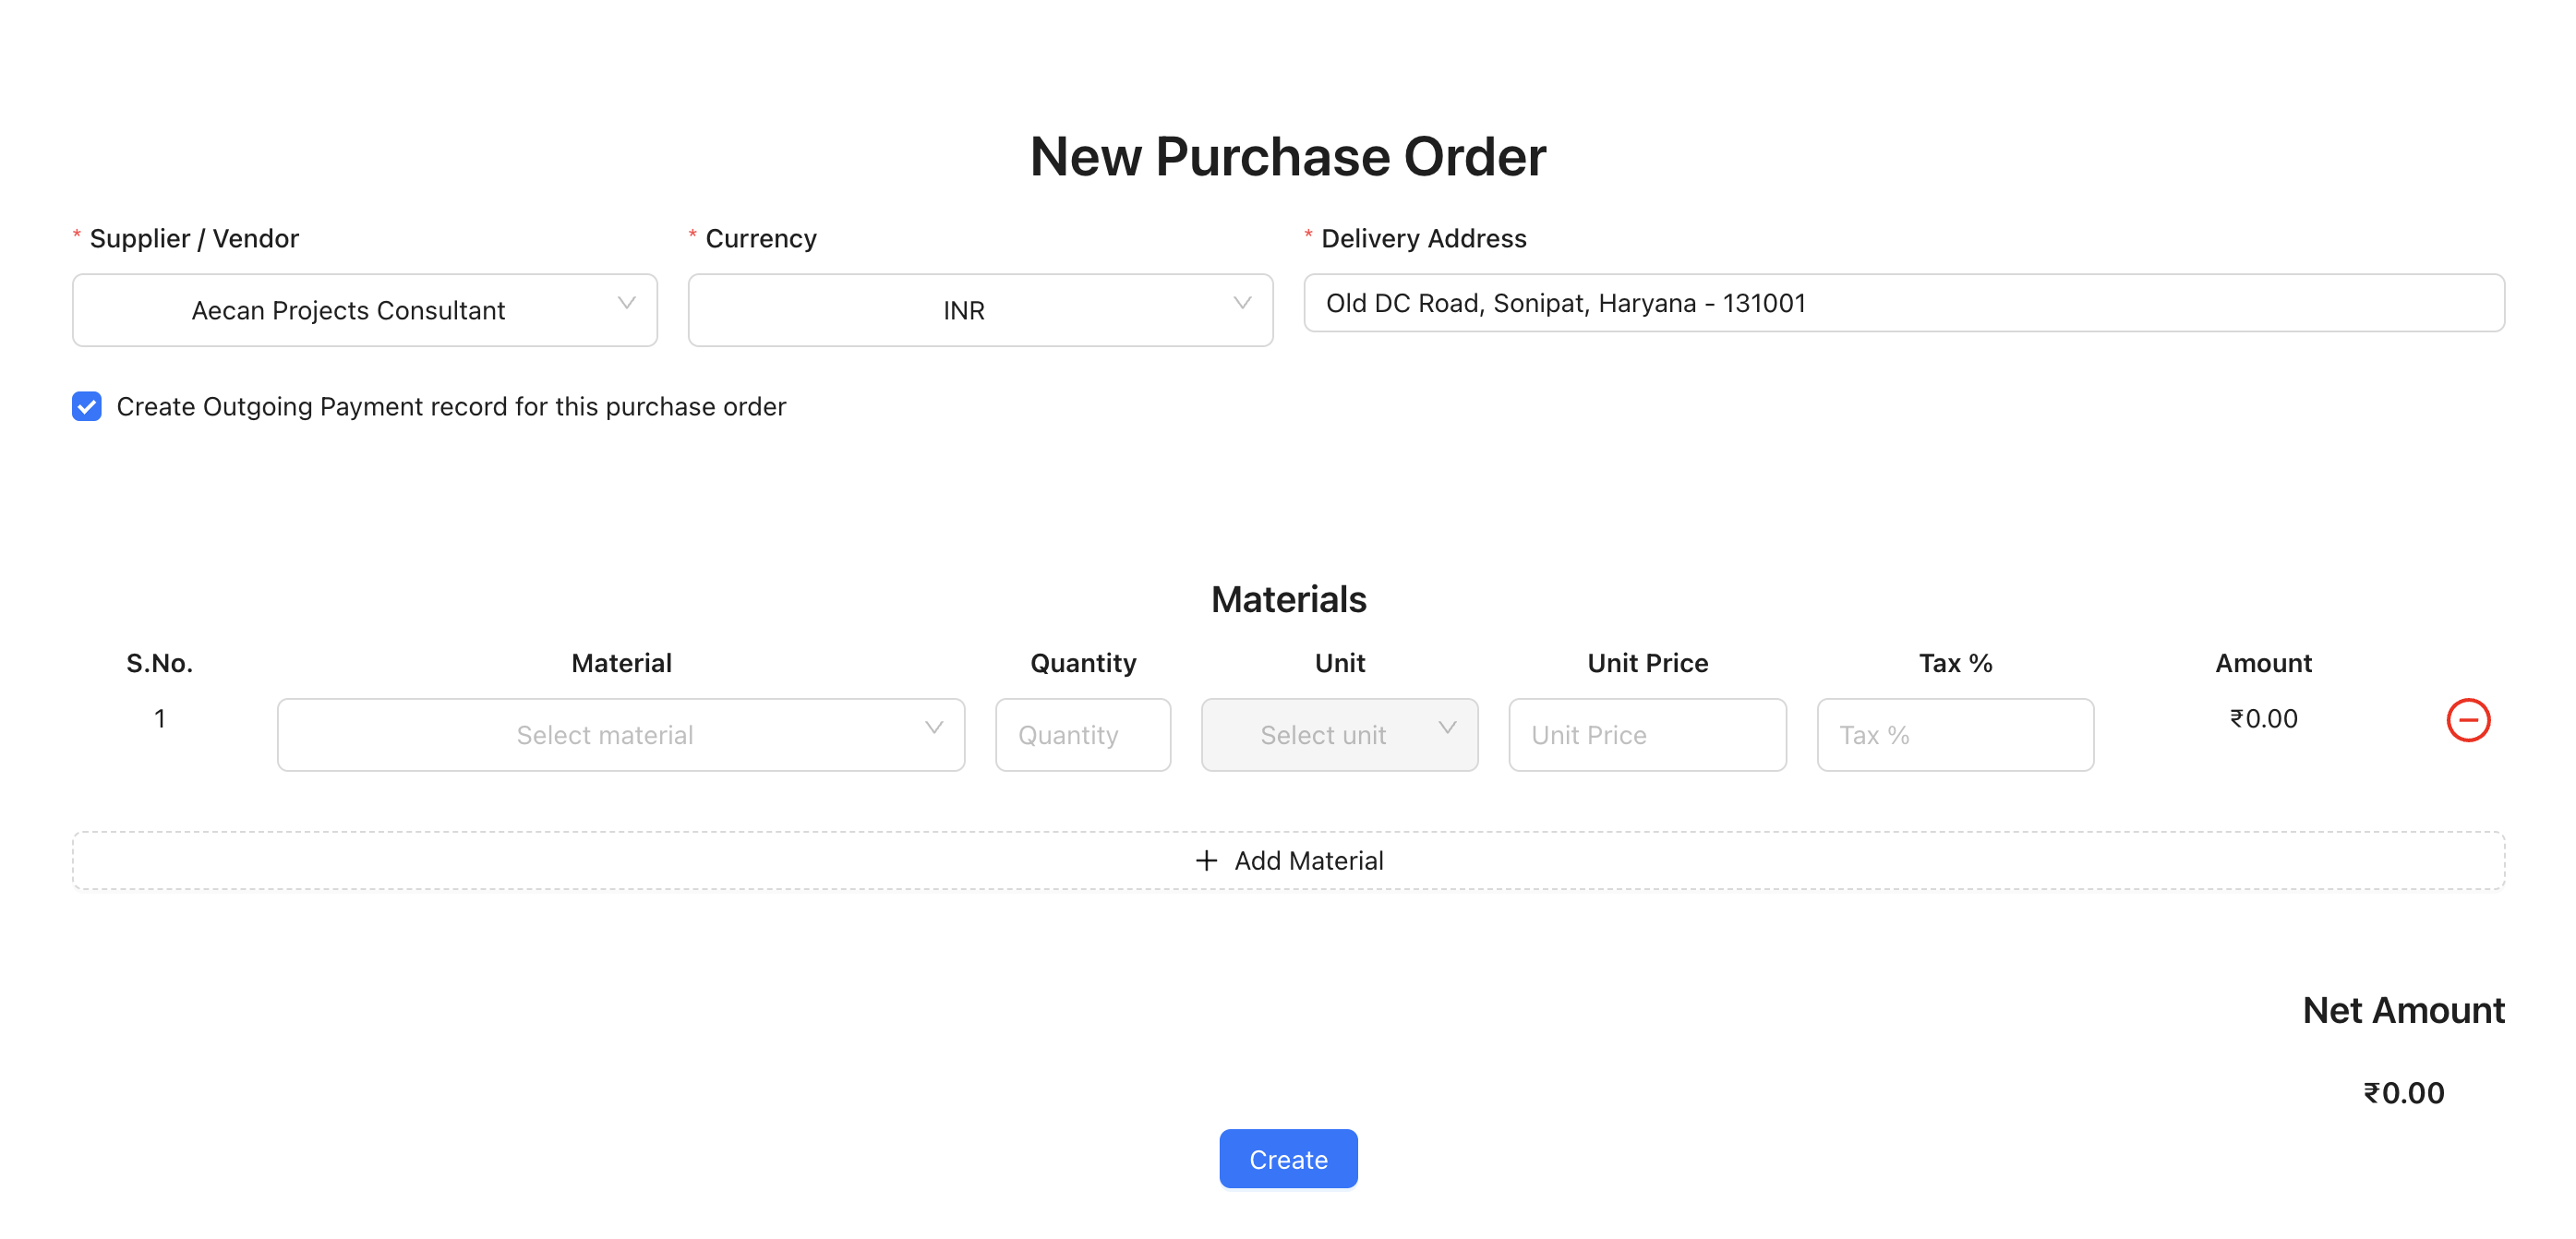
Adding Materials to Purchase Order
After selecting a supplier, the system will load all approved materials for that supplier. You can then add materials to the purchase order:
-
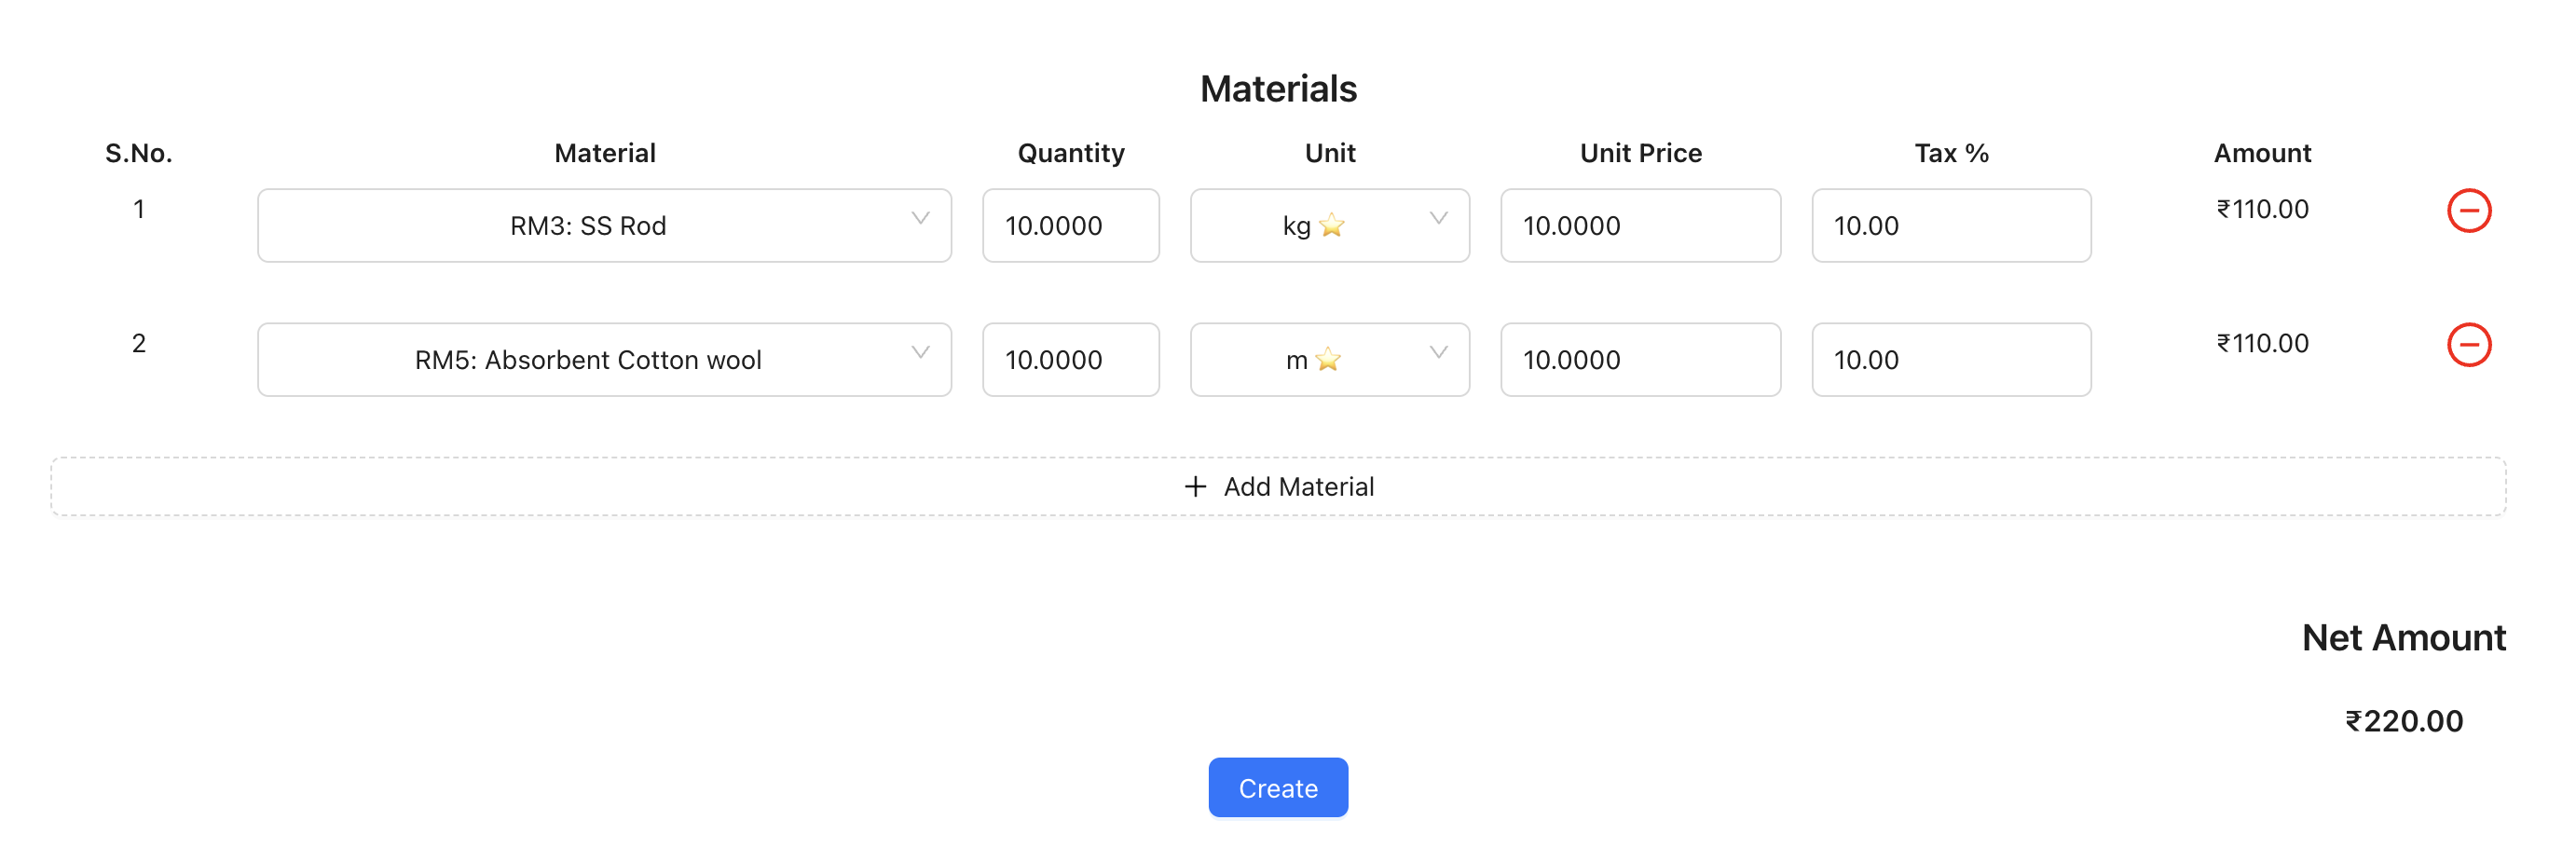
In the Materials section, you'll see a table with the following columns:
- S.No.: Serial number
- Material: Material selection dropdown
- Quantity: Quantity to order
- Unit: Unit of measurement (automatically set based on material's default purchase unit)
- Unit Price: Price per unit
- Tax %: Tax percentage
- Amount: Automatically calculated (Quantity × Unit Price × (1 + Tax%))
-
To add a material:
- Select a material from the dropdown (shows material code and name)
- Enter the quantity
- The unit will be automatically set to the material's default purchase unit
- Enter the unit price
- Enter the tax percentage
- The amount will be calculated automatically
-
Click the Add Material button (with + icon) to add more materials to the order
-
You can remove a material by clicking the red minus icon (🗙) next to it
Reviewing and Submitting
-
Review the Net Amount displayed at the bottom of the form
-
The net amount is calculated as the sum of all material amounts (including tax)
-
Click the Create button to create the purchase order
The net amount is displayed at the bottom of the form, calculated as the sum of all material amounts (including tax).
Note: You can only select materials that have been approved for the selected supplier. If no approved materials are available, you'll see an error message prompting you to approve materials from the Supplier Approved Materials page.
Step 2: Creating a GRN from Purchase Order
A GRN (Goods Receiving Note) is created when you receive goods against a purchase order. You create a GRN directly from the purchase order page.
Accessing Purchase Order Details
-
Navigate to Purchase → Purchase Orders from the main menu
-
Find and click on the purchase order you want to create a GRN for
-
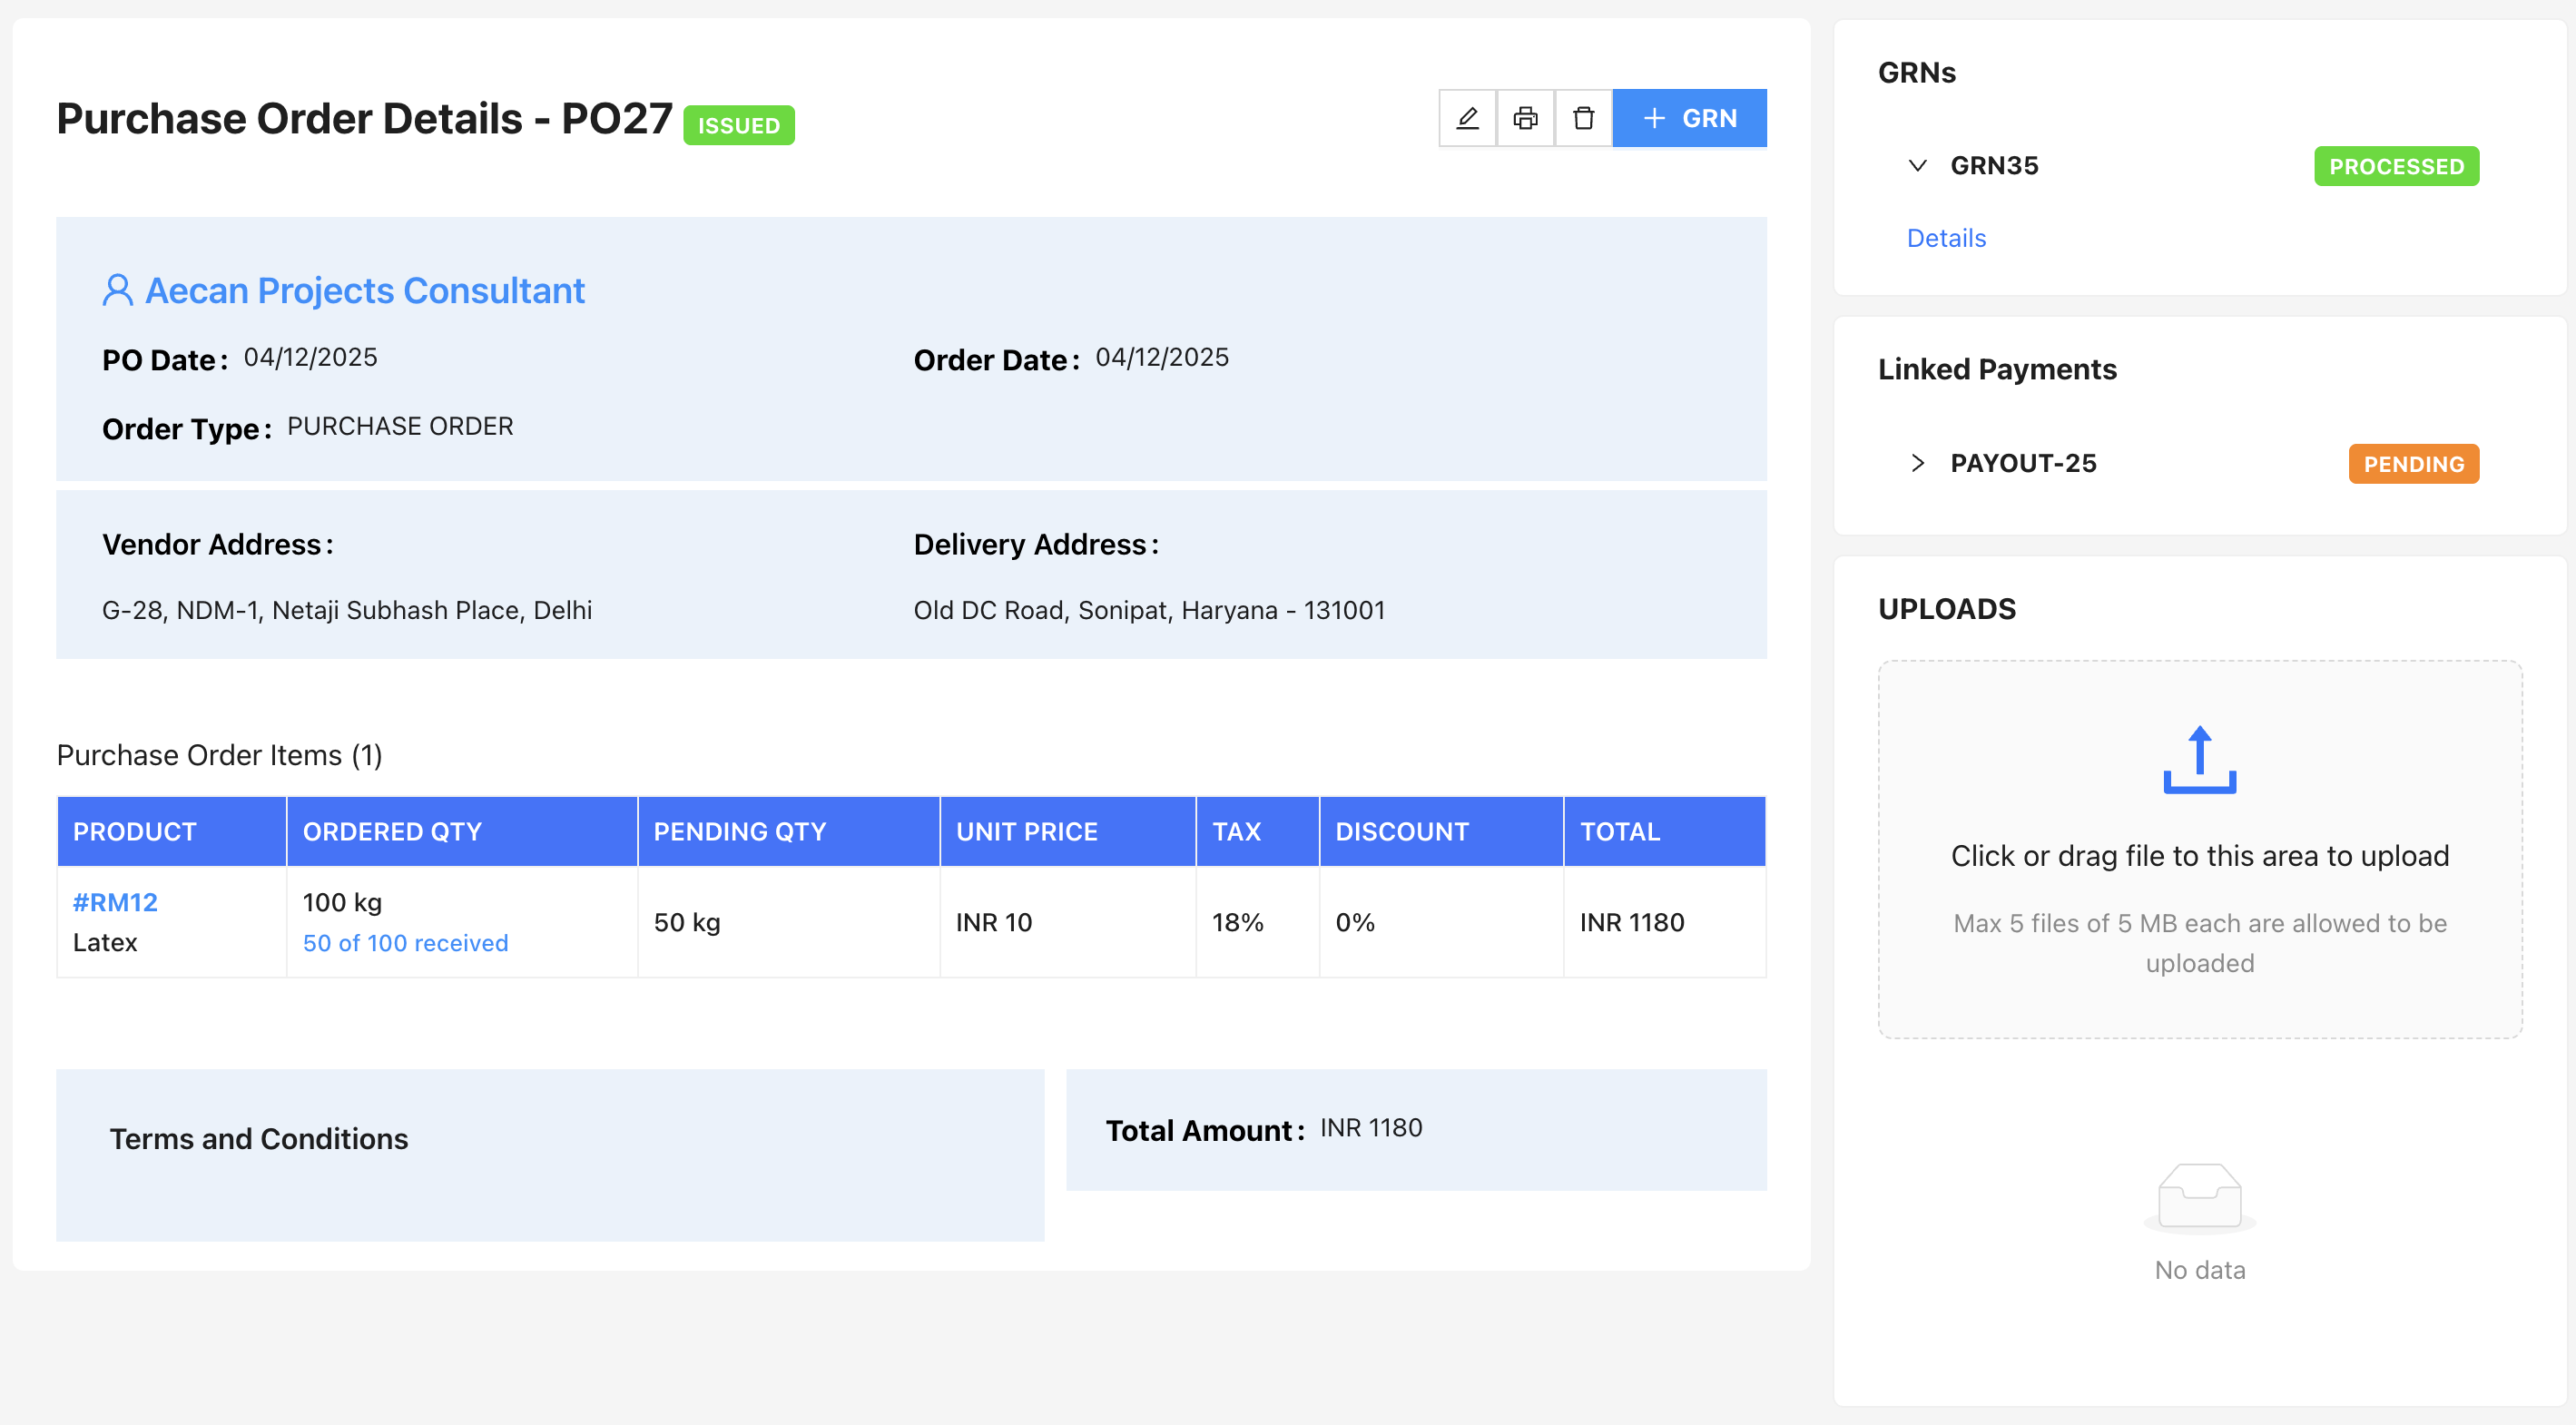
This will open the Purchase Order Details page
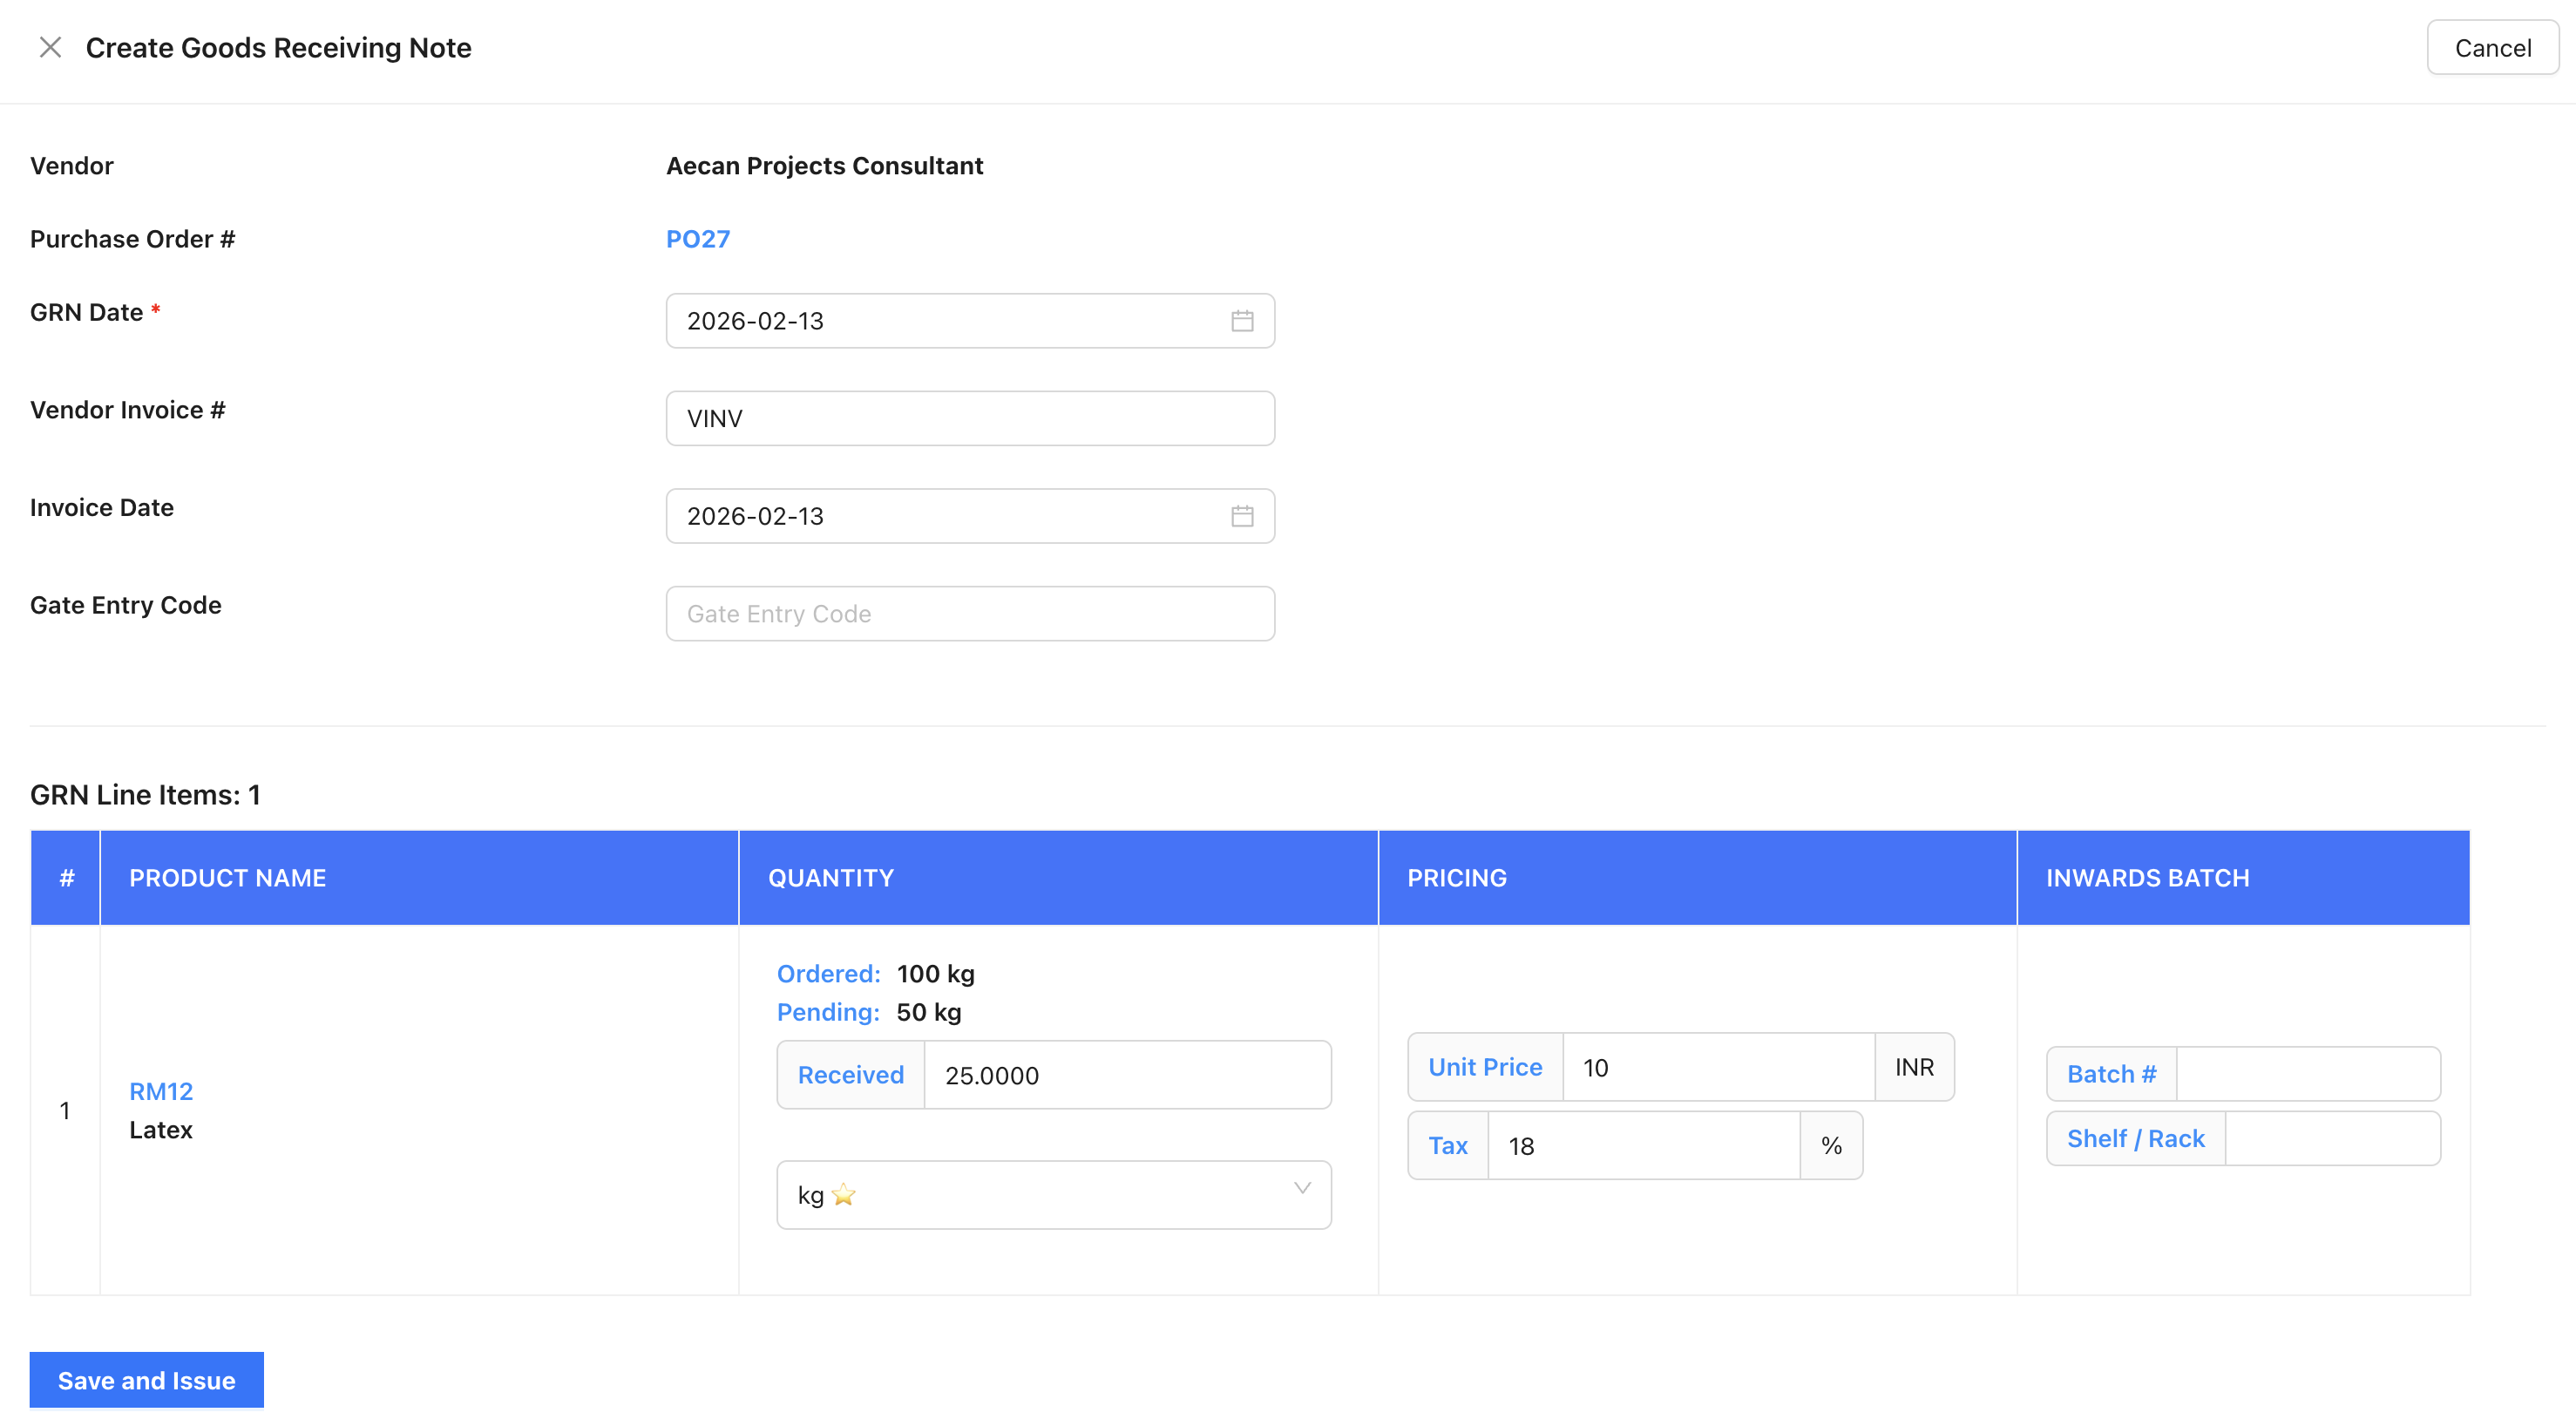
Creating GRN
-
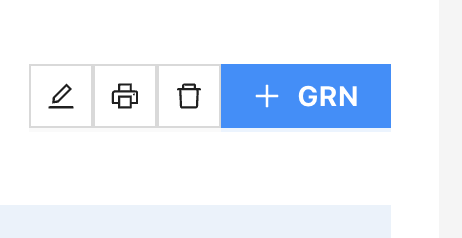
On the Purchase Order Details page, click the Create GRN button (usually in the top right area)
-
A drawer/form will open showing all materials from the purchase order
-
Fill in the GRN details:
- GRN Date: Select the date when goods were received
- Vendor Invoice Number: Enter the invoice number from the supplier
- Invoice Date: Select the invoice date
- Gate Entry Code: Enter the gate entry code (if applicable)

-
For each material, you'll see:
- Ordered Quantity: The quantity ordered in the purchase order
- Pending Quantity: Remaining quantity to be received
- Received Quantity: Enter the quantity actually received
- Unit: Select or confirm the unit of measurement
- Unit Price: Price per unit (inherited from purchase order)
- Tax %: Tax percentage (inherited from purchase order)
- Total: Automatically calculated
-
Enter the received quantity for each material you're receiving
-
Click Save to create the GRN
Note: You can create multiple GRNs for the same purchase order if you receive materials in multiple shipments. The system tracks pending quantities automatically.
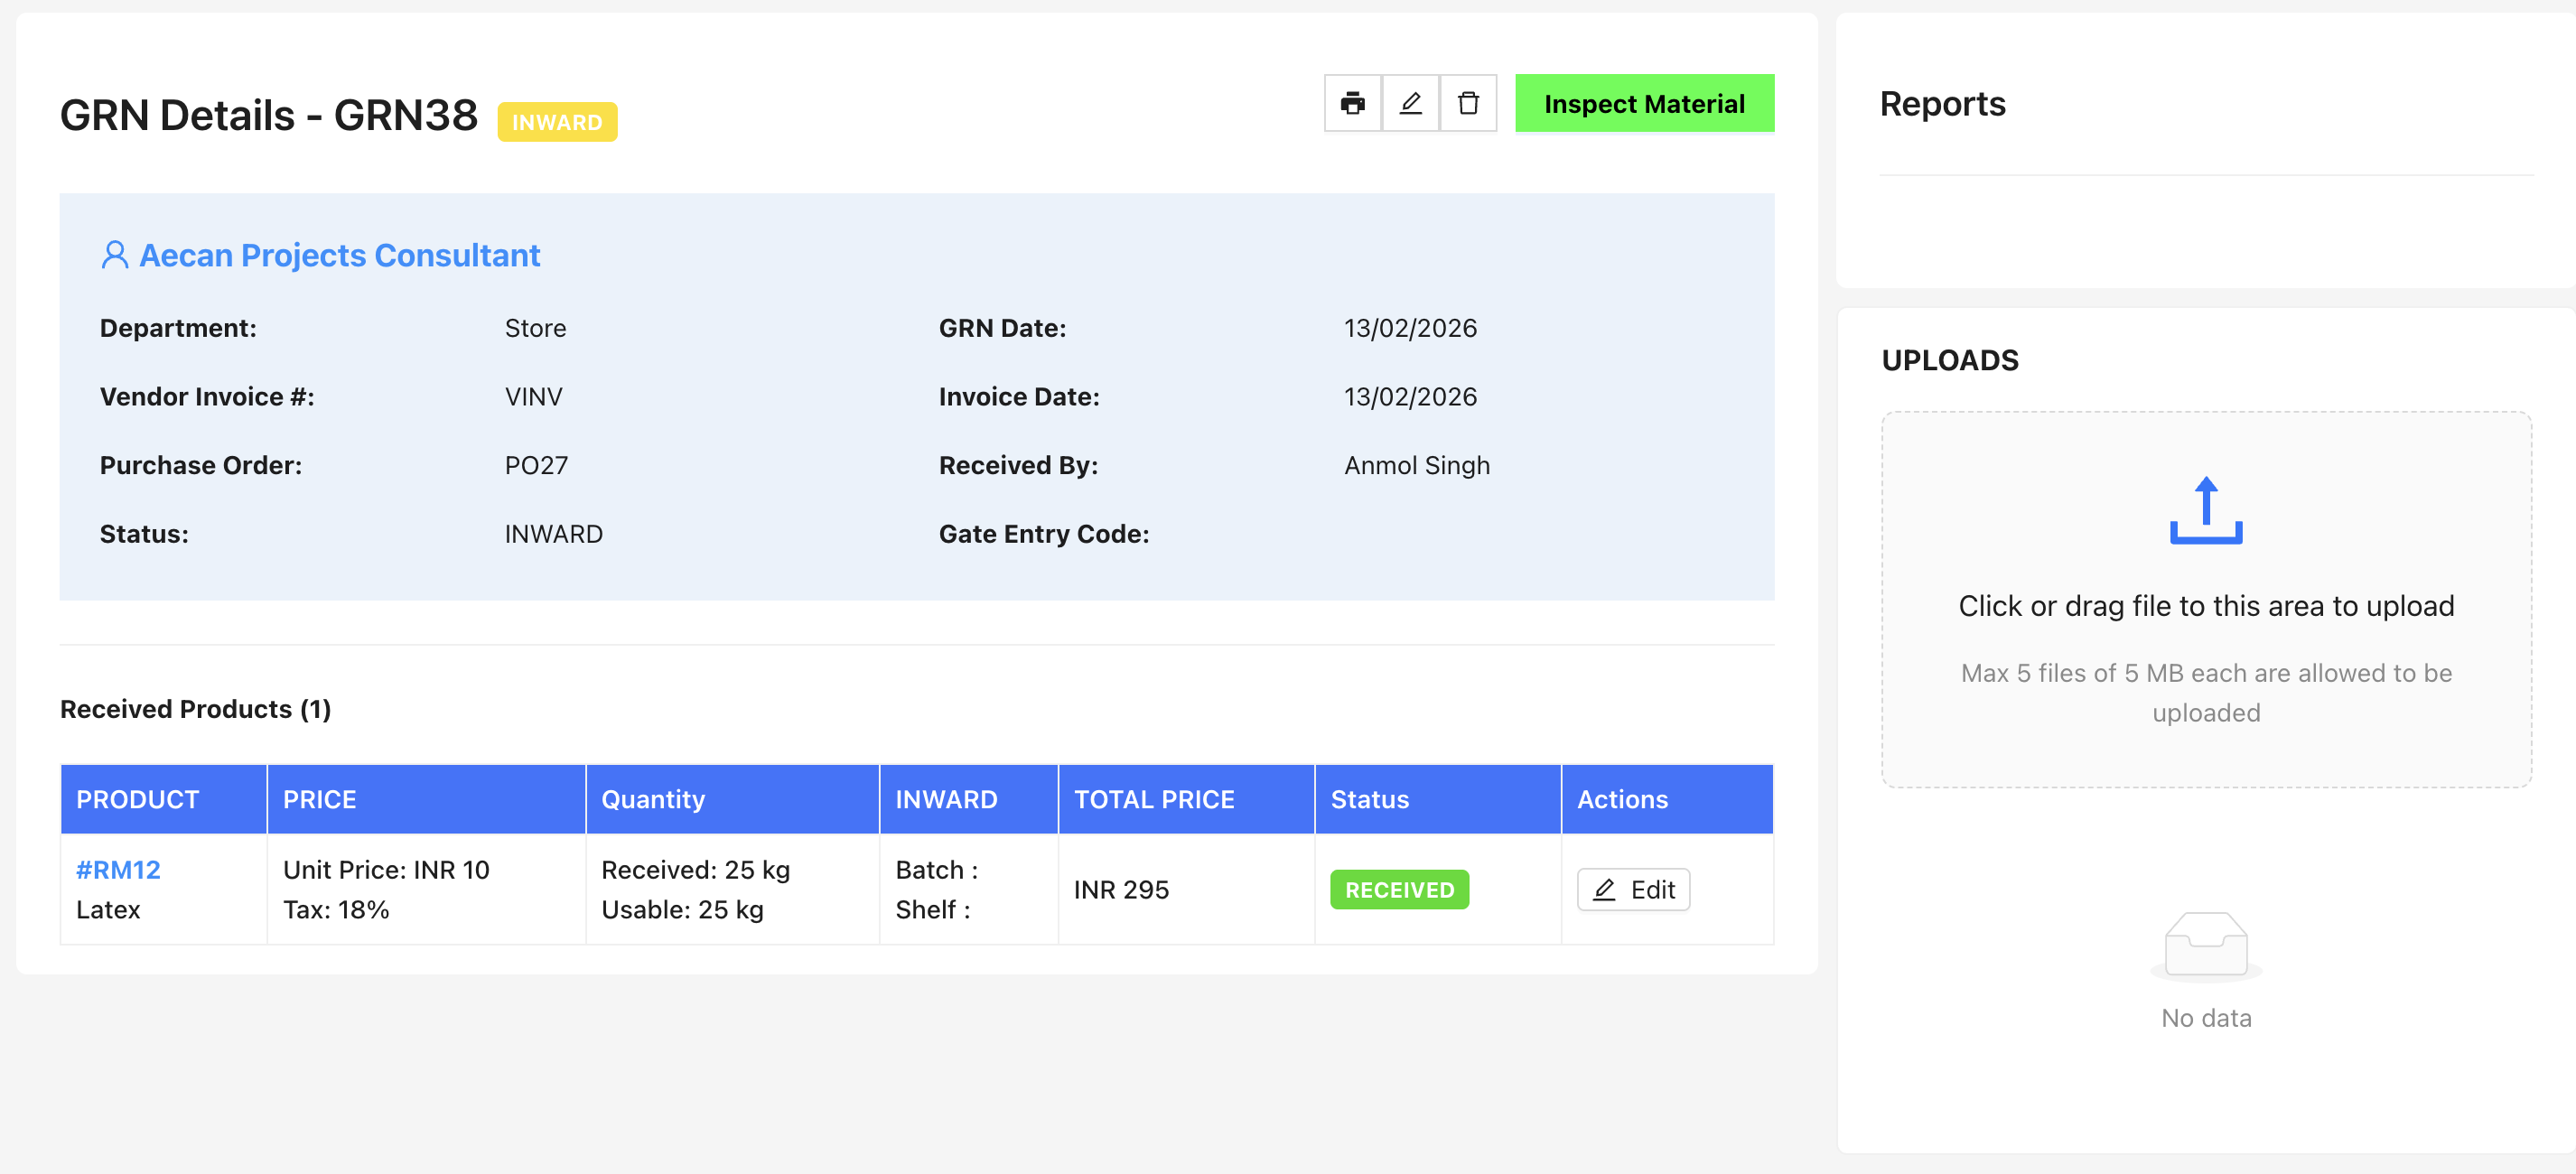
Step 3: Inspecting GRN Materials
After creating a GRN, you need to inspect the received materials to check for quality issues and breakage.
Accessing GRN for Inspection
-
Navigate to Purchase → Goods Receiving from the main menu
-
Find the GRN you want to inspect and click on it
-
This will open the GRN Details page
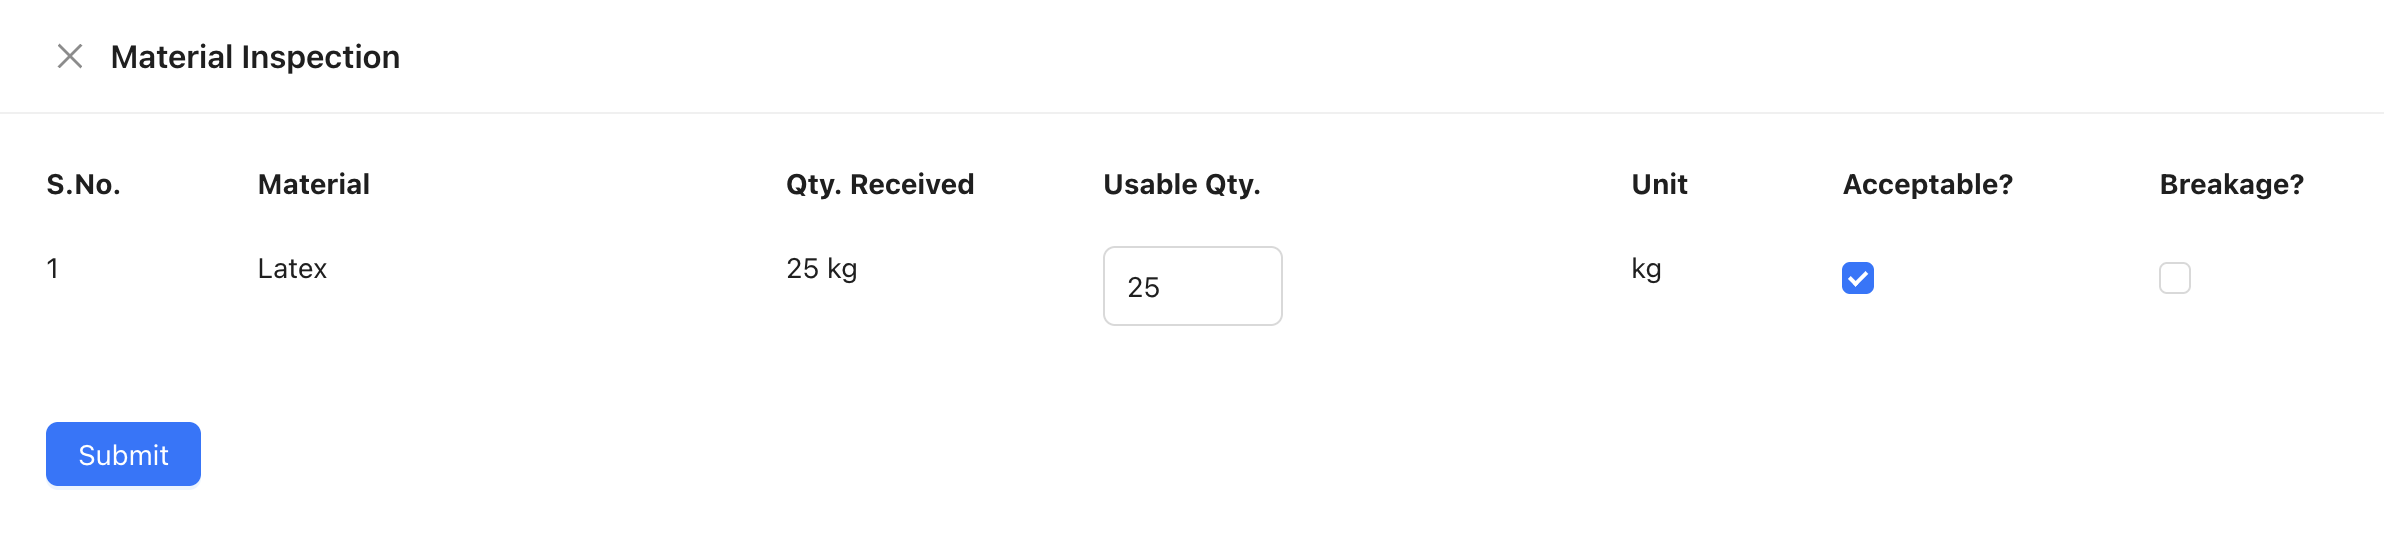
Performing Inspection
-
On the GRN Details page, click the Inspect Materials button (or similar action button)
On the GRN Details page, click the Inspect Materials button (or similar action button)
-
An inspection form will open showing all materials in the GRN
-
For each material, fill in the inspection details:
- Acceptable: Check this box if the material meets quality standards
- Breakage: Enter the breakage quantity (if any)
- Usable Quantity: Enter the quantity that is usable after accounting for breakage
- Inspection Date: Select the date when inspection was performed
-
The usable quantity should be: Received Quantity - Breakage Quantity
-
After filling in all inspection details, click Submit at the bottom of the inspection form to save the inspection
Note: Materials that are marked as "not acceptable" or have significant breakage may need to be rejected or returned to the supplier.
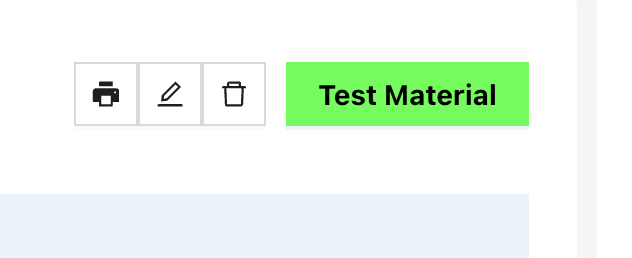
Step 4: Testing GRN Materials
After inspection, materials need to undergo quality testing based on their specifications before they can be accepted into inventory.
Accessing GRN for Testing
-
Navigate to Purchase → Goods Receiving from the main menu
-
Find the GRN that has been inspected and click on it
-
On the GRN Details page, you'll see materials that are ready for testing

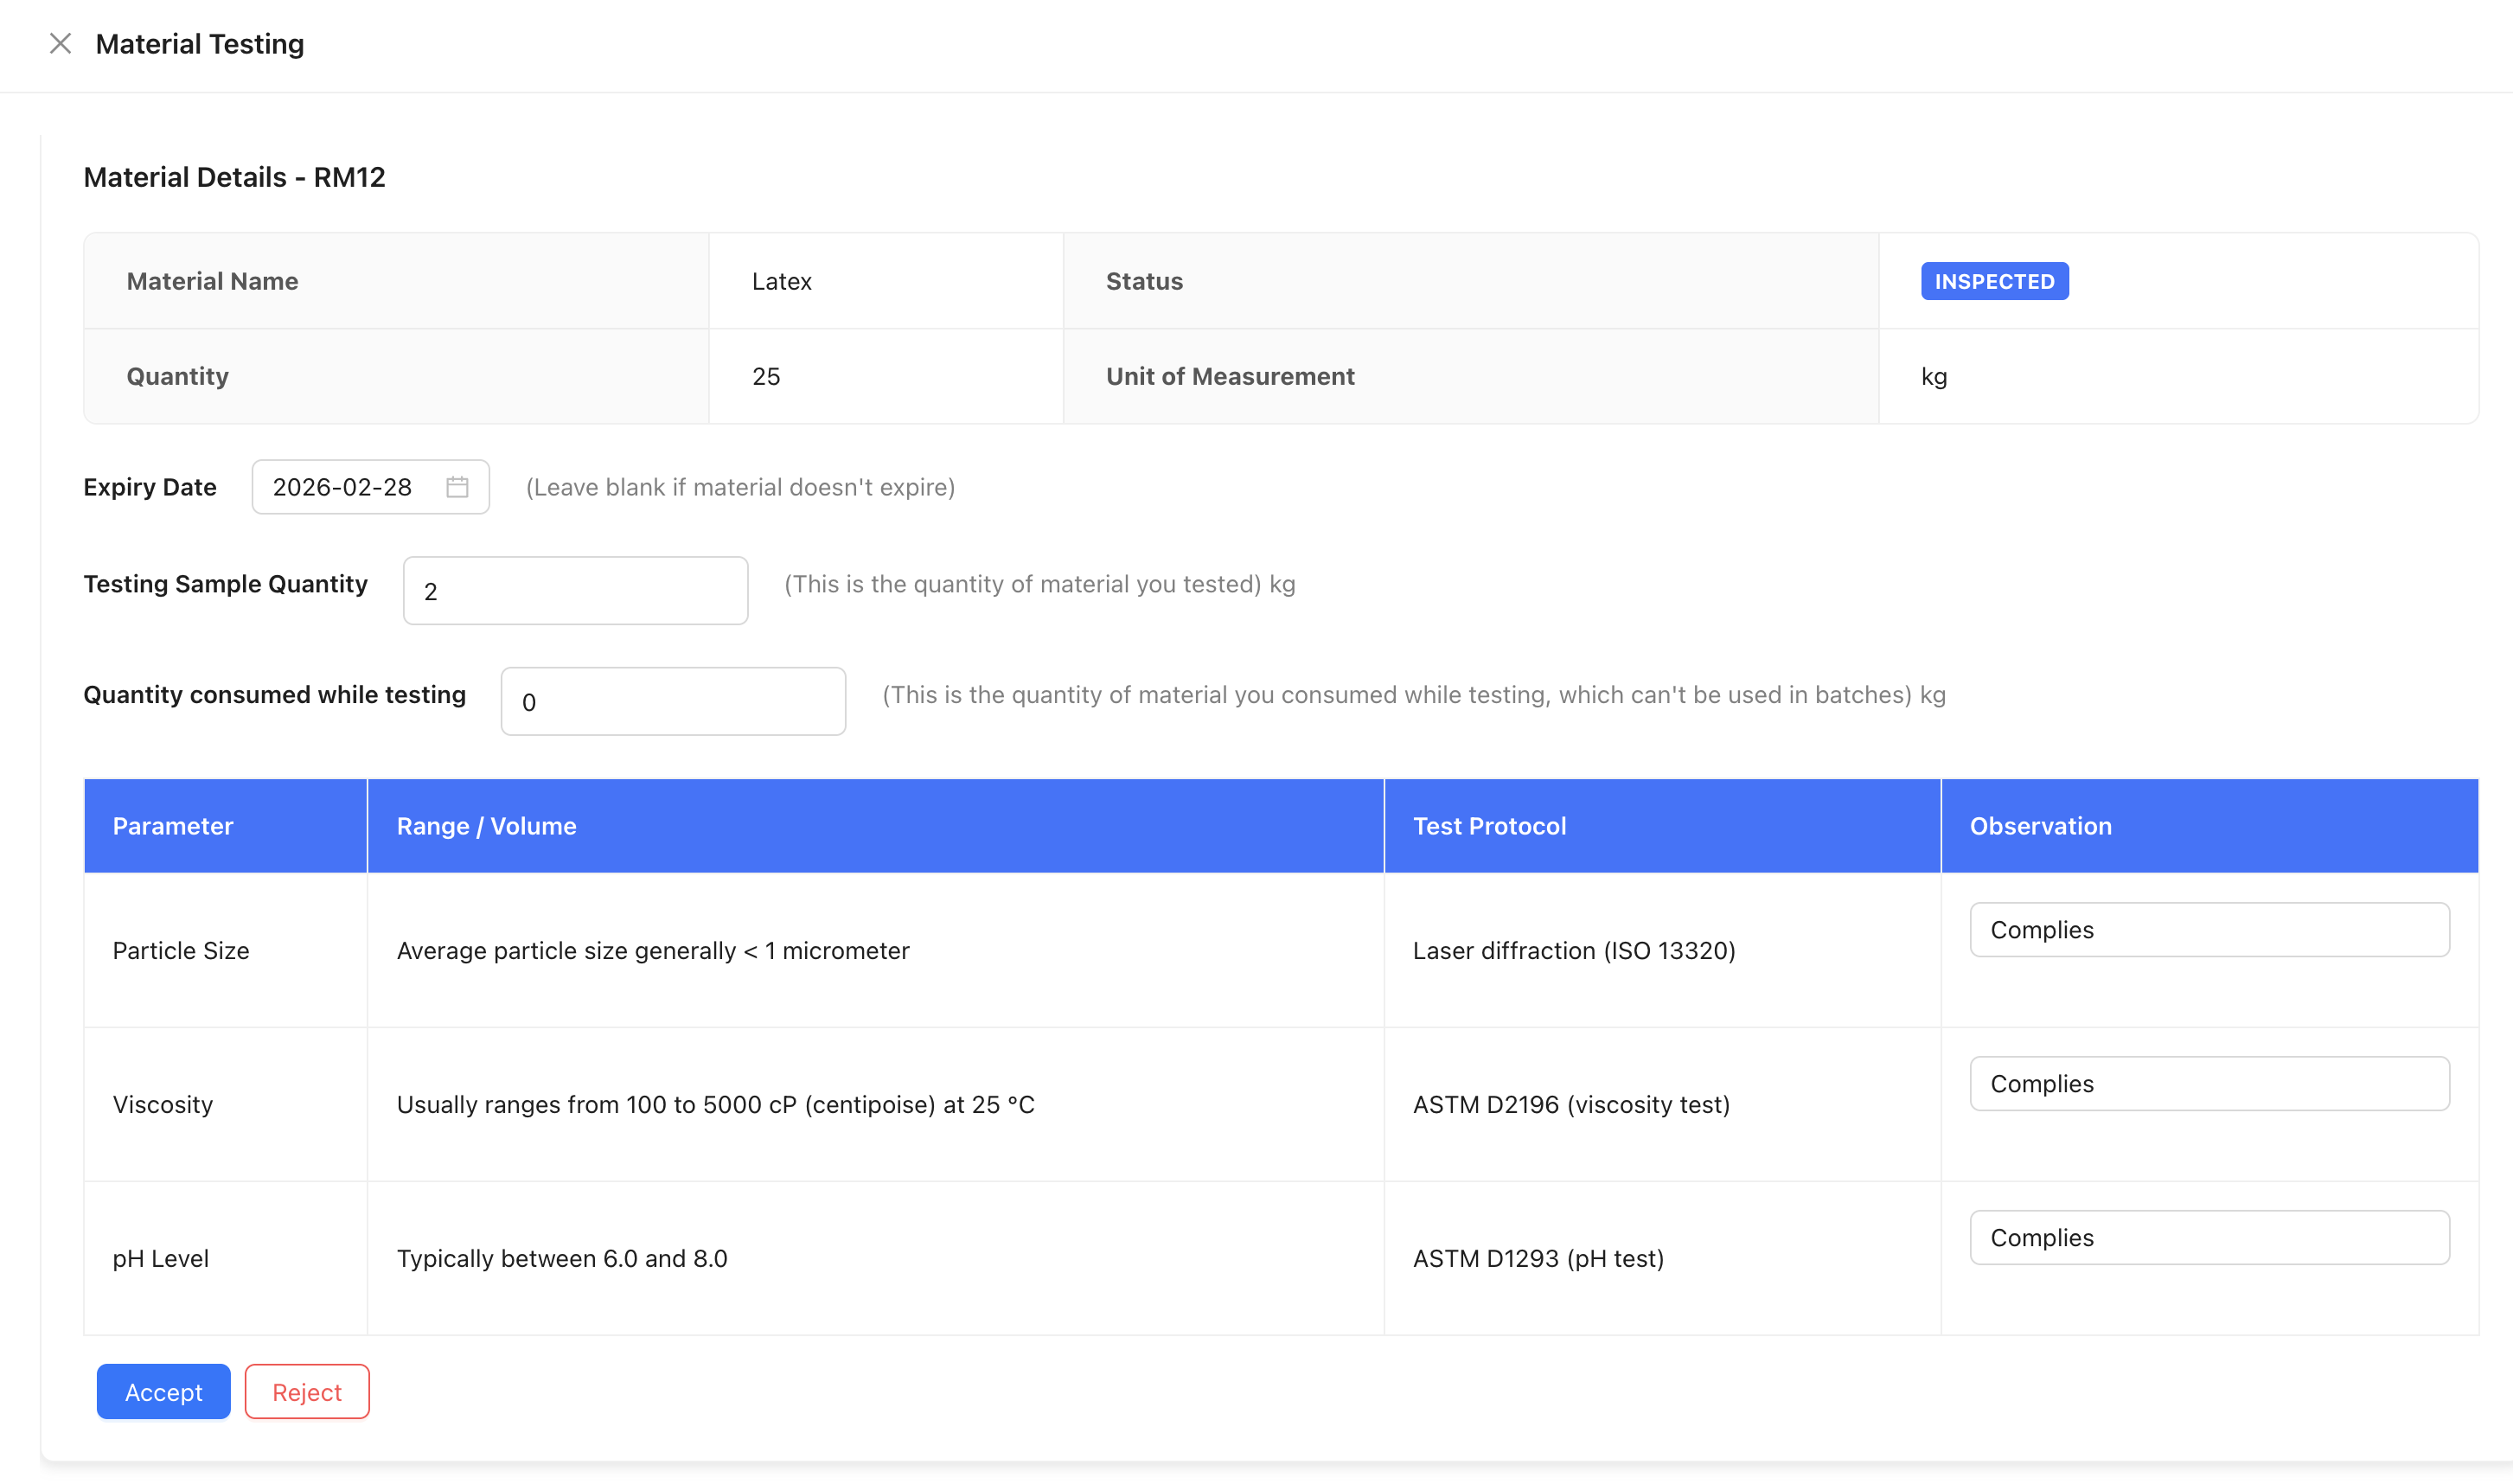
Performing Material Testing
-
Click on a material or the Test button to open the testing form
-
The testing form will show:
- Material Details: Material code, name, and specifications
- Usable Quantity: Quantity available for testing (from inspection)
- Testing Sample Quantity: Automatically calculated based on material's QC sample quantity formula, or enter manually
- Testing Quantity Consumed: Enter the quantity consumed during testing
- Test Date: Select the date when testing was performed
-
Review the material specifications that need to be tested
-
Fill in the test results:
- Enter the testing sample quantity (if not auto-calculated)
- Enter the quantity consumed during testing
- Select the test date
-
After completing the test:
- Click Accept if the material passes all quality tests
- Click Reject if the material fails quality tests
-
Accepted materials will be added to your inventory
-
Rejected materials should be returned to the supplier or disposed of according to your procedures
Viewing Test History
- You can view the testing history for each material
- Previous test results are displayed in the material details
- Test dates and results are tracked for audit purposes
Next Steps
After completing the purchase workflow:
- Accepted Materials: Will be available in your inventory
- Purchase Orders: Can be tracked and managed from the Purchase Orders page
- GRN Records: All GRN records are maintained for audit and traceability
- Outgoing Payments: If you checked "Create Outgoing Payment", payment records will be created automatically
For more information on managing inventory, see the Inventory section.