Production
The Production section manages the complete batch manufacturing process from start to finish, including material requisitions, manufacturing steps, quality testing, and store transfers.
Overview
The production workflow in RapidFacto follows these sequential steps:
- Start New Batch - Create a new production batch
- Create Raw Material Requisition - Request raw materials needed for the batch
- Transfer Raw Material - Receive and transfer raw materials to production
- Create Packing Material Requisition - Request packing materials
- Transfer Packing Material - Receive and transfer packing materials
- Manufacturing & IPQC - Perform manufacturing steps with in-process quality control
- Request Finished Good Testing - Send finished goods for quality testing
- Test Finished Goods - Perform quality testing on finished goods
- Submit Finished Good Test Report - Submit test results (pass/fail)
- Request Store Transfer - Request transfer of finished goods to store
- Accept Store Transfer - Accept and complete the store transfer
Let's go through each step in detail.
Step 1: Starting a New Batch
A batch represents a production run of a specific product. Each batch tracks materials, manufacturing steps, and quality testing.
Creating a New Batch
-
Navigate to Production → Batches from the main menu
-
Click the New Batch button (usually a "+" or "New Batch" button)

-
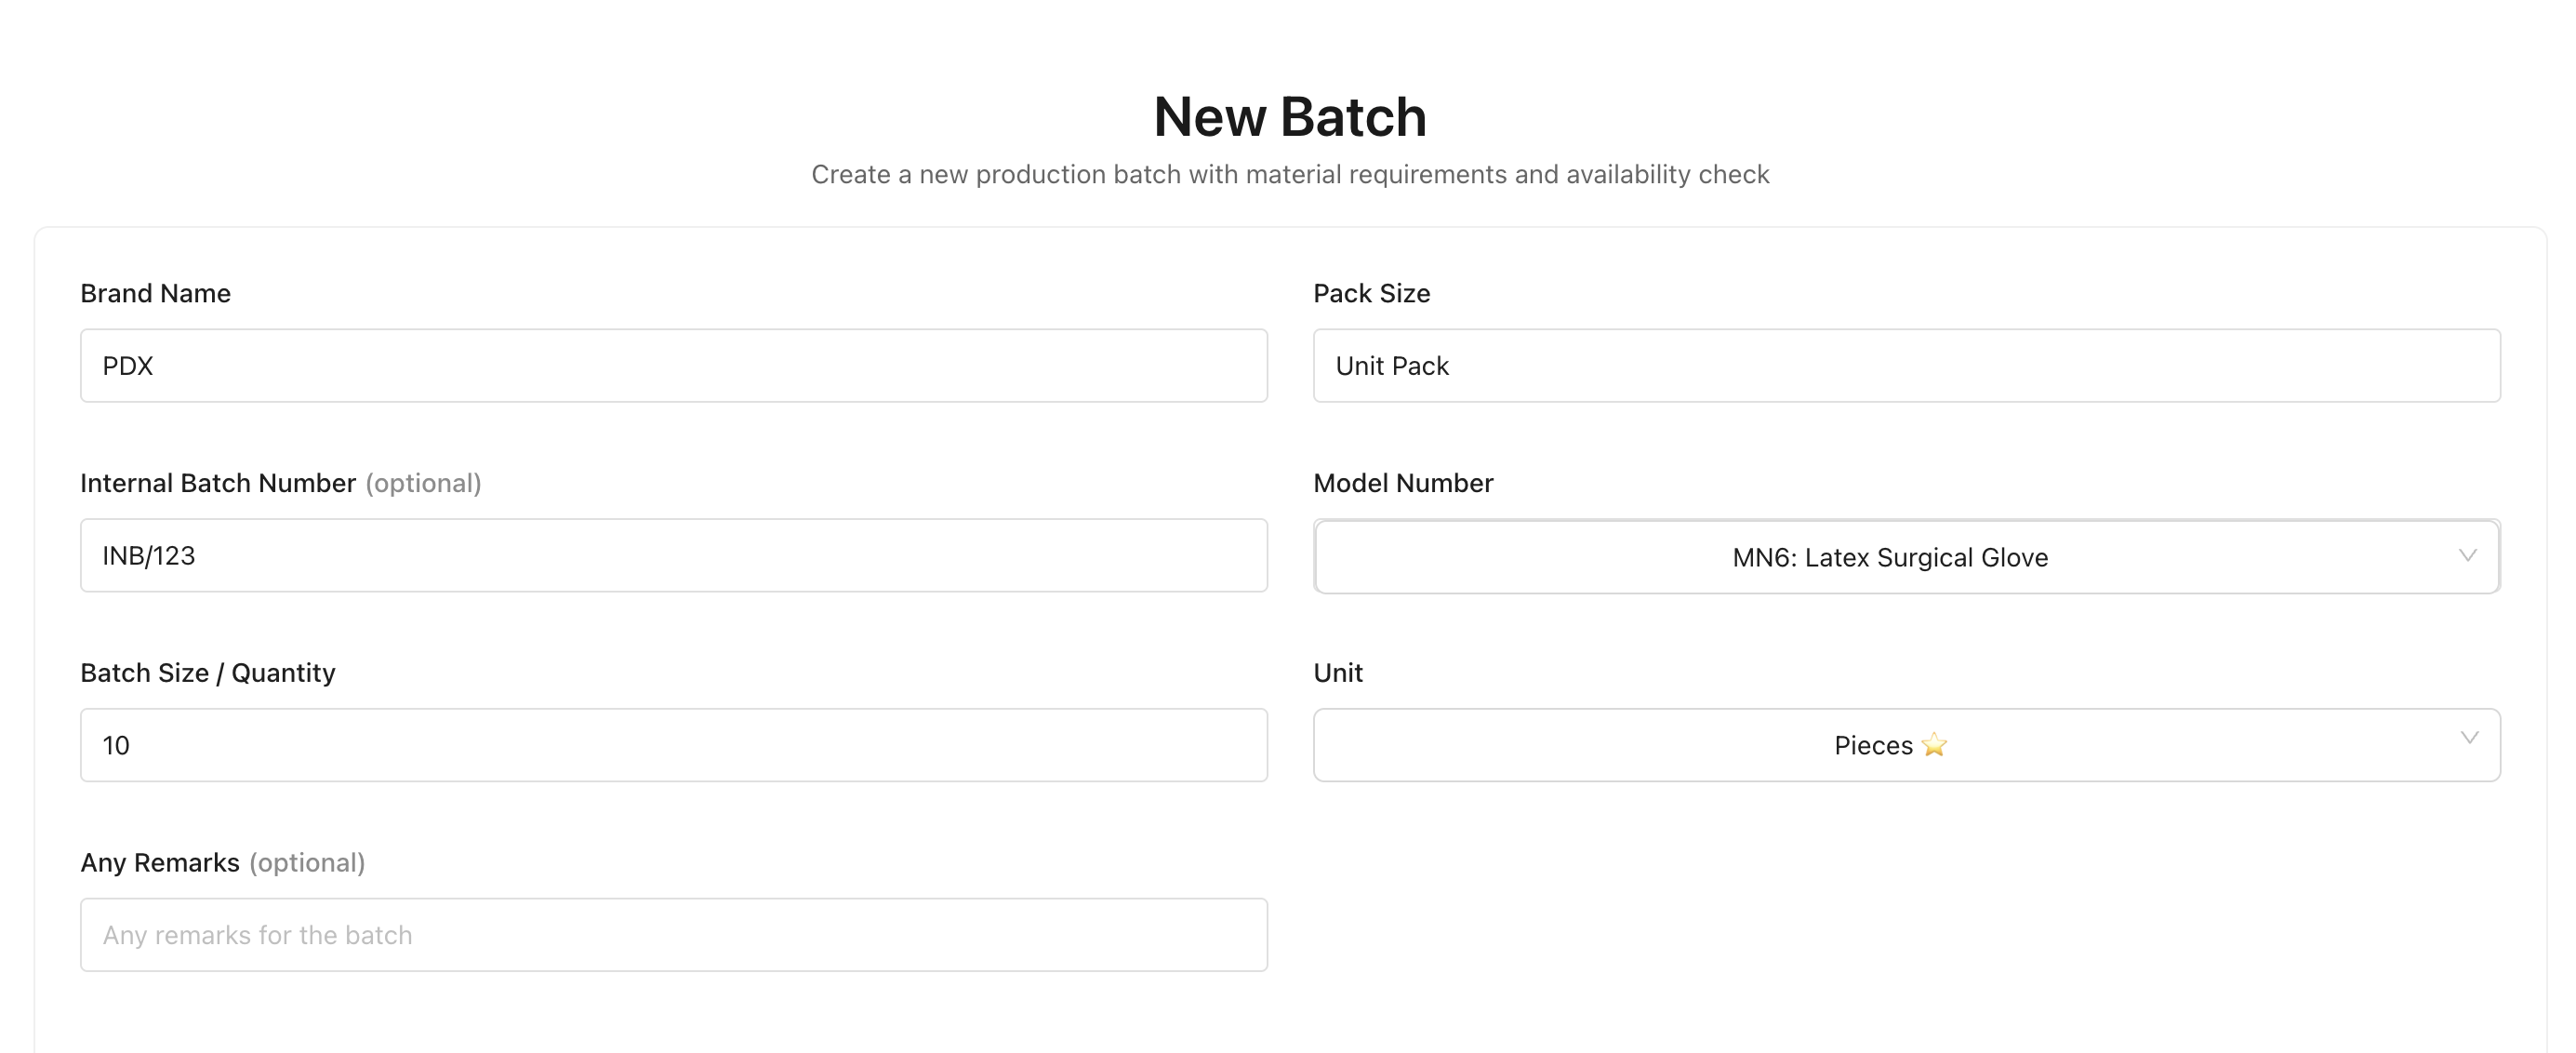
Fill in the batch details:
- Model/Product: Select the product model you want to manufacture
- Brand Name: Enter the brand name for this batch
- Expected Batch Size: Enter the quantity you plan to manufacture
- Unit: Select the unit of measurement (automatically set based on product's default production unit)
- Pack Size: Enter the pack size (if applicable)
- Internal Batch Number: Enter an internal batch number (optional, can be auto-generated)
- Batch Date: Select the date when the batch is being created
- Remarks: Add any additional notes or remarks
-
After selecting a model, the system will display the required raw materials and packing materials for that product
-
Click Create or Submit to create the batch
Note: Once a batch is created, you'll see it in the Batches list with status "CREATED" or "RAW_MATERIAL_REQUESTED".
Step 2: Creating Raw Material Requisition
After creating a batch, you need to request the raw materials required for production.
Creating a Raw Material Requisition
-
Navigate to Production → Batches from the main menu
-
Find the batch you just created and click on it to view batch details
-
On the batch details page, click the Create Raw Material Requisition button (or similar action button)

-
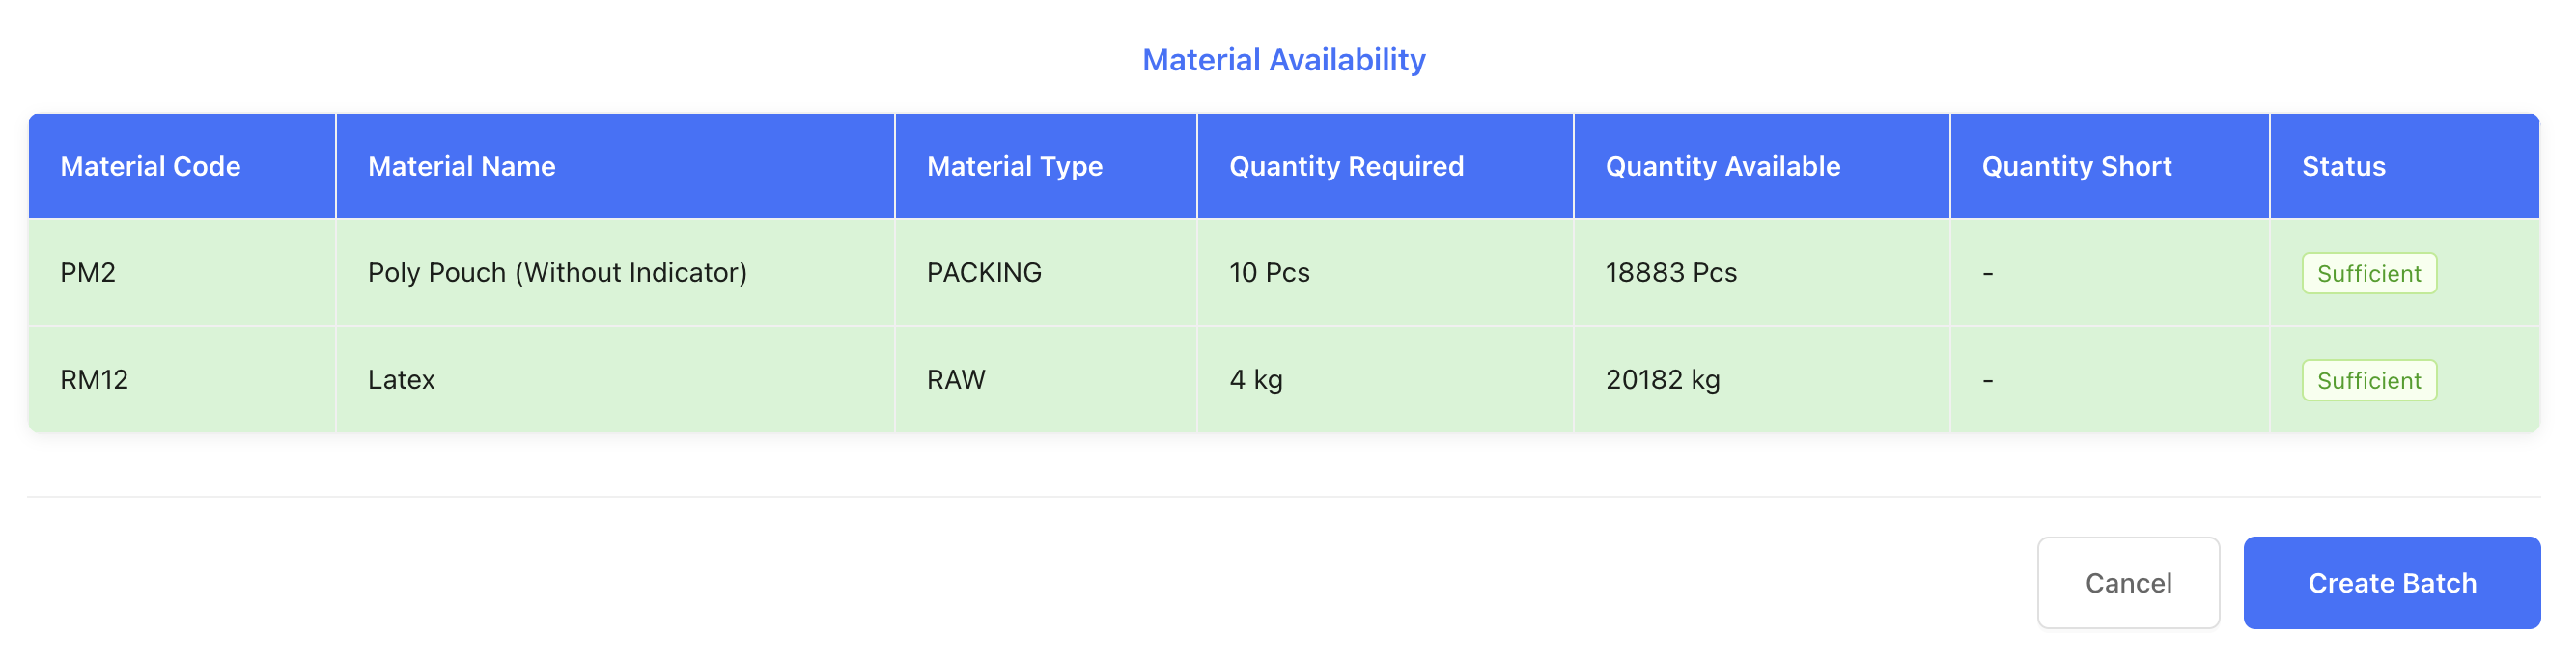
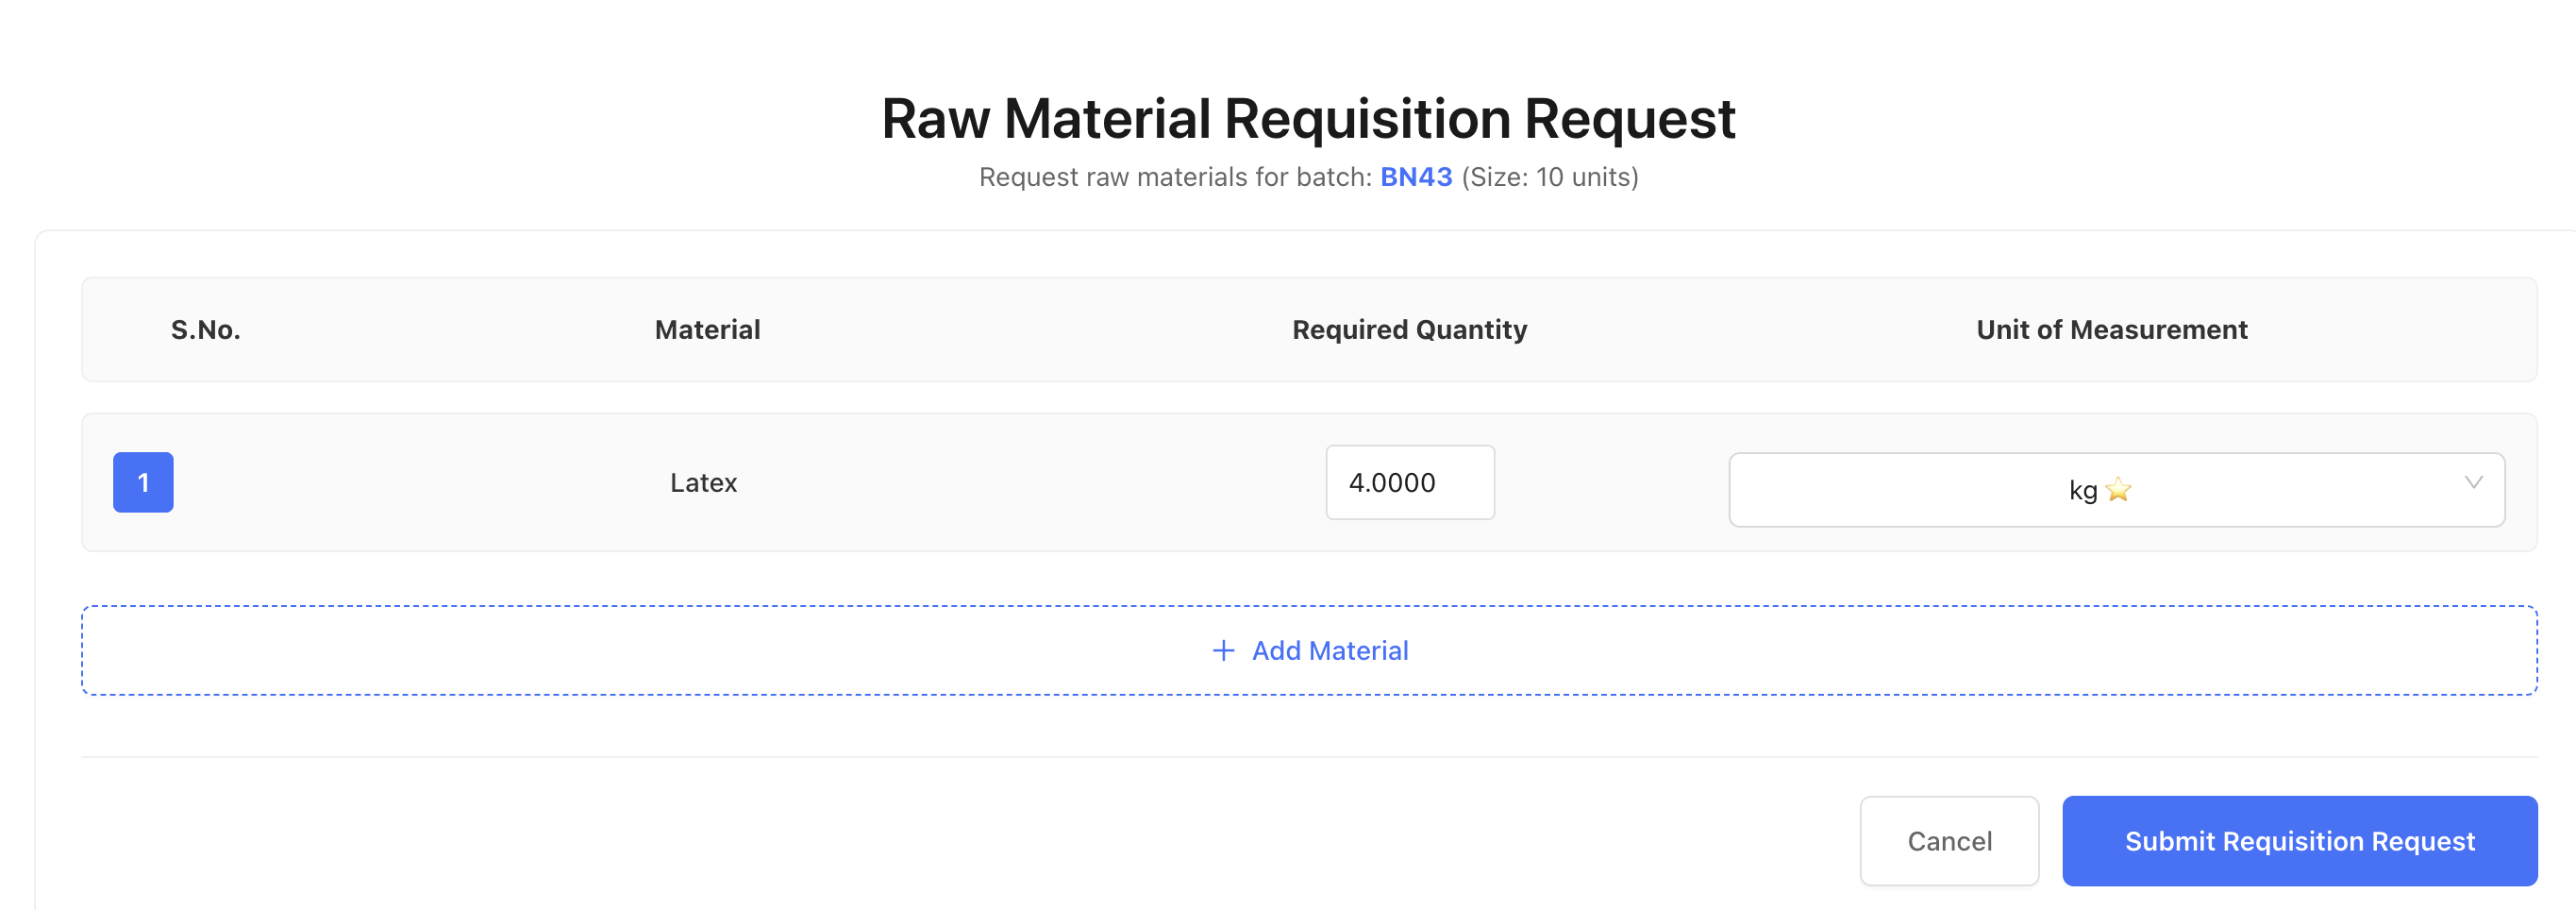
The requisition form will show:
- Batch Information: Batch number, product details, and batch size
- Required Materials: List of raw materials needed based on the product configuration
- Calculated Quantities: Quantities are automatically calculated based on batch size
-
Review the materials and quantities:
- The system calculates required quantities based on the batch size and product's material requirements
- You can see the material code, name, and required quantity
- Quantities are shown in the appropriate units
-
You can modify quantities if needed, or add additional materials not in the product configuration
-
Click Submit or Create Requisition at the bottom of the form to create the raw material requisition
Note: After creating the requisition, the batch status will change to indicate that raw materials have been requested. The requisition will need to be approved and materials transferred before manufacturing can begin.
Step 3: Transferring Raw Materials
Once the raw material requisition is approved, you need to transfer the materials from inventory to the production batch.
Transferring Raw Materials
-
Navigate to Production → Batches from the main menu
-
Find the batch with status "RAW_MATERIAL_REQUESTED" or similar
-
Click the Transfer Raw Material button on the batch

-
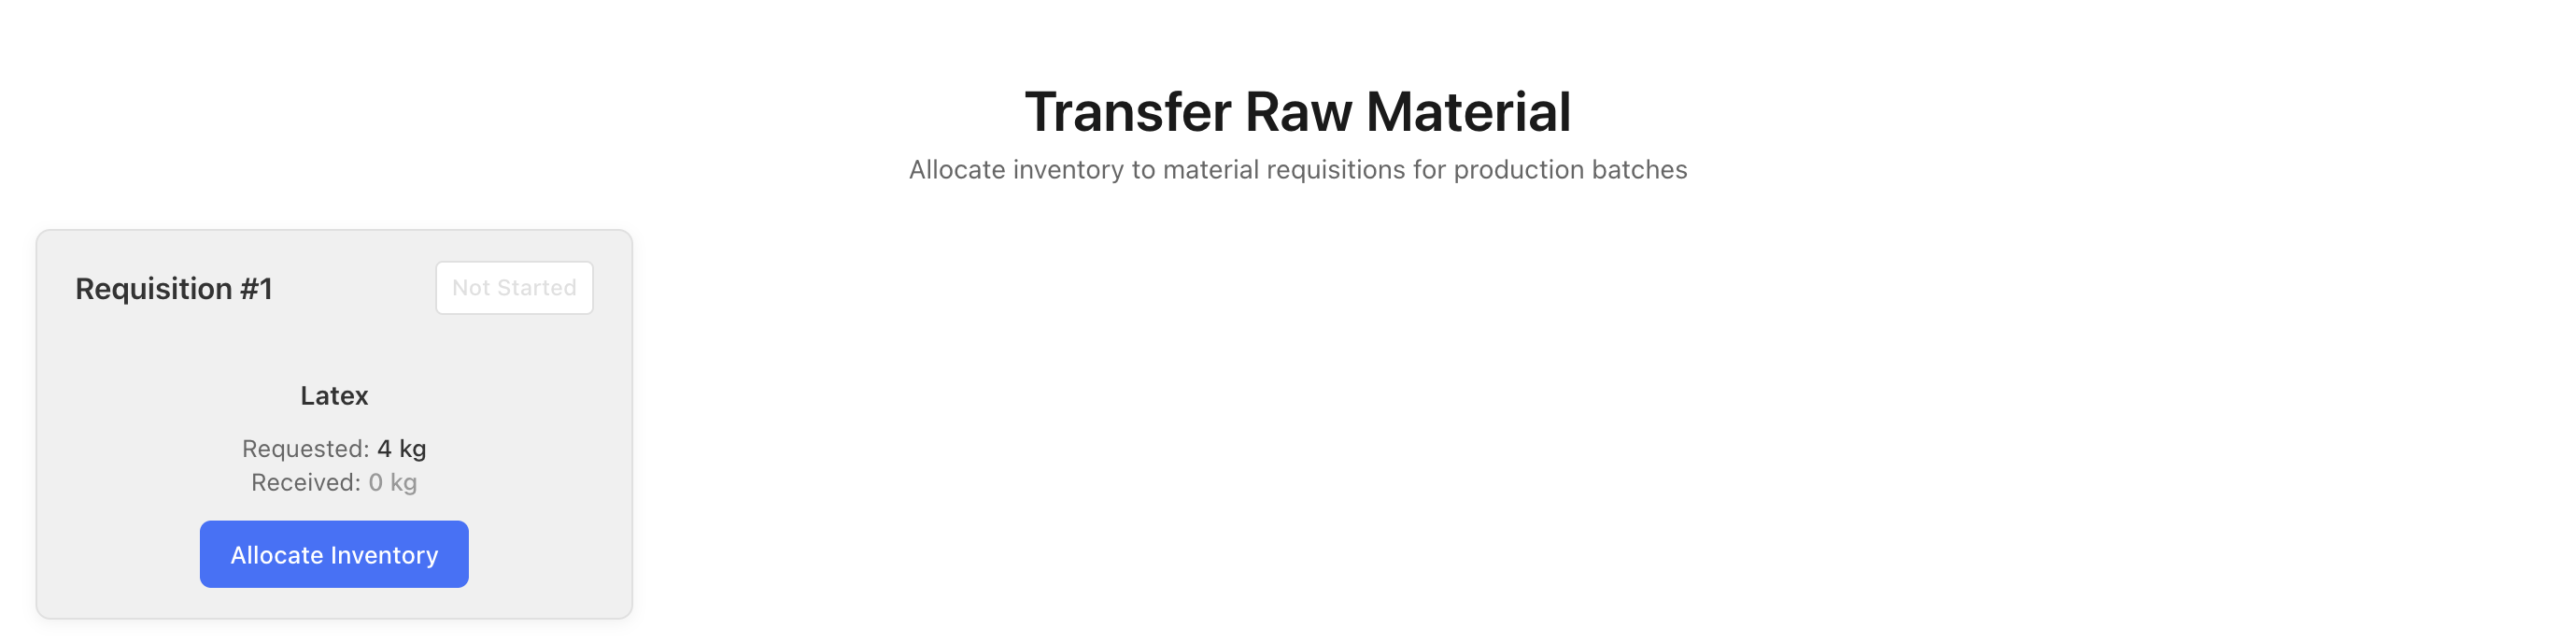
The transfer form will show:
- Requisition Details: Information about the material requisition
- Materials List: All materials that need to be transferred
- Requested Quantity: Quantity requested in the requisition
- Received Quantity: Enter the quantity actually received/transferred
-
For each material:
- Review the requested quantity
- Enter the quantity actually received/transferred
- Select or confirm the unit of measurement
- Add any notes if quantities differ from requested
-
Click Submit or Transfer at the bottom of the form to complete the raw material transfer
Note: After transferring raw materials, the batch will be ready for packing material requisition. Make sure all required raw materials are transferred before proceeding.
Step 4: Creating Packing Material Requisition
After raw materials are transferred, you need to request packing materials for packaging the finished products.
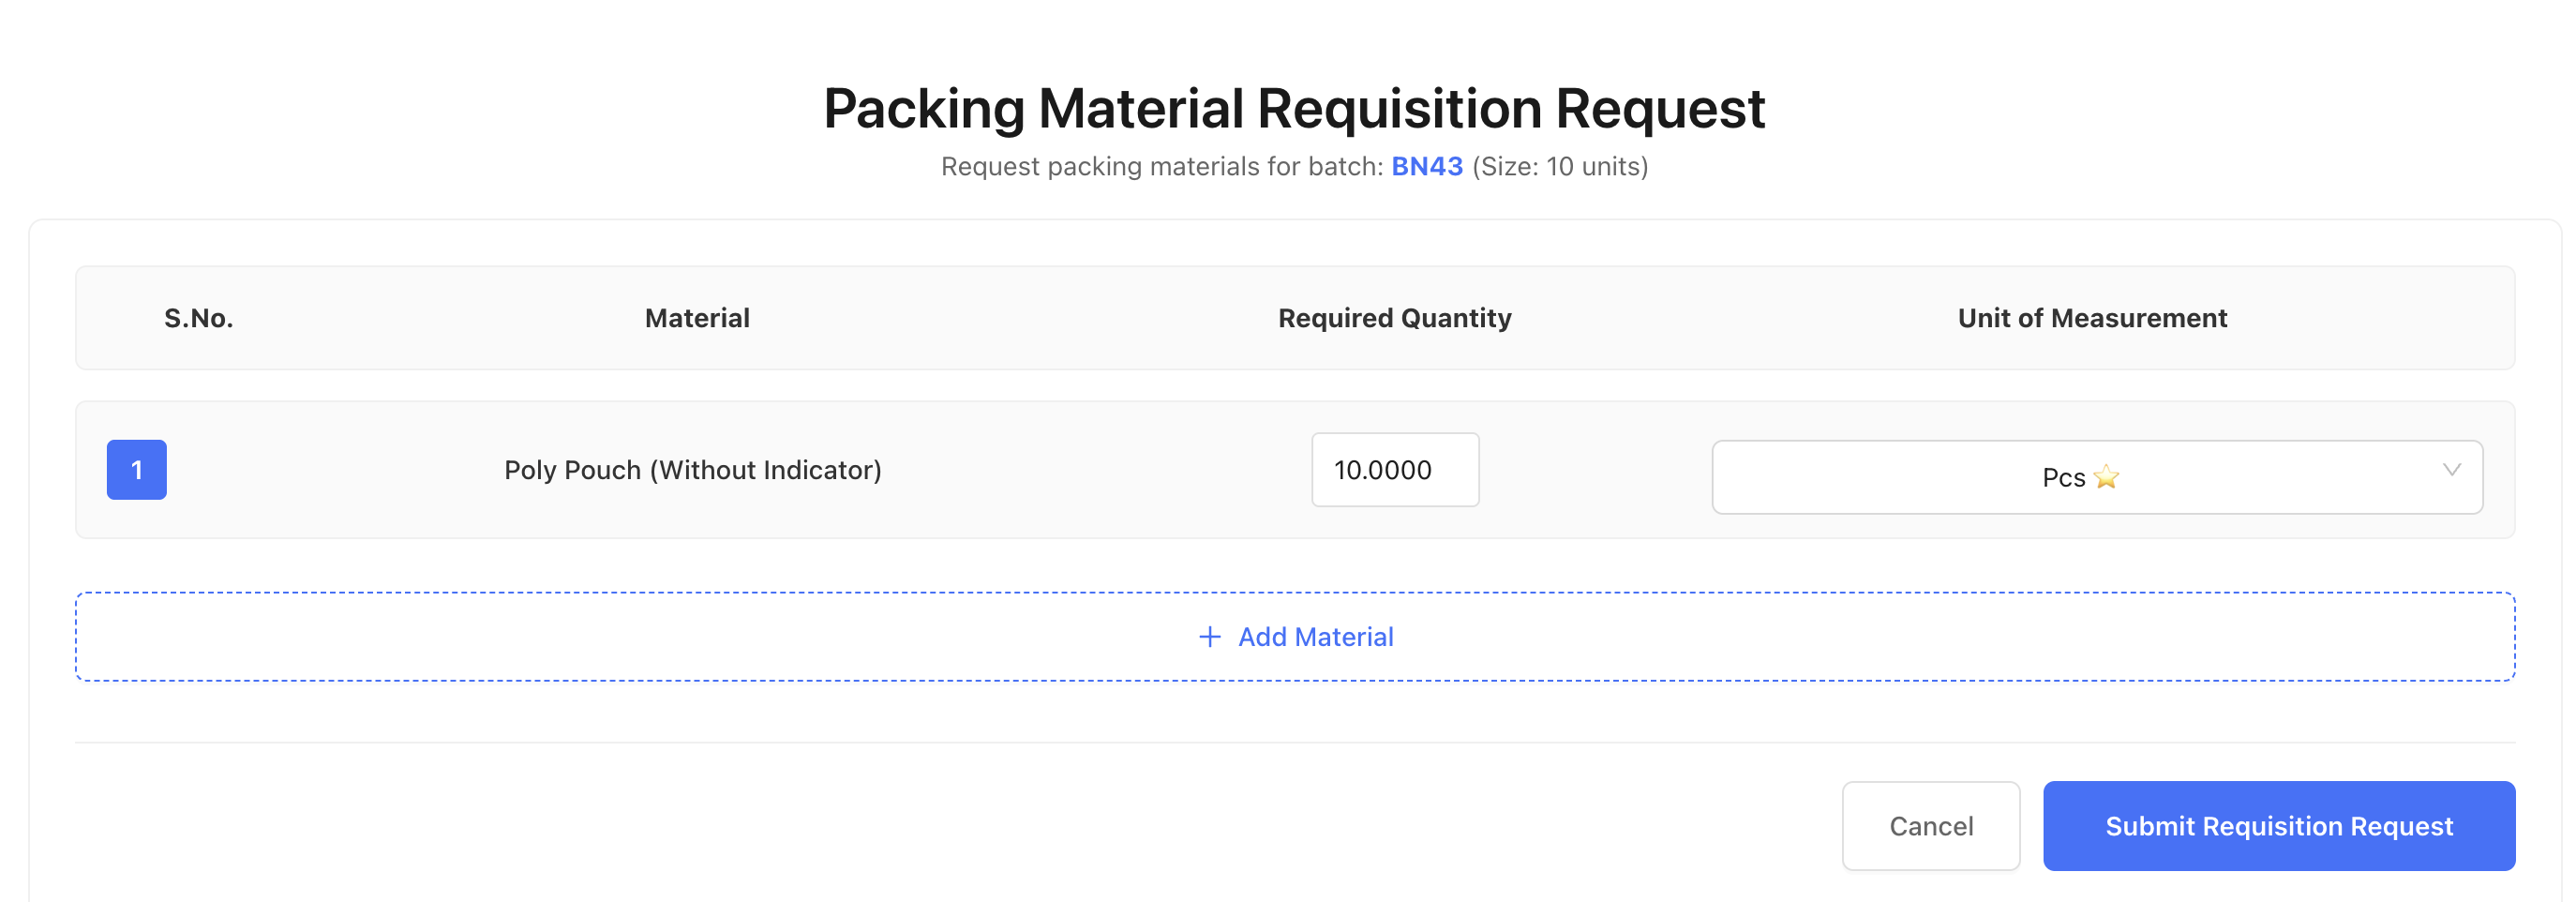
Creating a Packing Material Requisition
-
Navigate to Production → Batches from the main menu
-
Find the batch that has completed raw material transfer
-
Click the Create Packing Material Requisition button (or similar action button)

-
The requisition form will show:
- Batch Information: Batch details and expected batch size
- Required Packing Materials: List of packing materials needed based on the product configuration
- Calculated Quantities: Quantities automatically calculated based on batch size
-
Review the packing materials and quantities:
- Required quantities are calculated based on batch size and product configuration
- You can see material codes, names, and required quantities
- Quantities are shown in appropriate units
-
Modify quantities if needed or add additional packing materials
-
Click Submit or Create Requisition at the bottom of the form to create the packing material requisition
Note: Packing materials are typically requested after raw materials are transferred and before manufacturing begins.
Step 5: Transferring Packing Materials
After the packing material requisition is approved, transfer the packing materials from inventory to the batch.
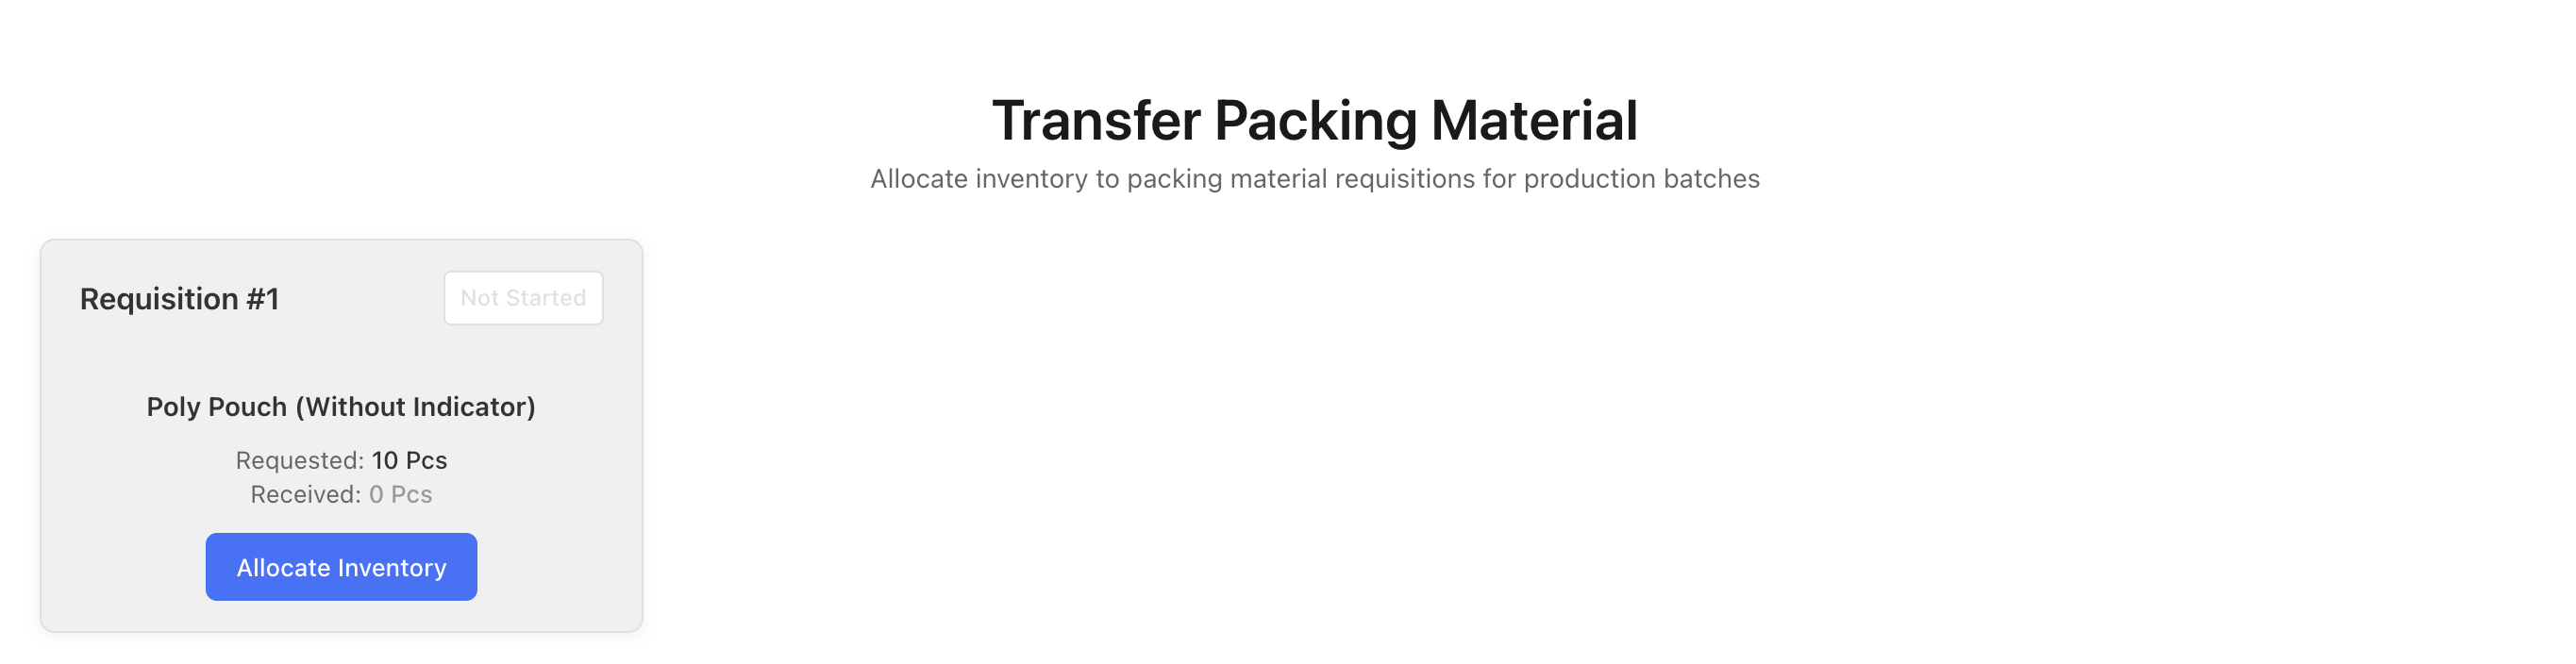
Transferring Packing Materials
-
Navigate to Production → Batches from the main menu
-
Find the batch that has a packing material requisition ready
-
Click the Transfer Packing Material button

-
The transfer form will show:
- Requisition Details: Information about the packing material requisition
- Materials List: All packing materials to be transferred
- Requested Quantity: Quantity requested
- Received Quantity: Enter the quantity actually received
-
For each packing material:
- Review the requested quantity
- Enter the quantity actually received/transferred
- Confirm the unit of measurement
- Add notes if needed
-
Click Submit or Transfer at the bottom of the form to complete the packing material transfer
Note: After both raw and packing materials are transferred, the batch is ready for manufacturing.
Step 6: Manufacturing & IPQC (In-Process Quality Control)
Once all materials are transferred, you can begin the manufacturing process. This includes performing manufacturing steps and in-process quality control checks.
Accessing Manufacturing Steps
-
Navigate to Production → Batches from the main menu
-
Find the batch that has all materials transferred
-
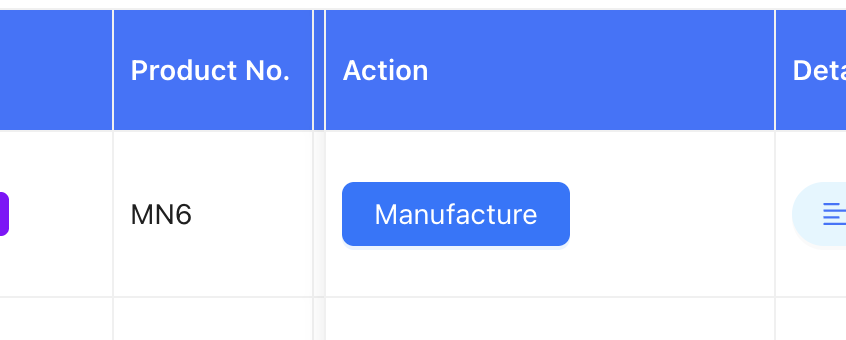
Click on the batch to view details, then navigate to Manufacturing or click the Manufacturing button
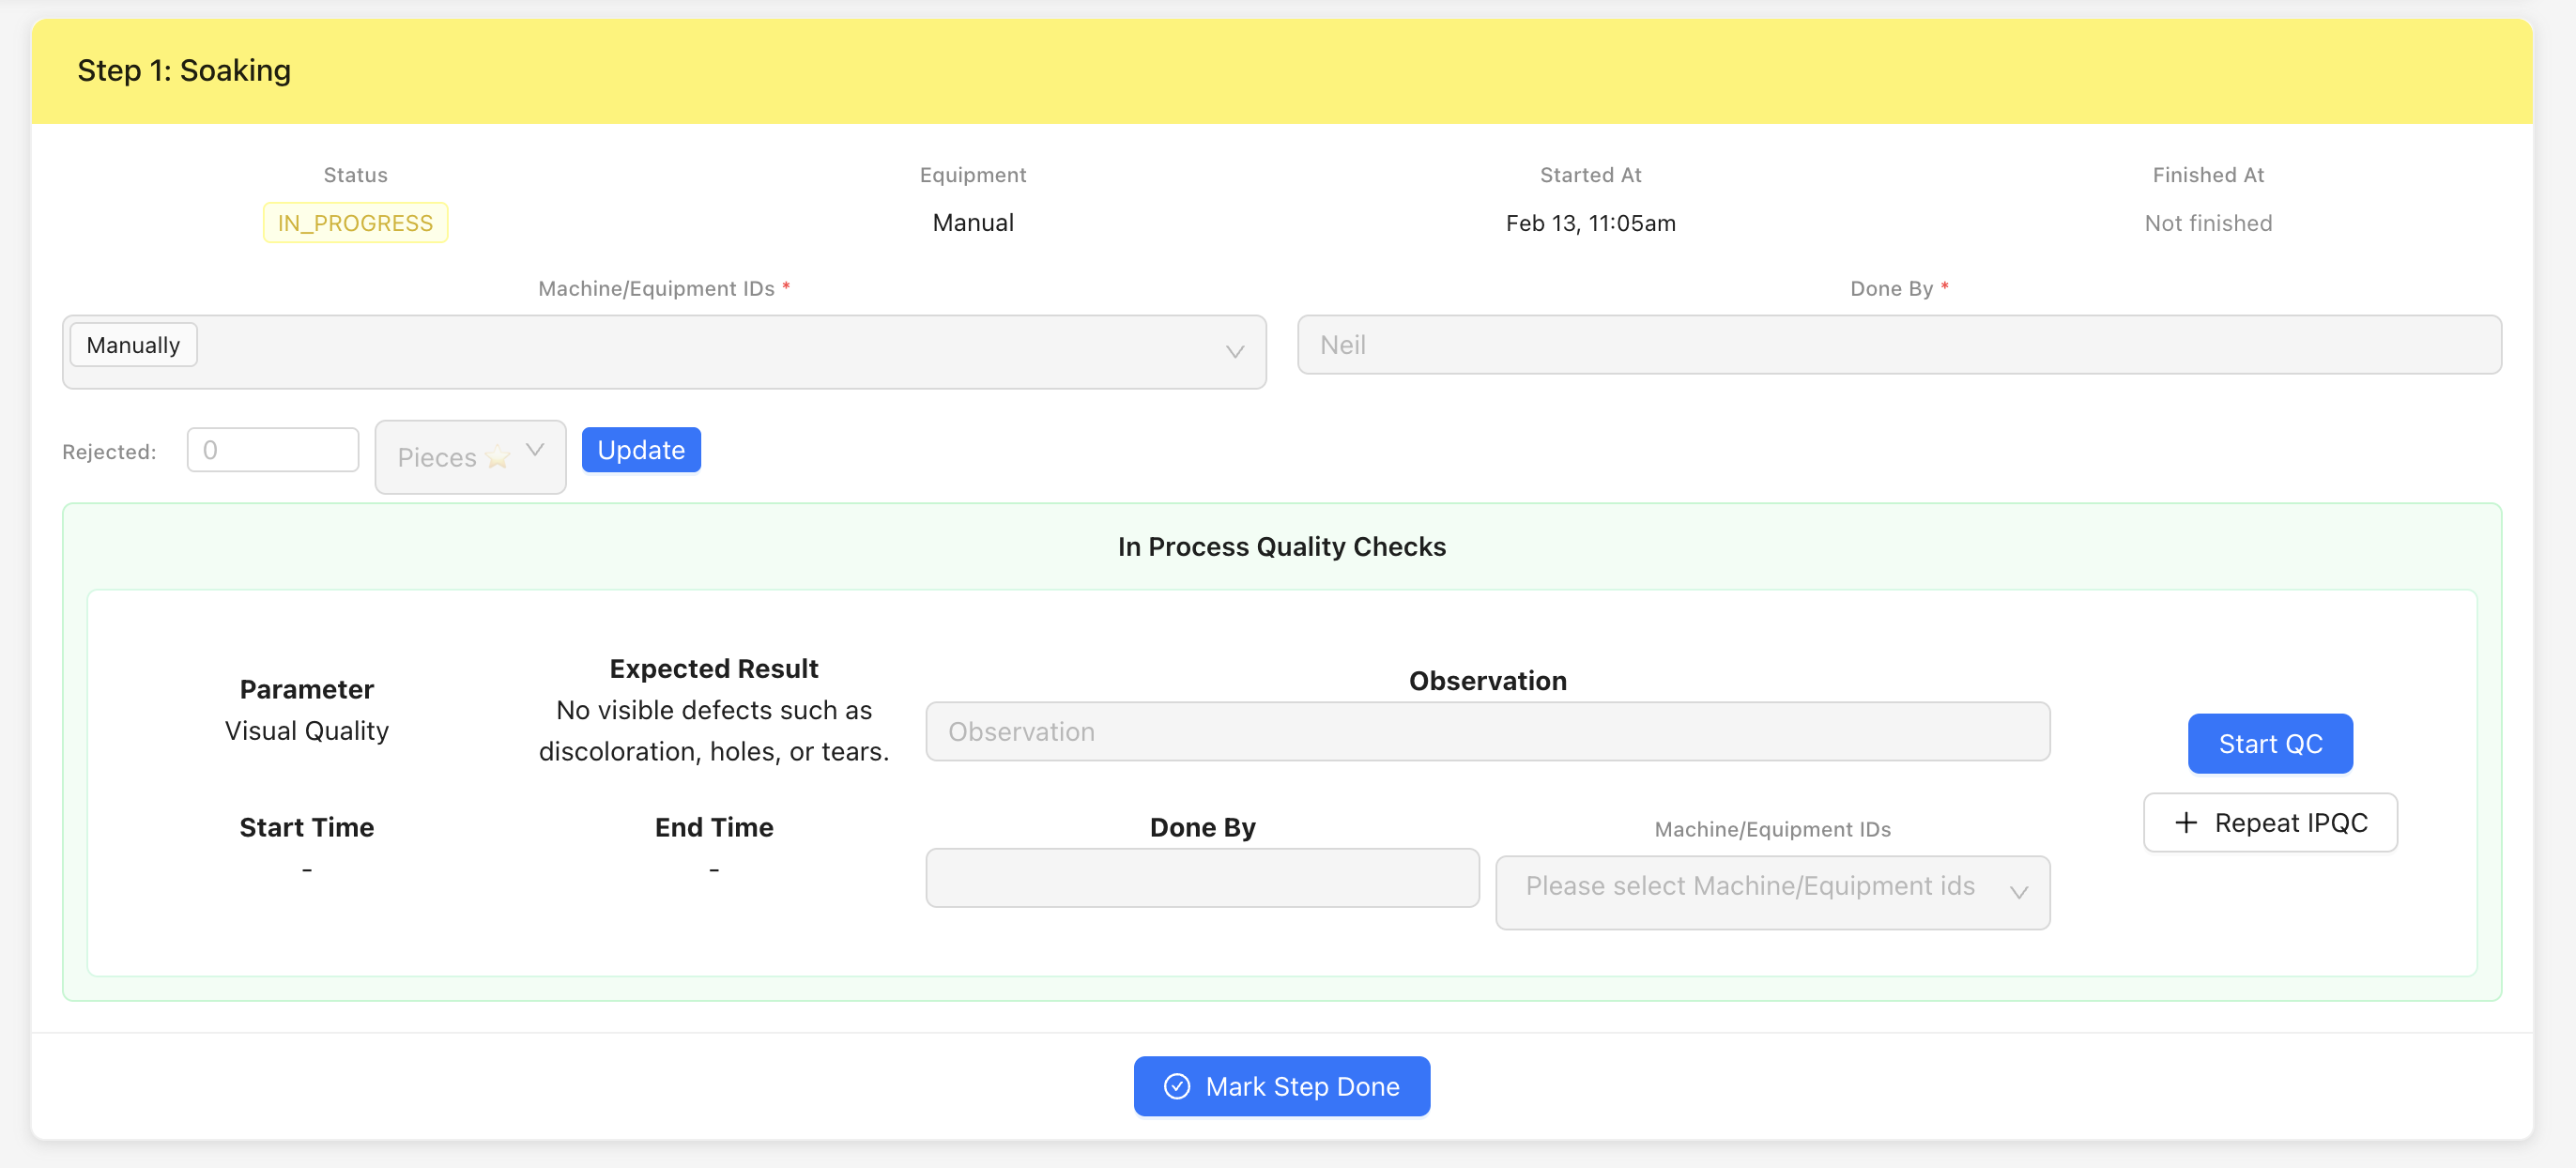
Performing Manufacturing Steps
-
The manufacturing page will show:
- Batch Details: Batch number, product, batch size, and other information
- Manufacturing Steps: List of all manufacturing steps defined for the product
- Step Status: Current status of each step (Pending, In Progress, Completed)
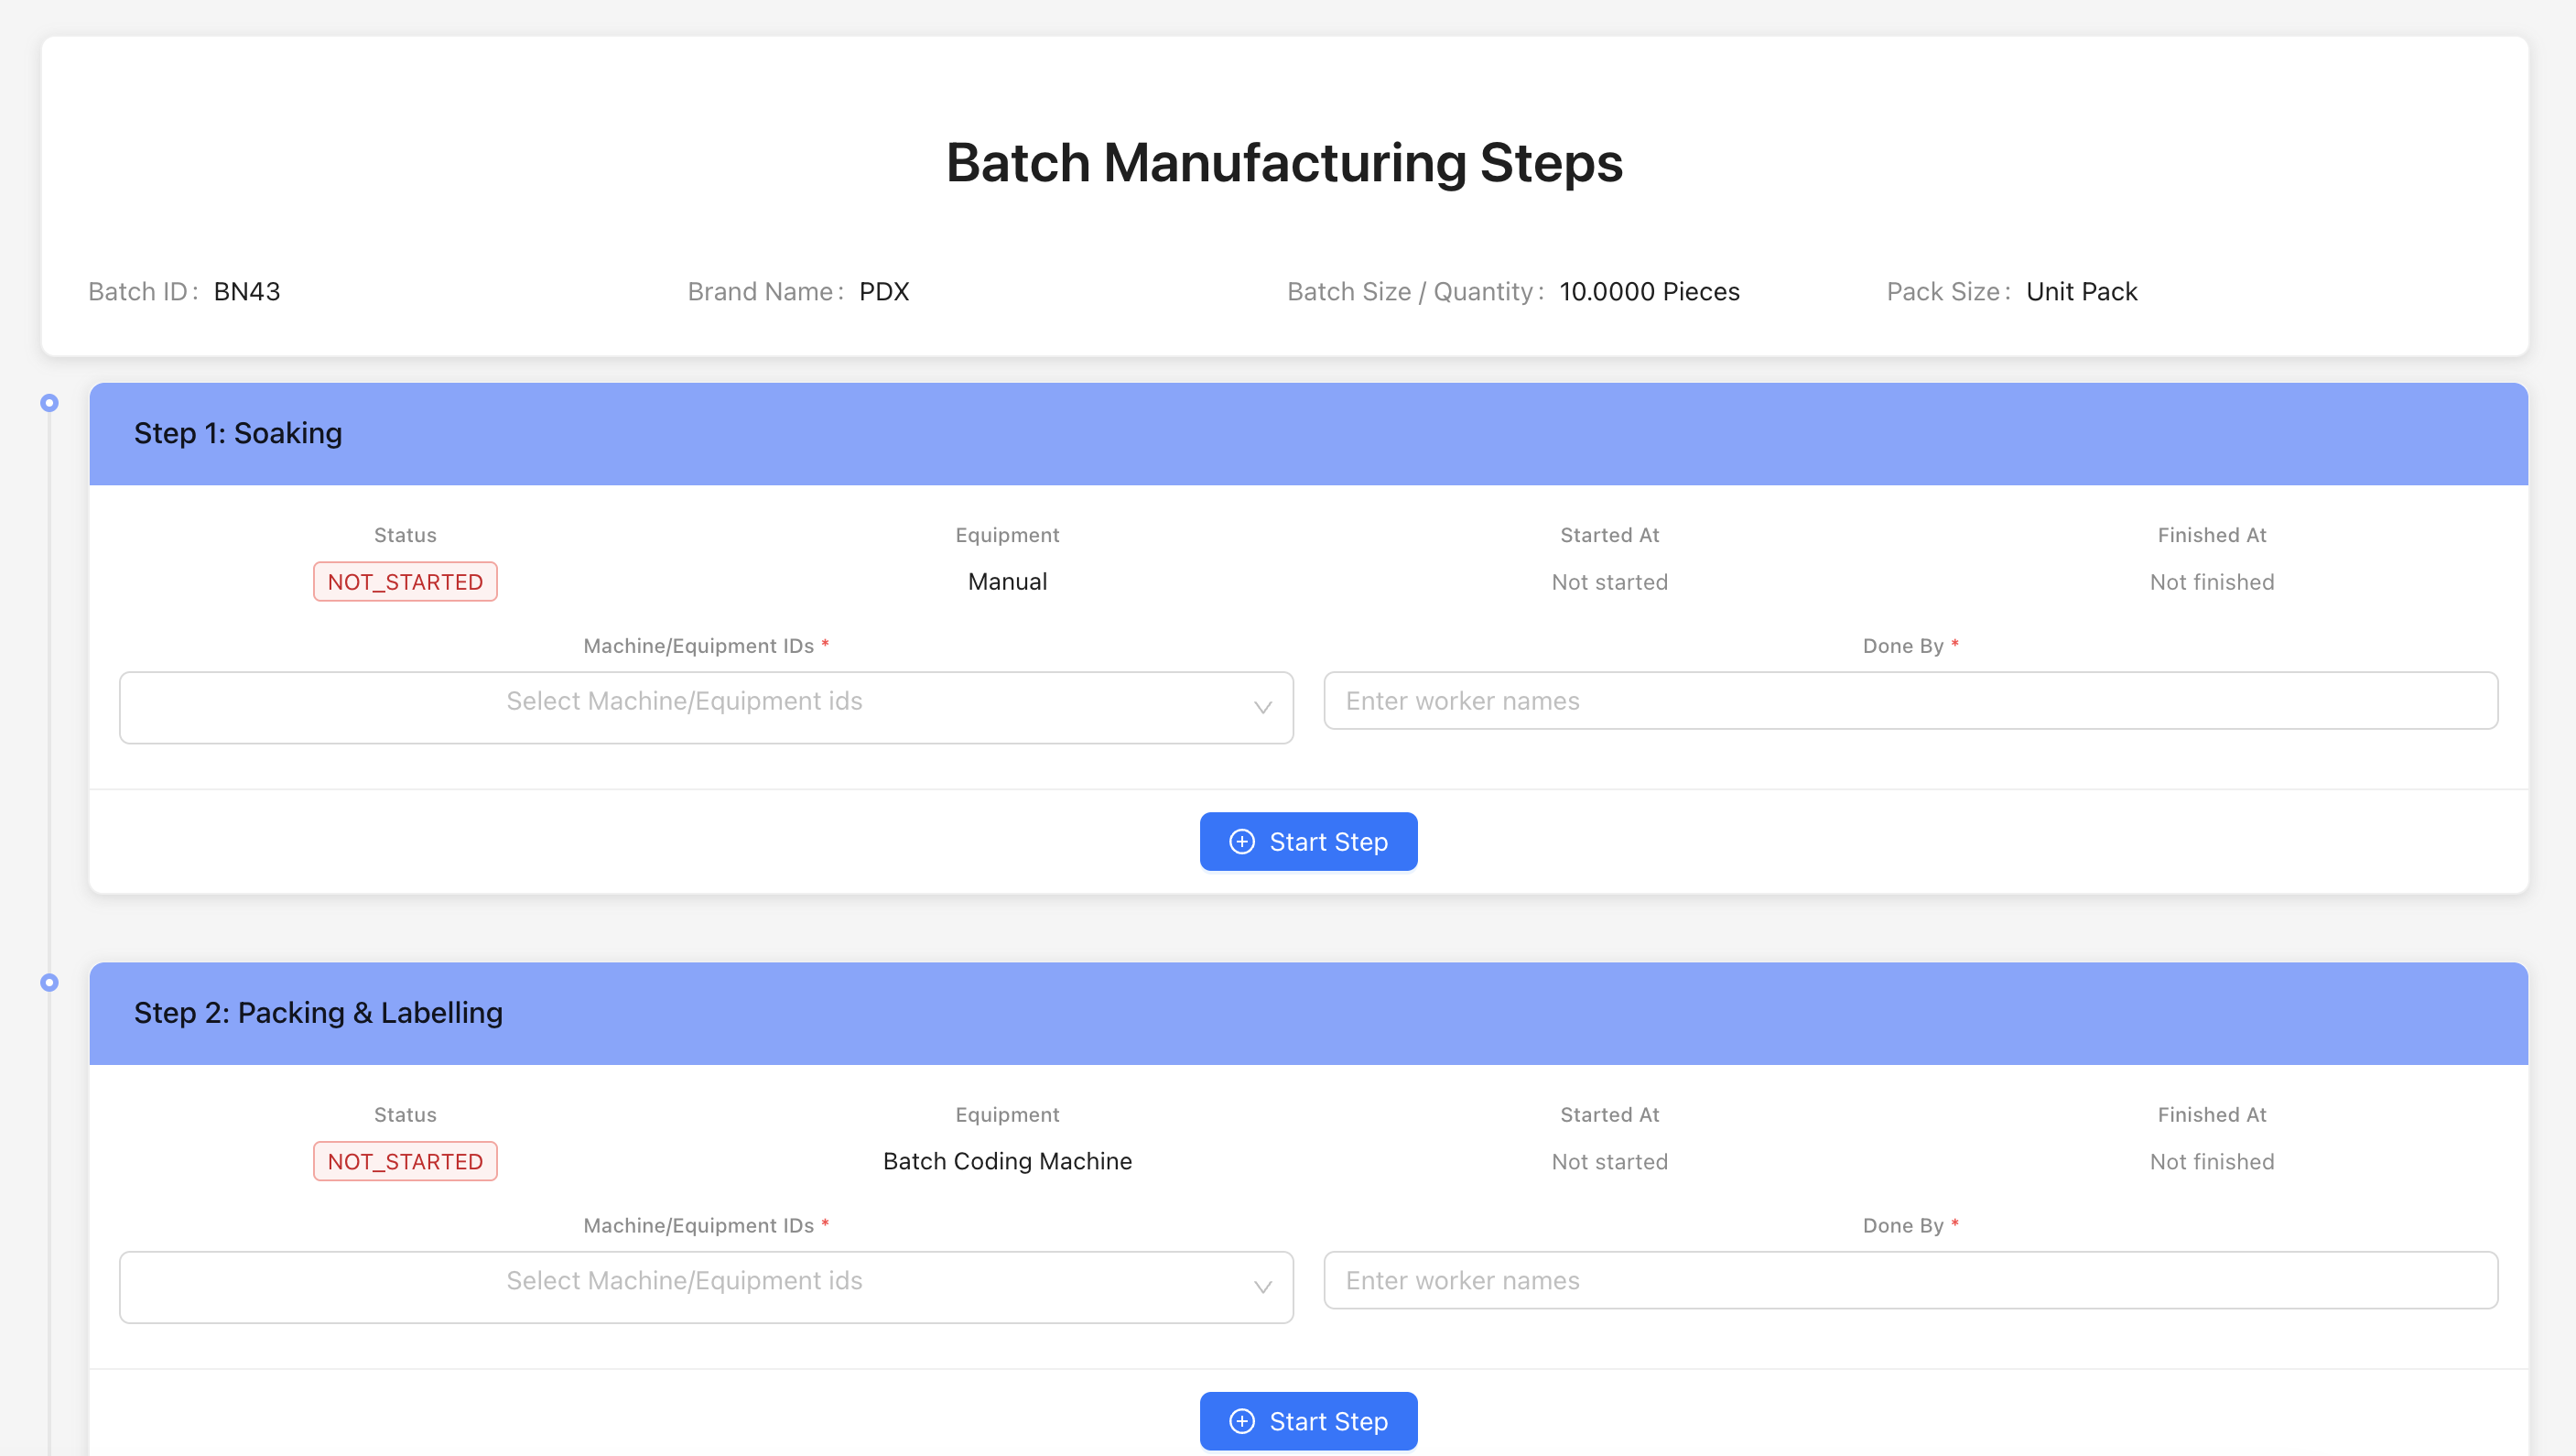
-
For each manufacturing step:
- Click on the step to open it
- Review the step details and requirements
- Select the machine/equipment used (if applicable)
- Enter the quantity processed in this step
- Record any rejected quantity (if applicable)
- Update the step status
Performing IPQC (In-Process Quality Control)
-
For each manufacturing step, you can perform IPQC checks:
- Click the IPQC or Quality Check button for the step
- Review the quality parameters defined for the step
- Enter test results for each parameter
- Record pass/fail status
- Add comments or observations
-
Complete IPQC for each step before marking the step as complete
-
After completing all manufacturing steps:
- Review the overall batch progress on the manufacturing page
- Check that all steps are completed
- The batch will be ready for finished good testing
Note: Each manufacturing step must be completed in sequence. IPQC checks ensure quality at each stage of production.
Step 7: Requesting Finished Good Testing
After manufacturing is complete, you need to send finished goods for quality testing.
Requesting Testing
-
Navigate to Production → Batches from the main menu
-
Find the batch that has completed manufacturing
-
Click the Request Finished Good Testing button (or similar action)

-
The testing request form will show:
- Batch Details: Batch number, product, and batch size
- Quantity for Testing: Enter the quantity to be sent for testing
- Unit: Select or confirm the unit of measurement
- Testing Sample Quantity: May be auto-calculated based on product's QC sample quantity formula
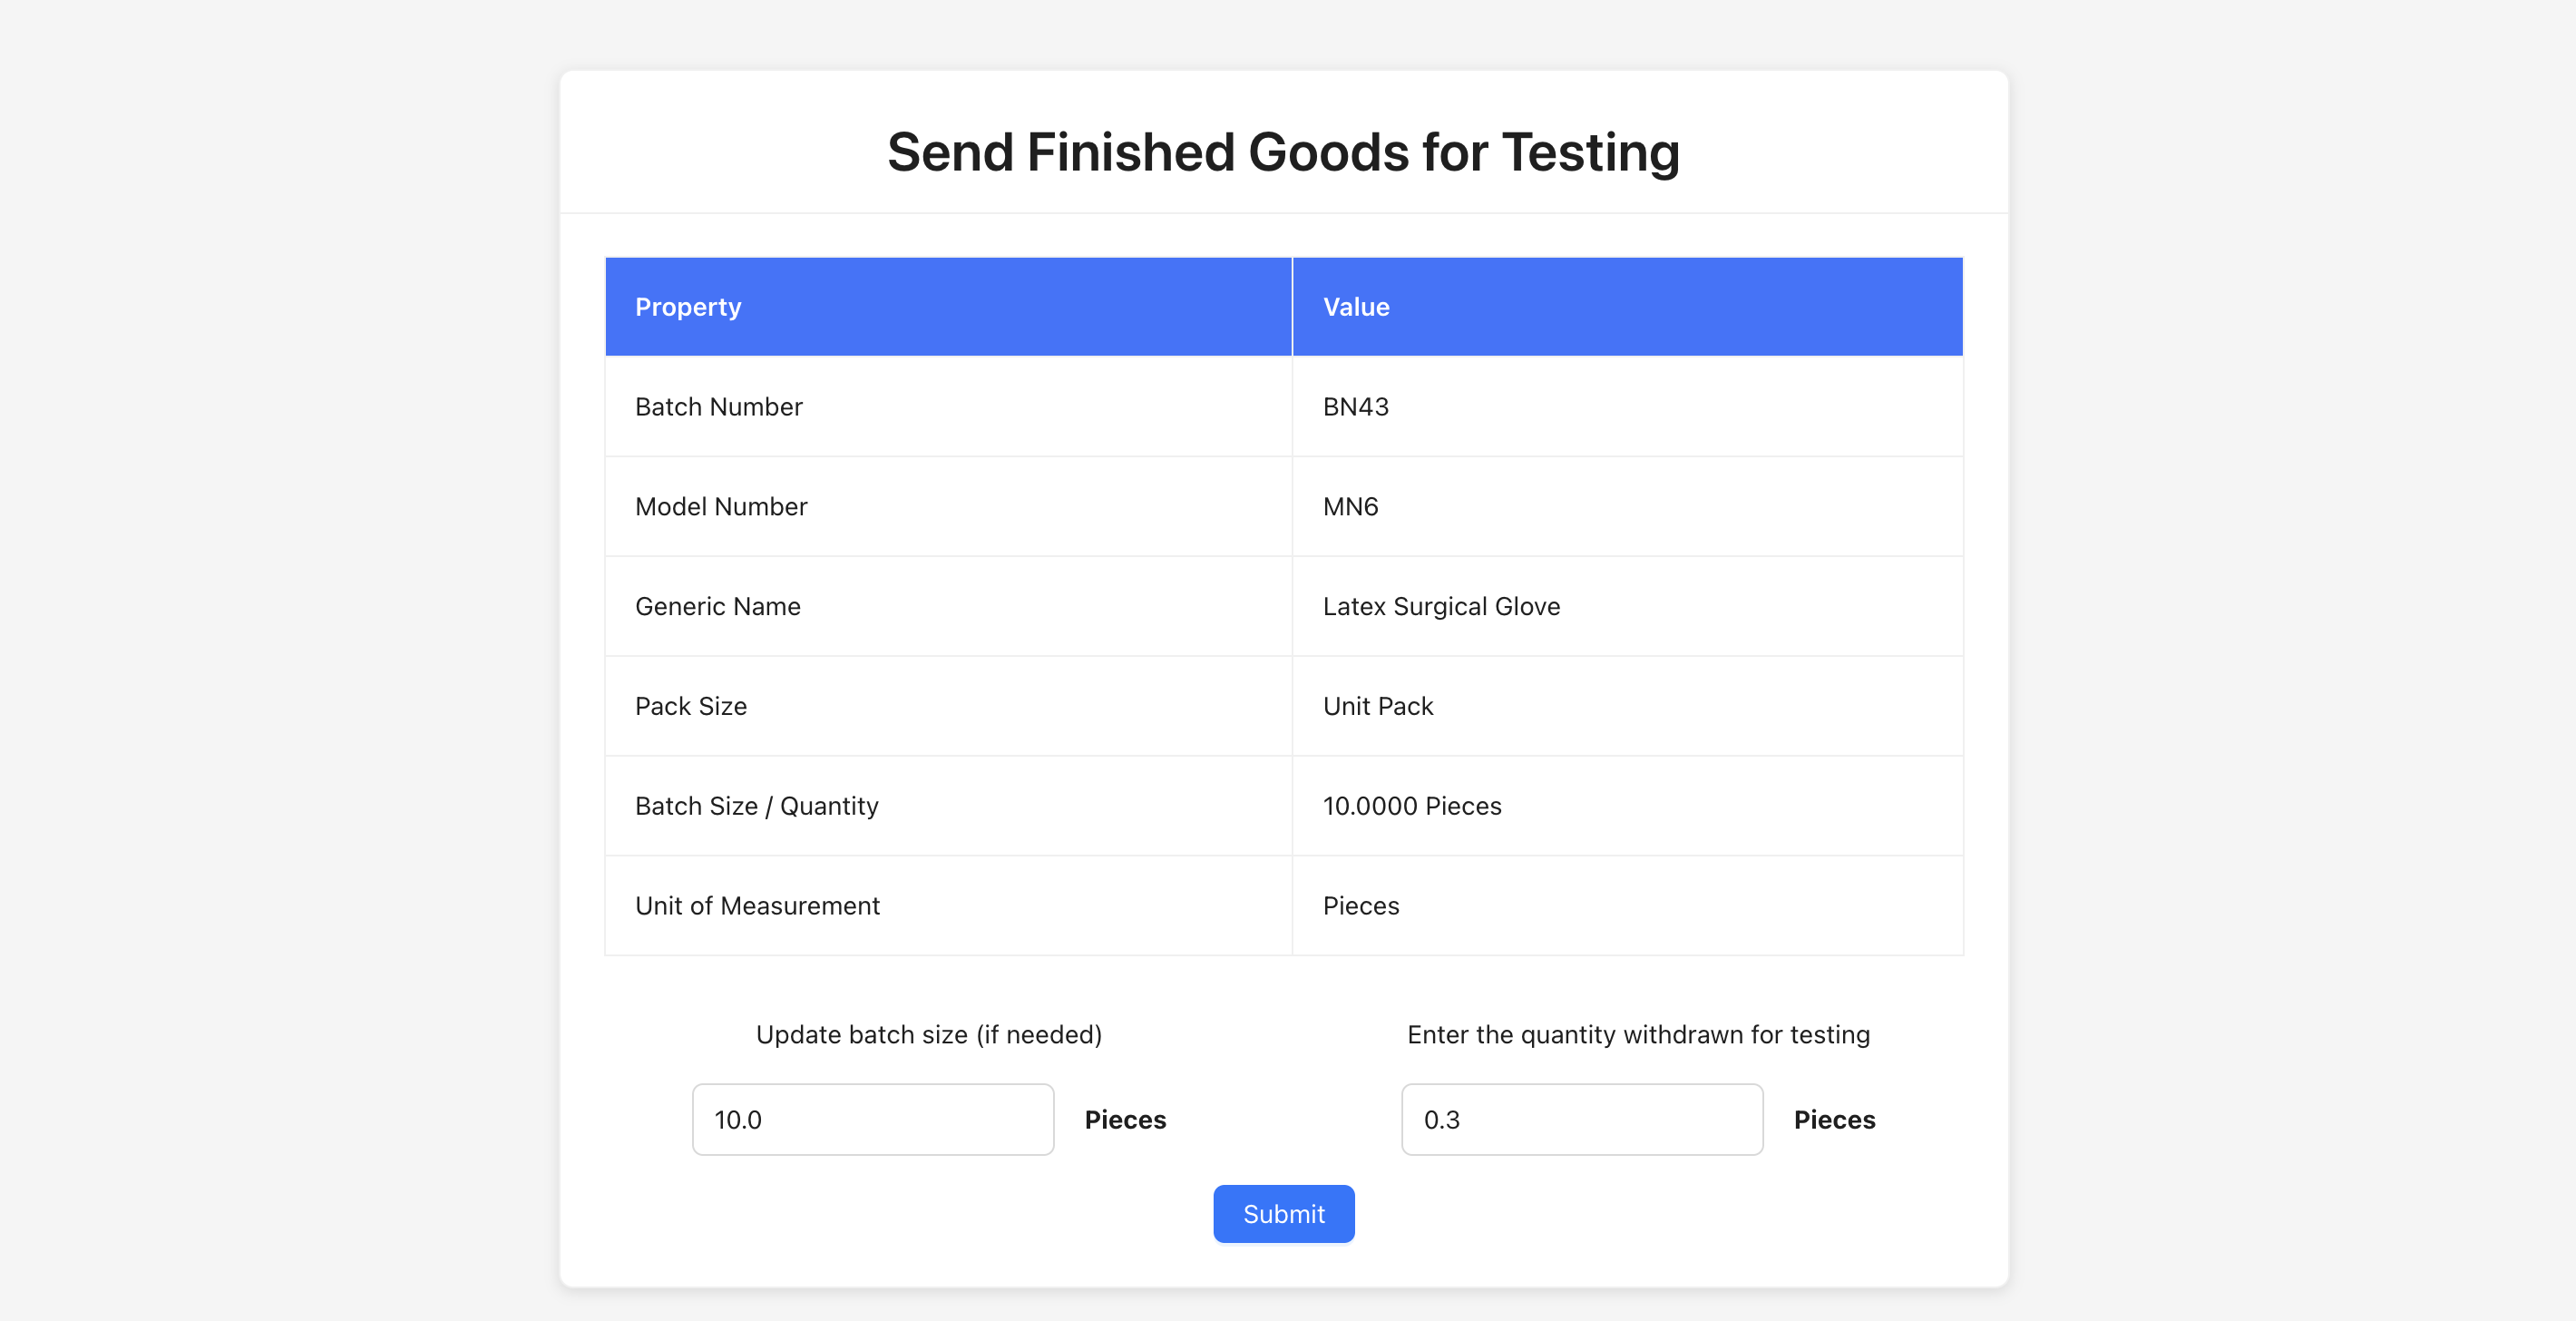
-
Review the calculated testing sample quantity (if auto-calculated)
-
Enter or confirm the quantity to be sent for testing
-
Click Submit or Request Testing at the bottom of the form to send the finished goods for testing
Note: The testing sample quantity is typically calculated based on the product's quality control specifications. The batch status will change to indicate that testing has been requested.
Step 8: Testing Finished Goods
After requesting testing, quality control personnel will perform tests on the finished goods.
Accessing Testing
-
Navigate to Production → Batches from the main menu
-
Find the batch that has testing requested
-
Click on the batch and navigate to the Testing section, or click the Test Finished Goods button

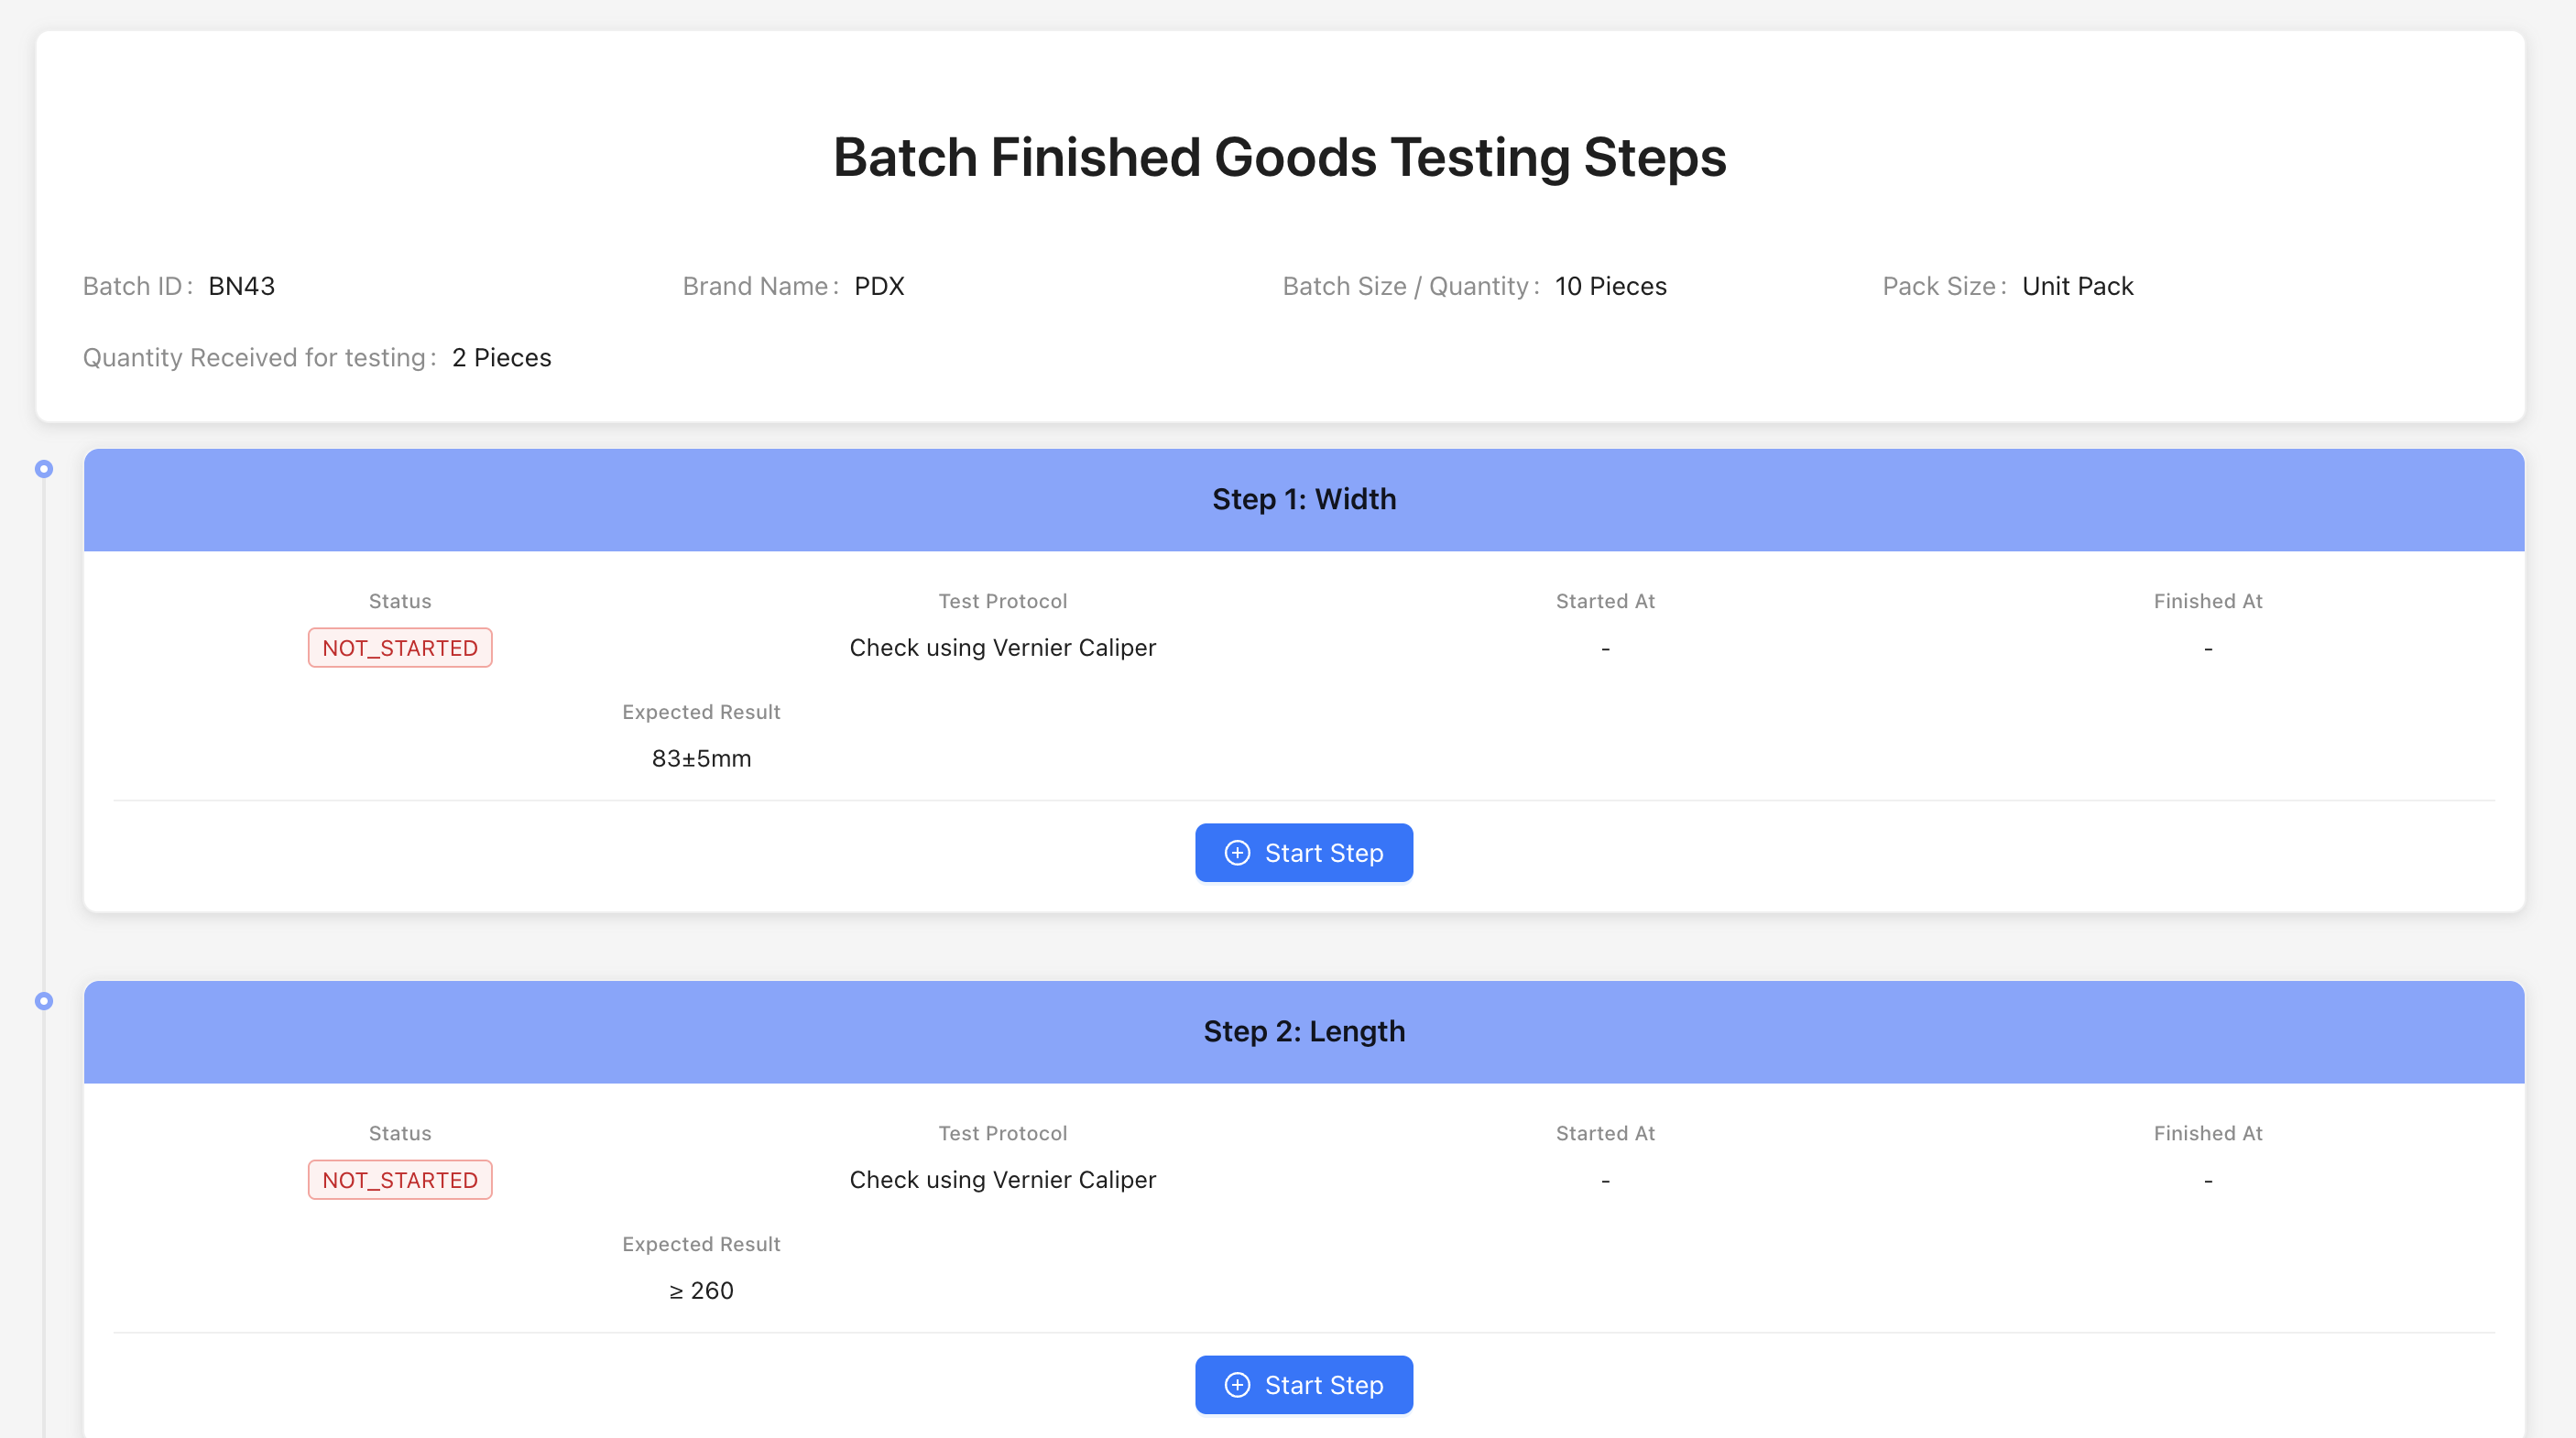
-
The testing page will show:
- Batch Information: Batch details and testing sample quantity
- Testing Steps: List of all testing steps defined for the product
- Test Parameters: Quality parameters that need to be tested
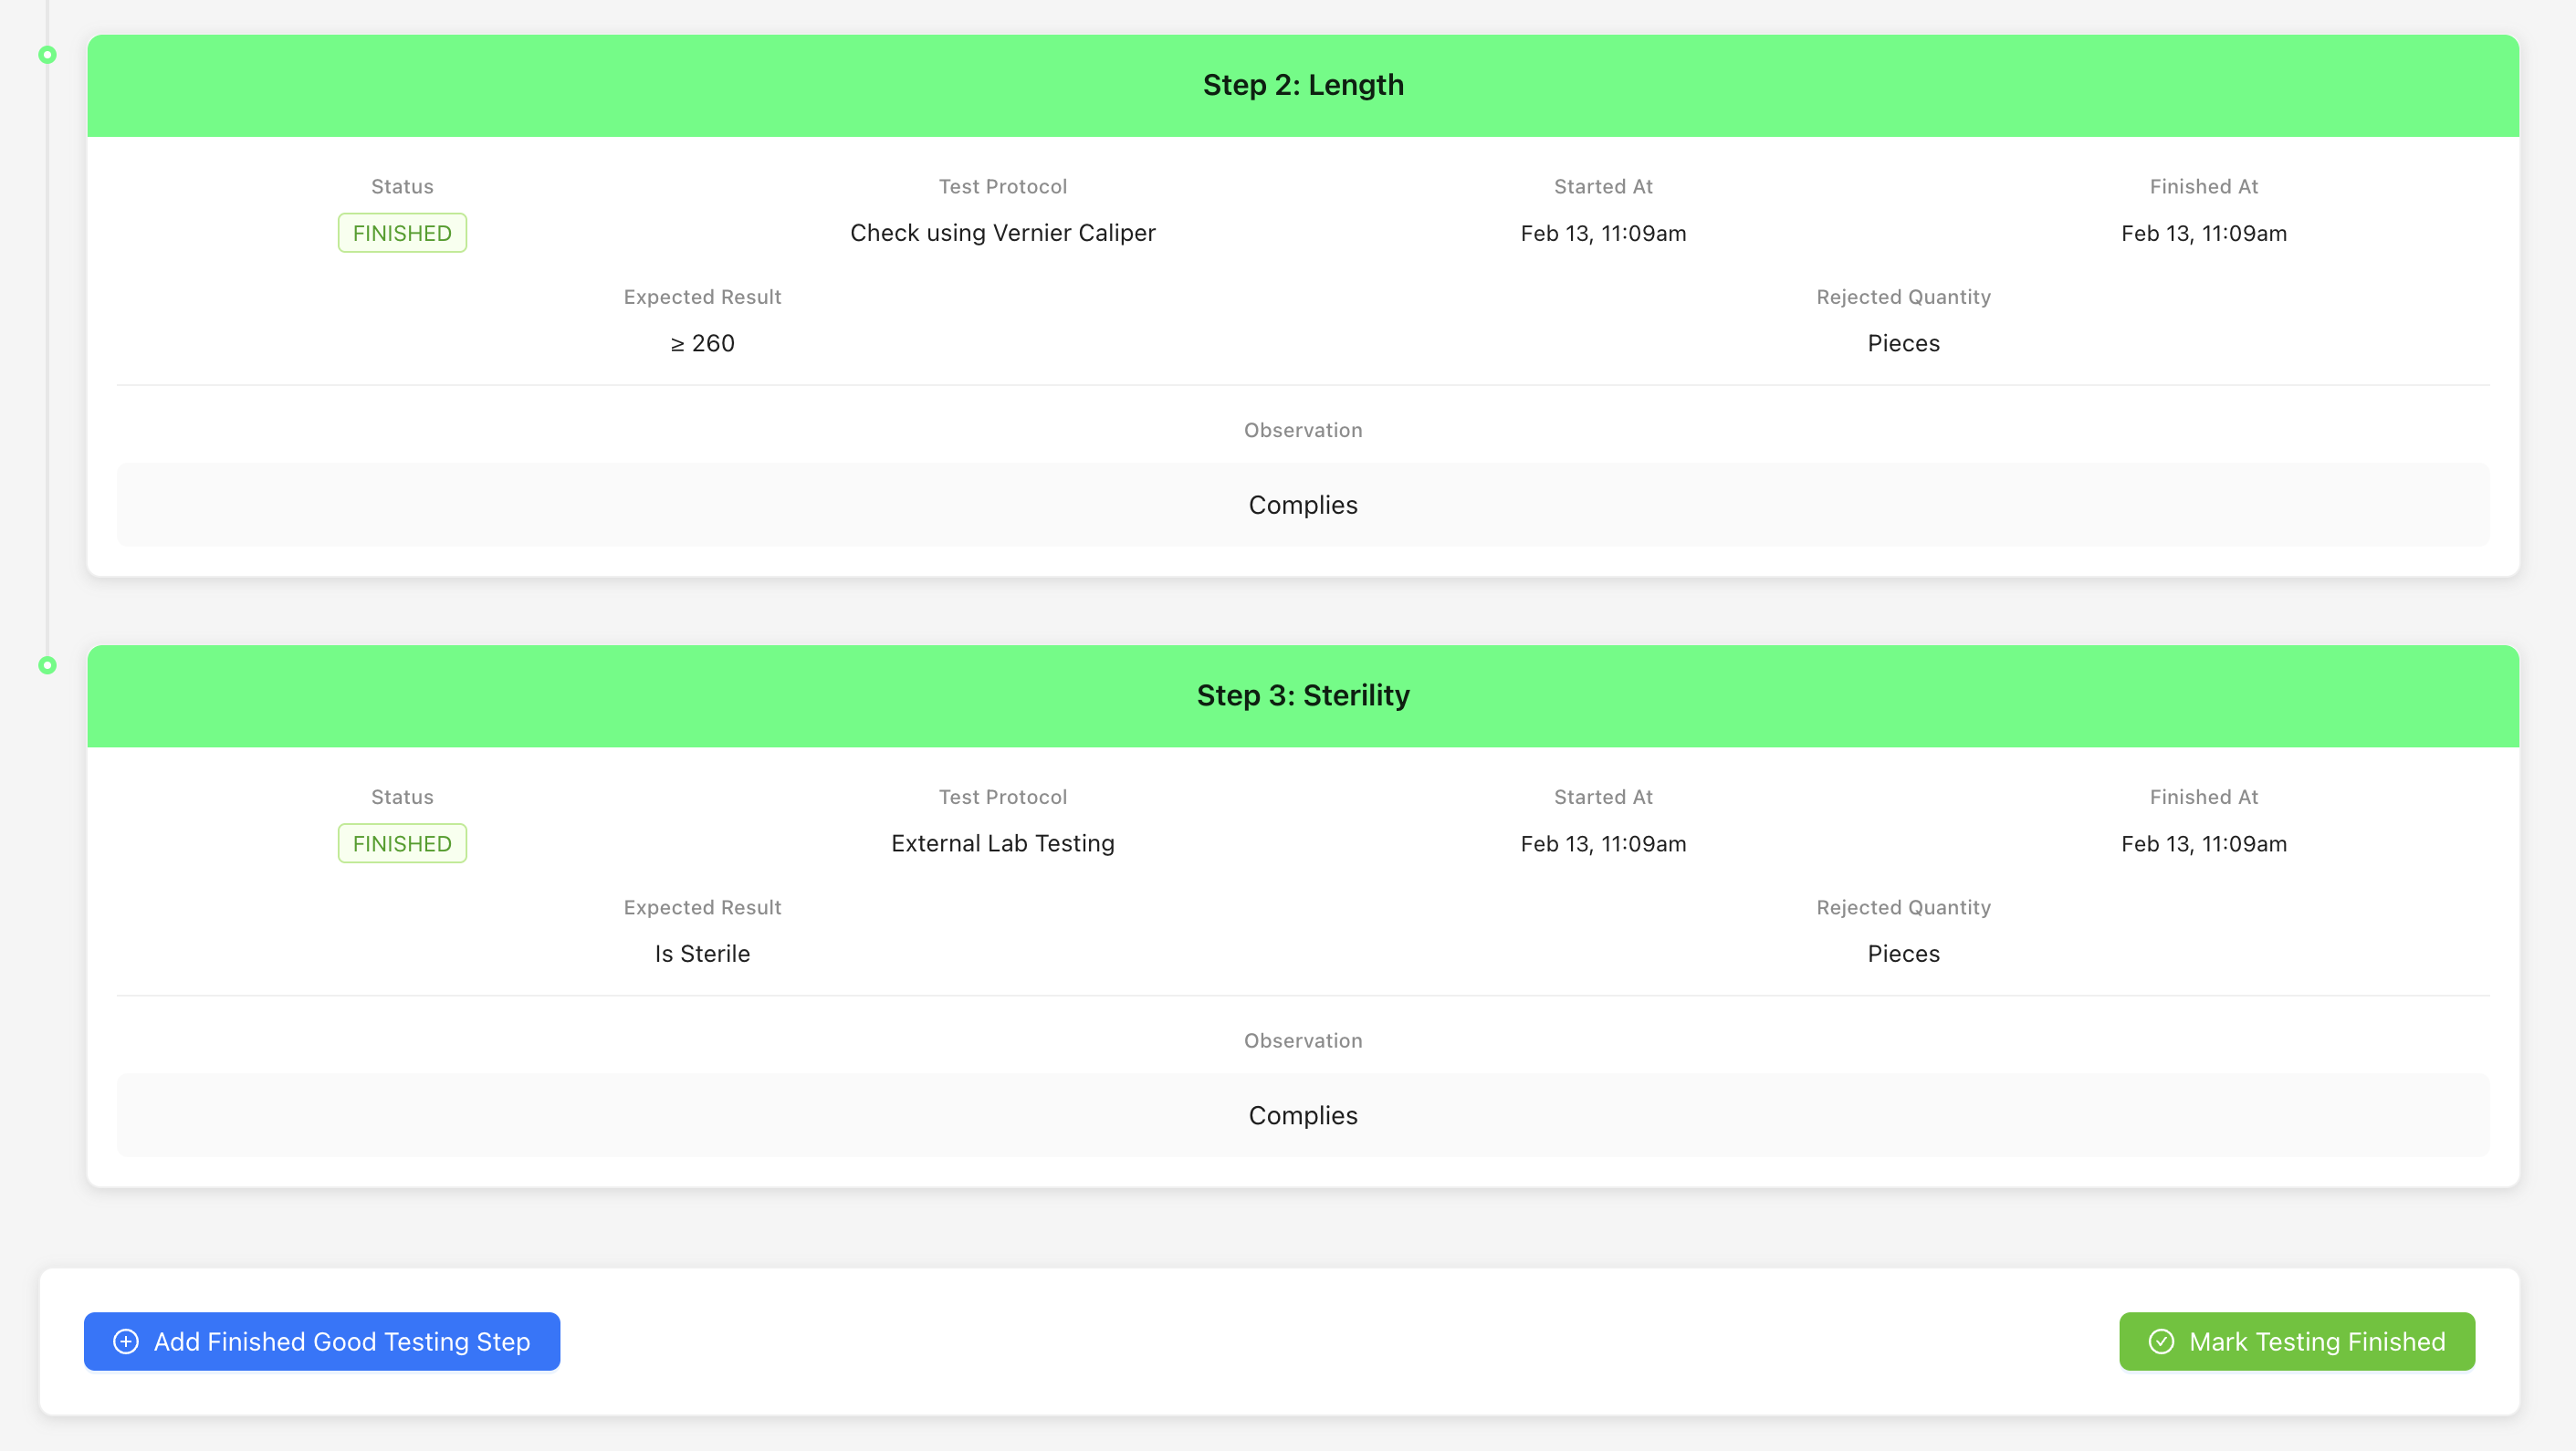
Performing Tests
-
For each testing step:
- Review the test requirements and specifications
- Enter test results for each parameter
- Record the testing quantity consumed
- Select the test date
- Add any observations or notes
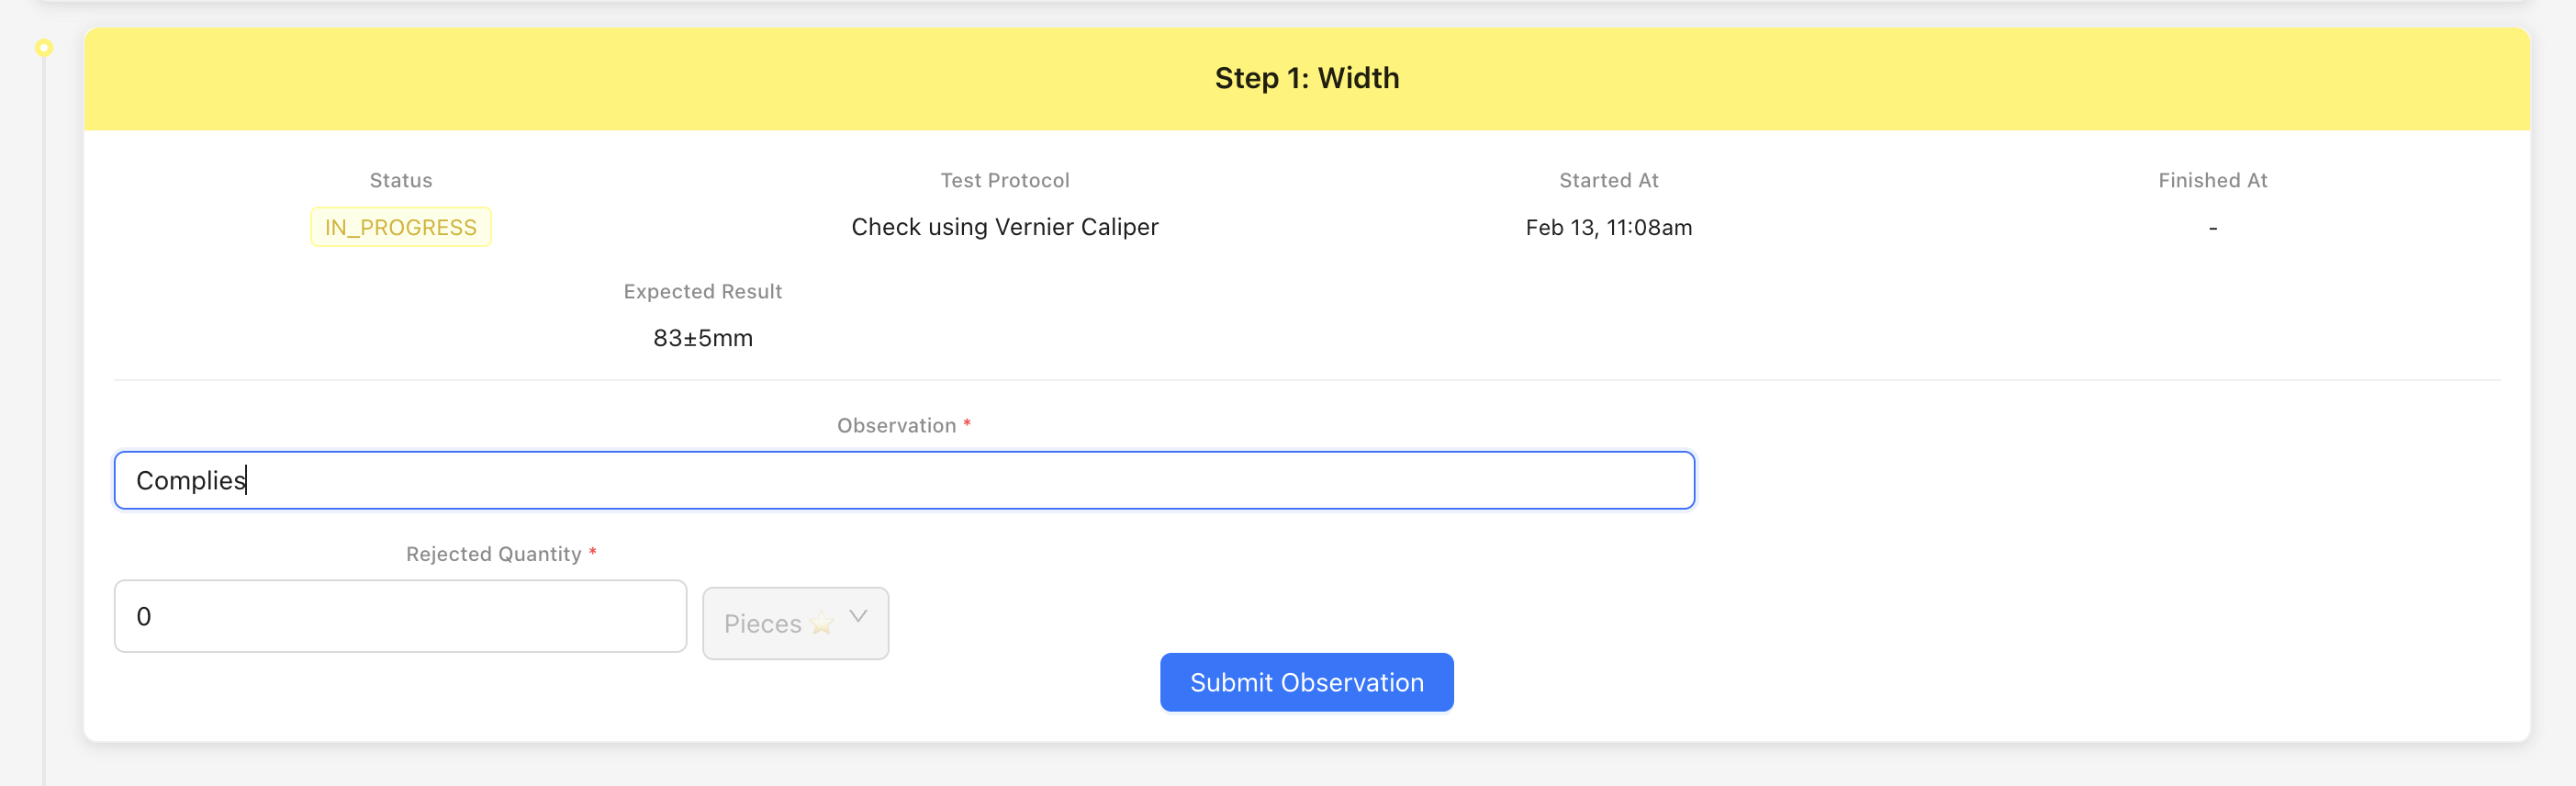
-
Complete all required testing steps
-
Review all test results before submitting
Note: All testing steps must be completed before you can submit the test report. Test results are recorded for quality assurance and regulatory compliance.
Step 9: Submitting Finished Good Test Report
After completing all tests, you need to submit the test report with pass/fail results.
Submitting Test Report
-
Navigate to Production → Batches from the main menu
-
Find the batch that has completed testing
-
Click the Submit Test Report button or navigate to the test report submission page
-
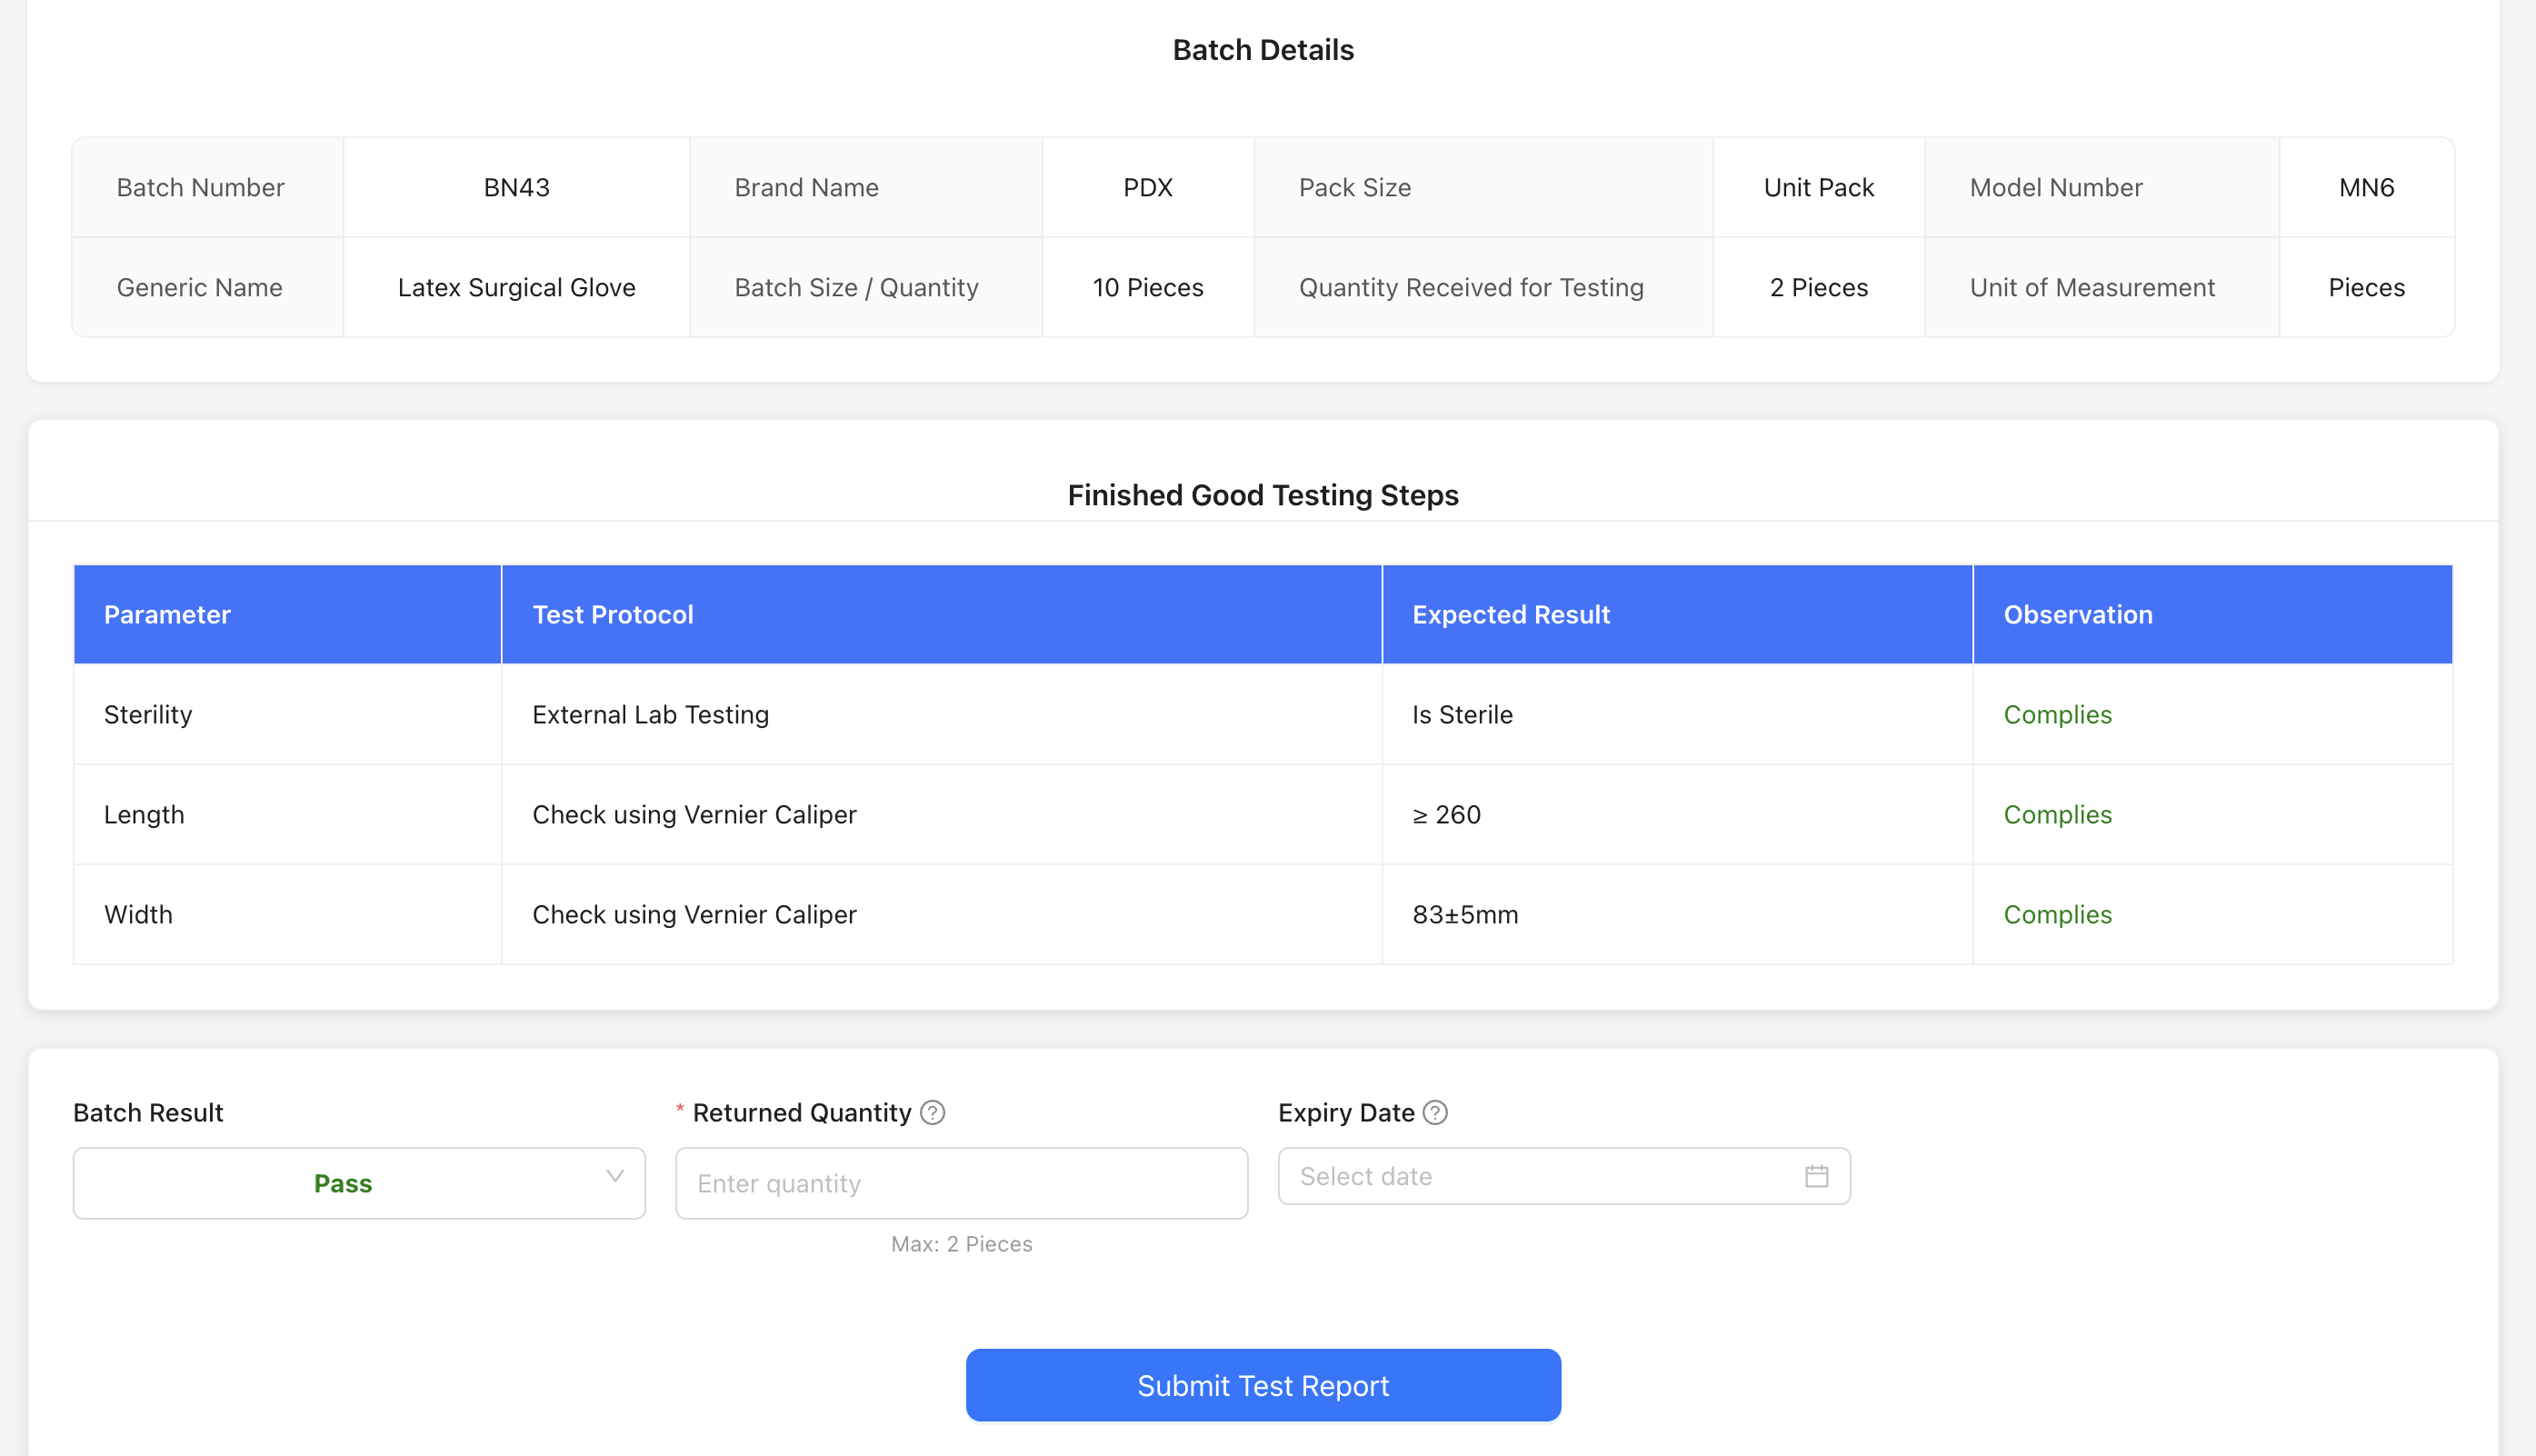
The test report form will show:
- Batch Details: Complete batch information
- Test Results Summary: Overview of all test results
- Test Result: Select PASS or FAIL
- Returned Quantity: Enter the quantity returned from testing (if any)
- Expiry Date: Enter the expiry date for the finished goods (if applicable)
-
Review all test results and ensure they meet specifications
-
Select the overall test result:
- PASS: All tests passed, batch can proceed
- FAIL: One or more tests failed, batch may need rework or rejection
-
Enter the quantity returned from testing (if any was consumed or returned)
-
Set the expiry date if applicable
-
Click Submit Report at the bottom of the form to submit the test report
Note:
- If the test result is PASS, the batch can proceed to store transfer
- If the test result is FAIL, the batch may need investigation, rework, or disposal according to your quality procedures
- The batch status will update to "TEST_REPORT_SUBMITTED" after submission
Step 10: Requesting Store Transfer
After the test report is submitted with a PASS result, you can request to transfer the finished goods to the store/inventory.
Requesting Store Transfer
-
Navigate to Production → Batches from the main menu
-
Find the batch with status "TEST_REPORT_SUBMITTED"
-
Click the Request Store Transfer button

-
The store transfer request form will show:
- Batch Details: Batch number, product, and batch size
- Manufactured Quantity: The actual quantity manufactured (may differ from expected)
- Quantity for Transfer: Enter or confirm the quantity to be transferred to store
- Unit: Confirm the unit of measurement
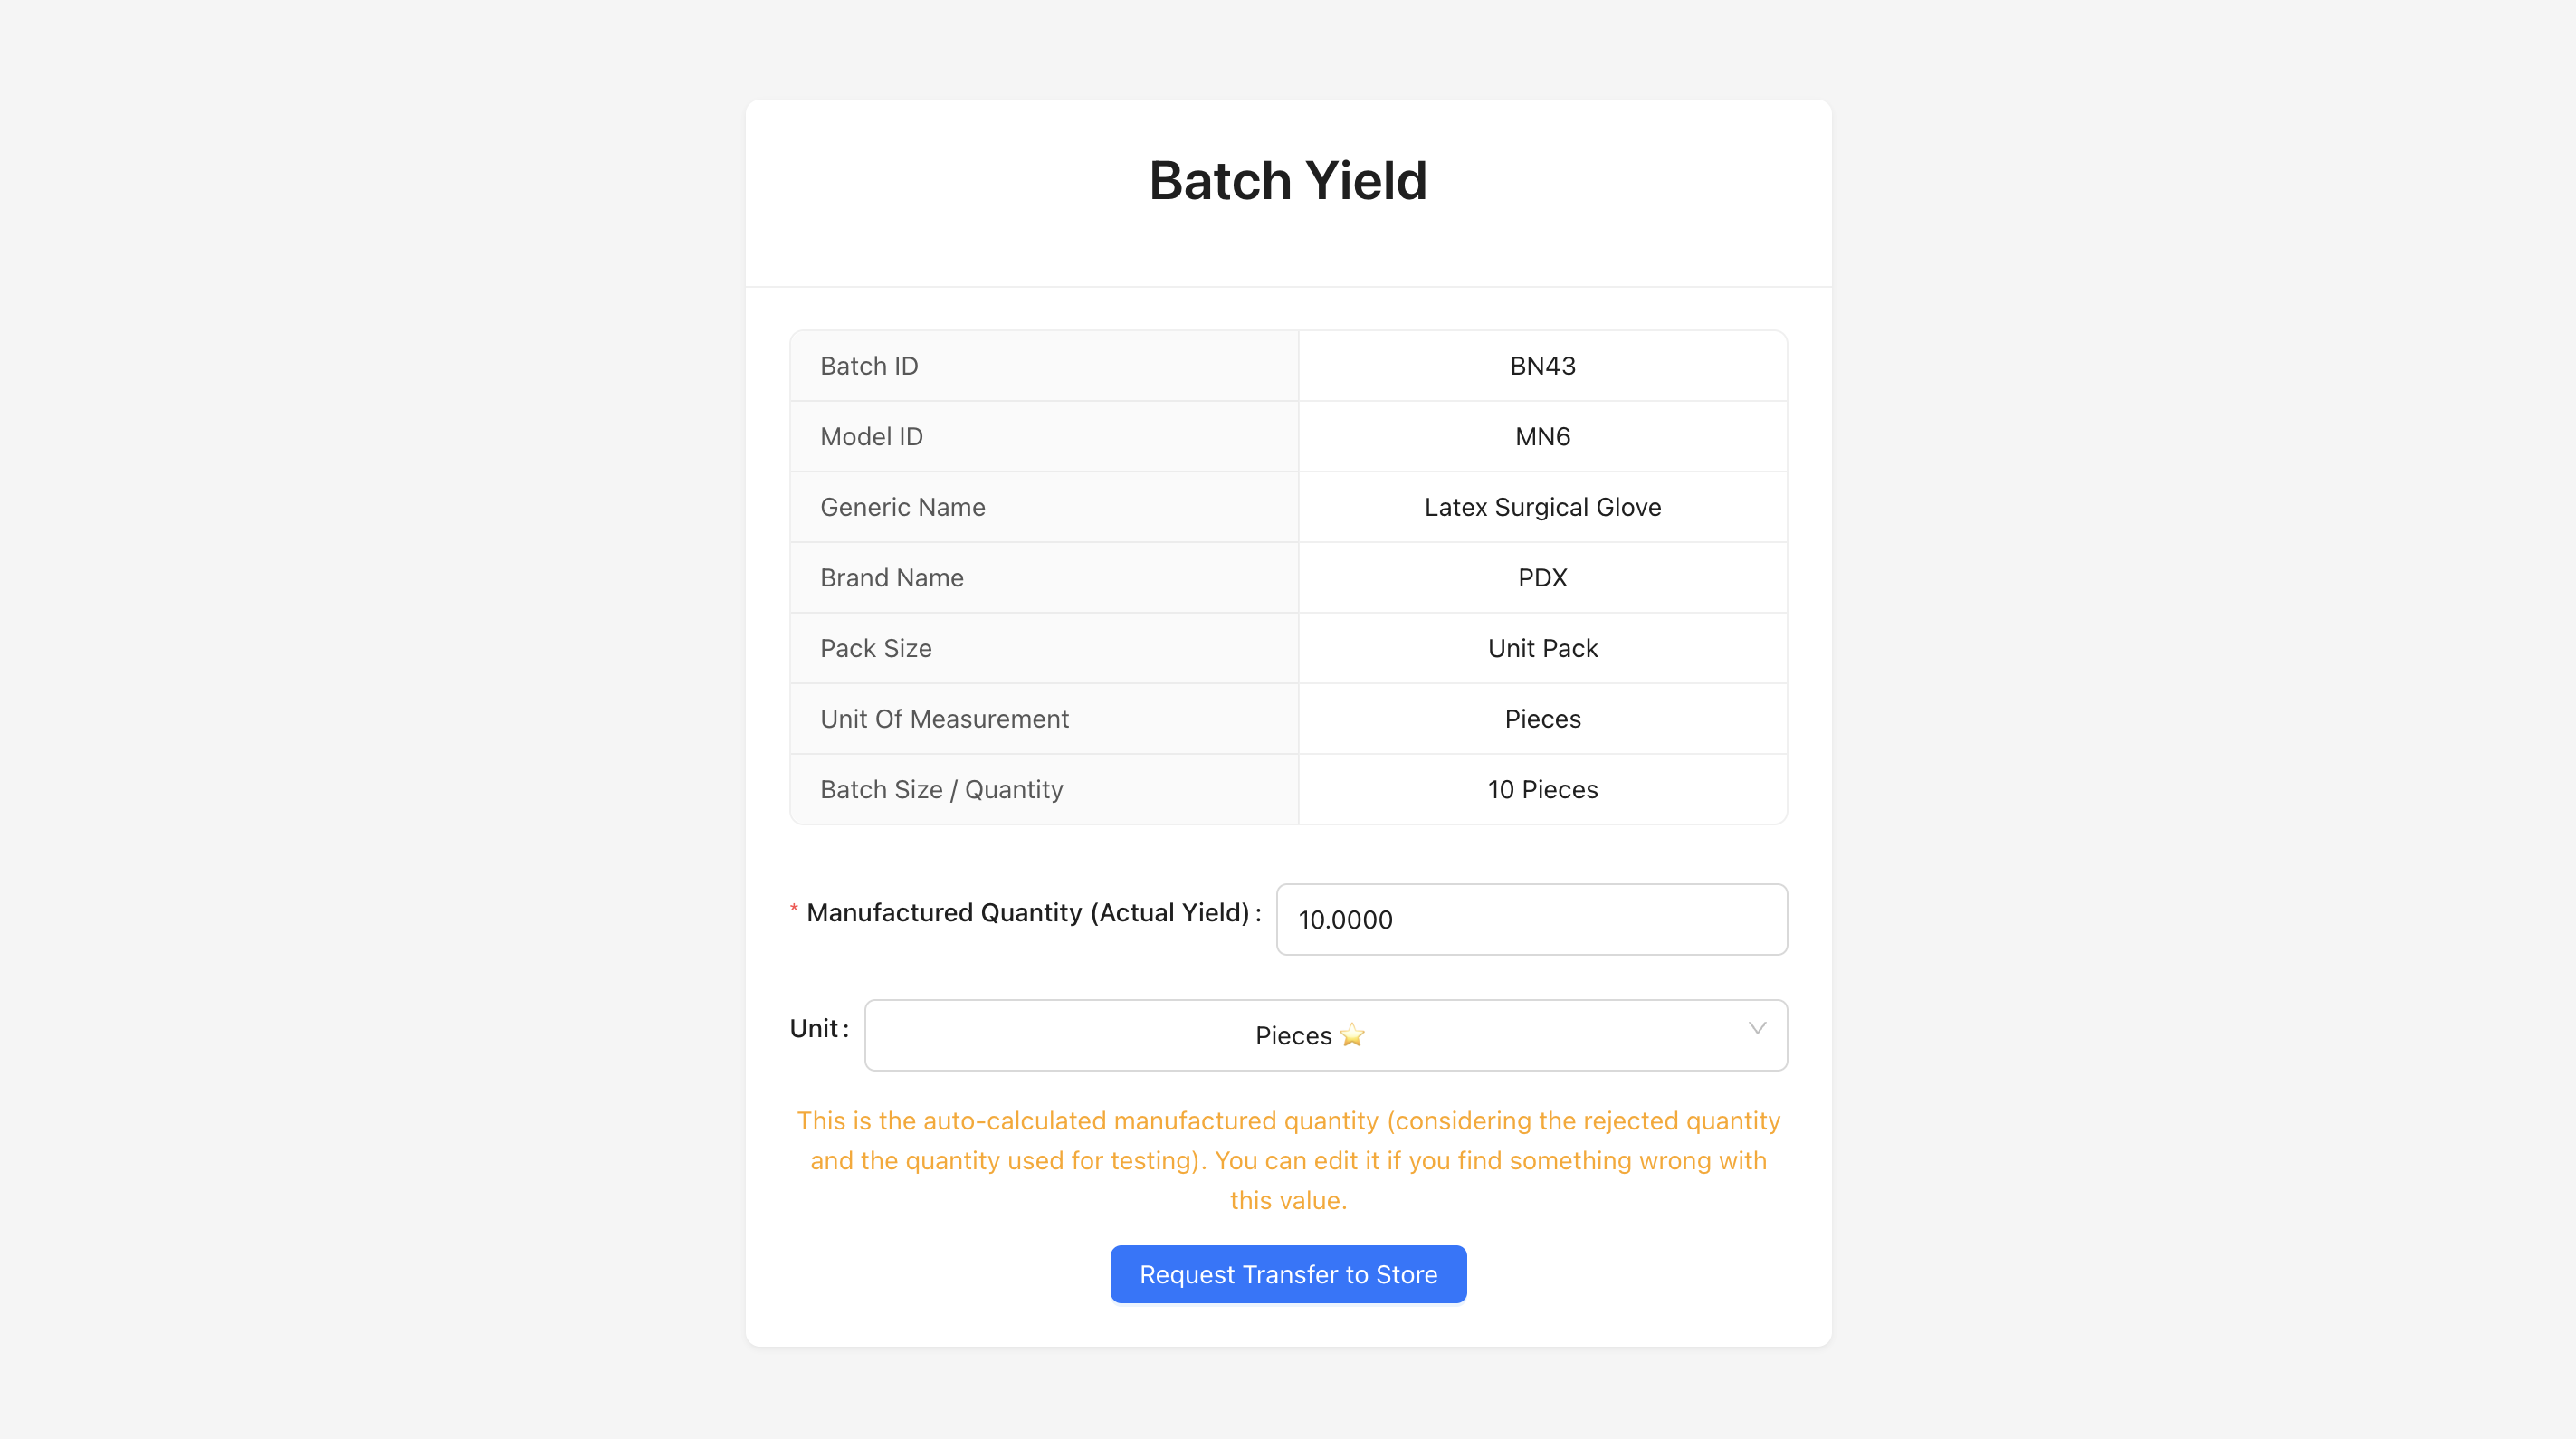
-
Review the manufactured quantity (this may have been updated during yield submission)
-
Enter or confirm the quantity to be transferred to store
-
Click Submit or Request Transfer at the bottom of the form to create the store transfer request
Note: After requesting store transfer, the batch status will change to "STORE_PICKUP_REQUESTED". The store/inventory team will need to accept the transfer to complete the process.
Step 11: Accepting Store Transfer
The final step is for the store/inventory team to accept the transfer and add the finished goods to inventory.
Accepting Store Transfer
-
Navigate to Production → Batches from the main menu
-
Find the batch with status "STORE_PICKUP_REQUESTED"
-
Click the Transfer to Store or Accept Transfer button
-
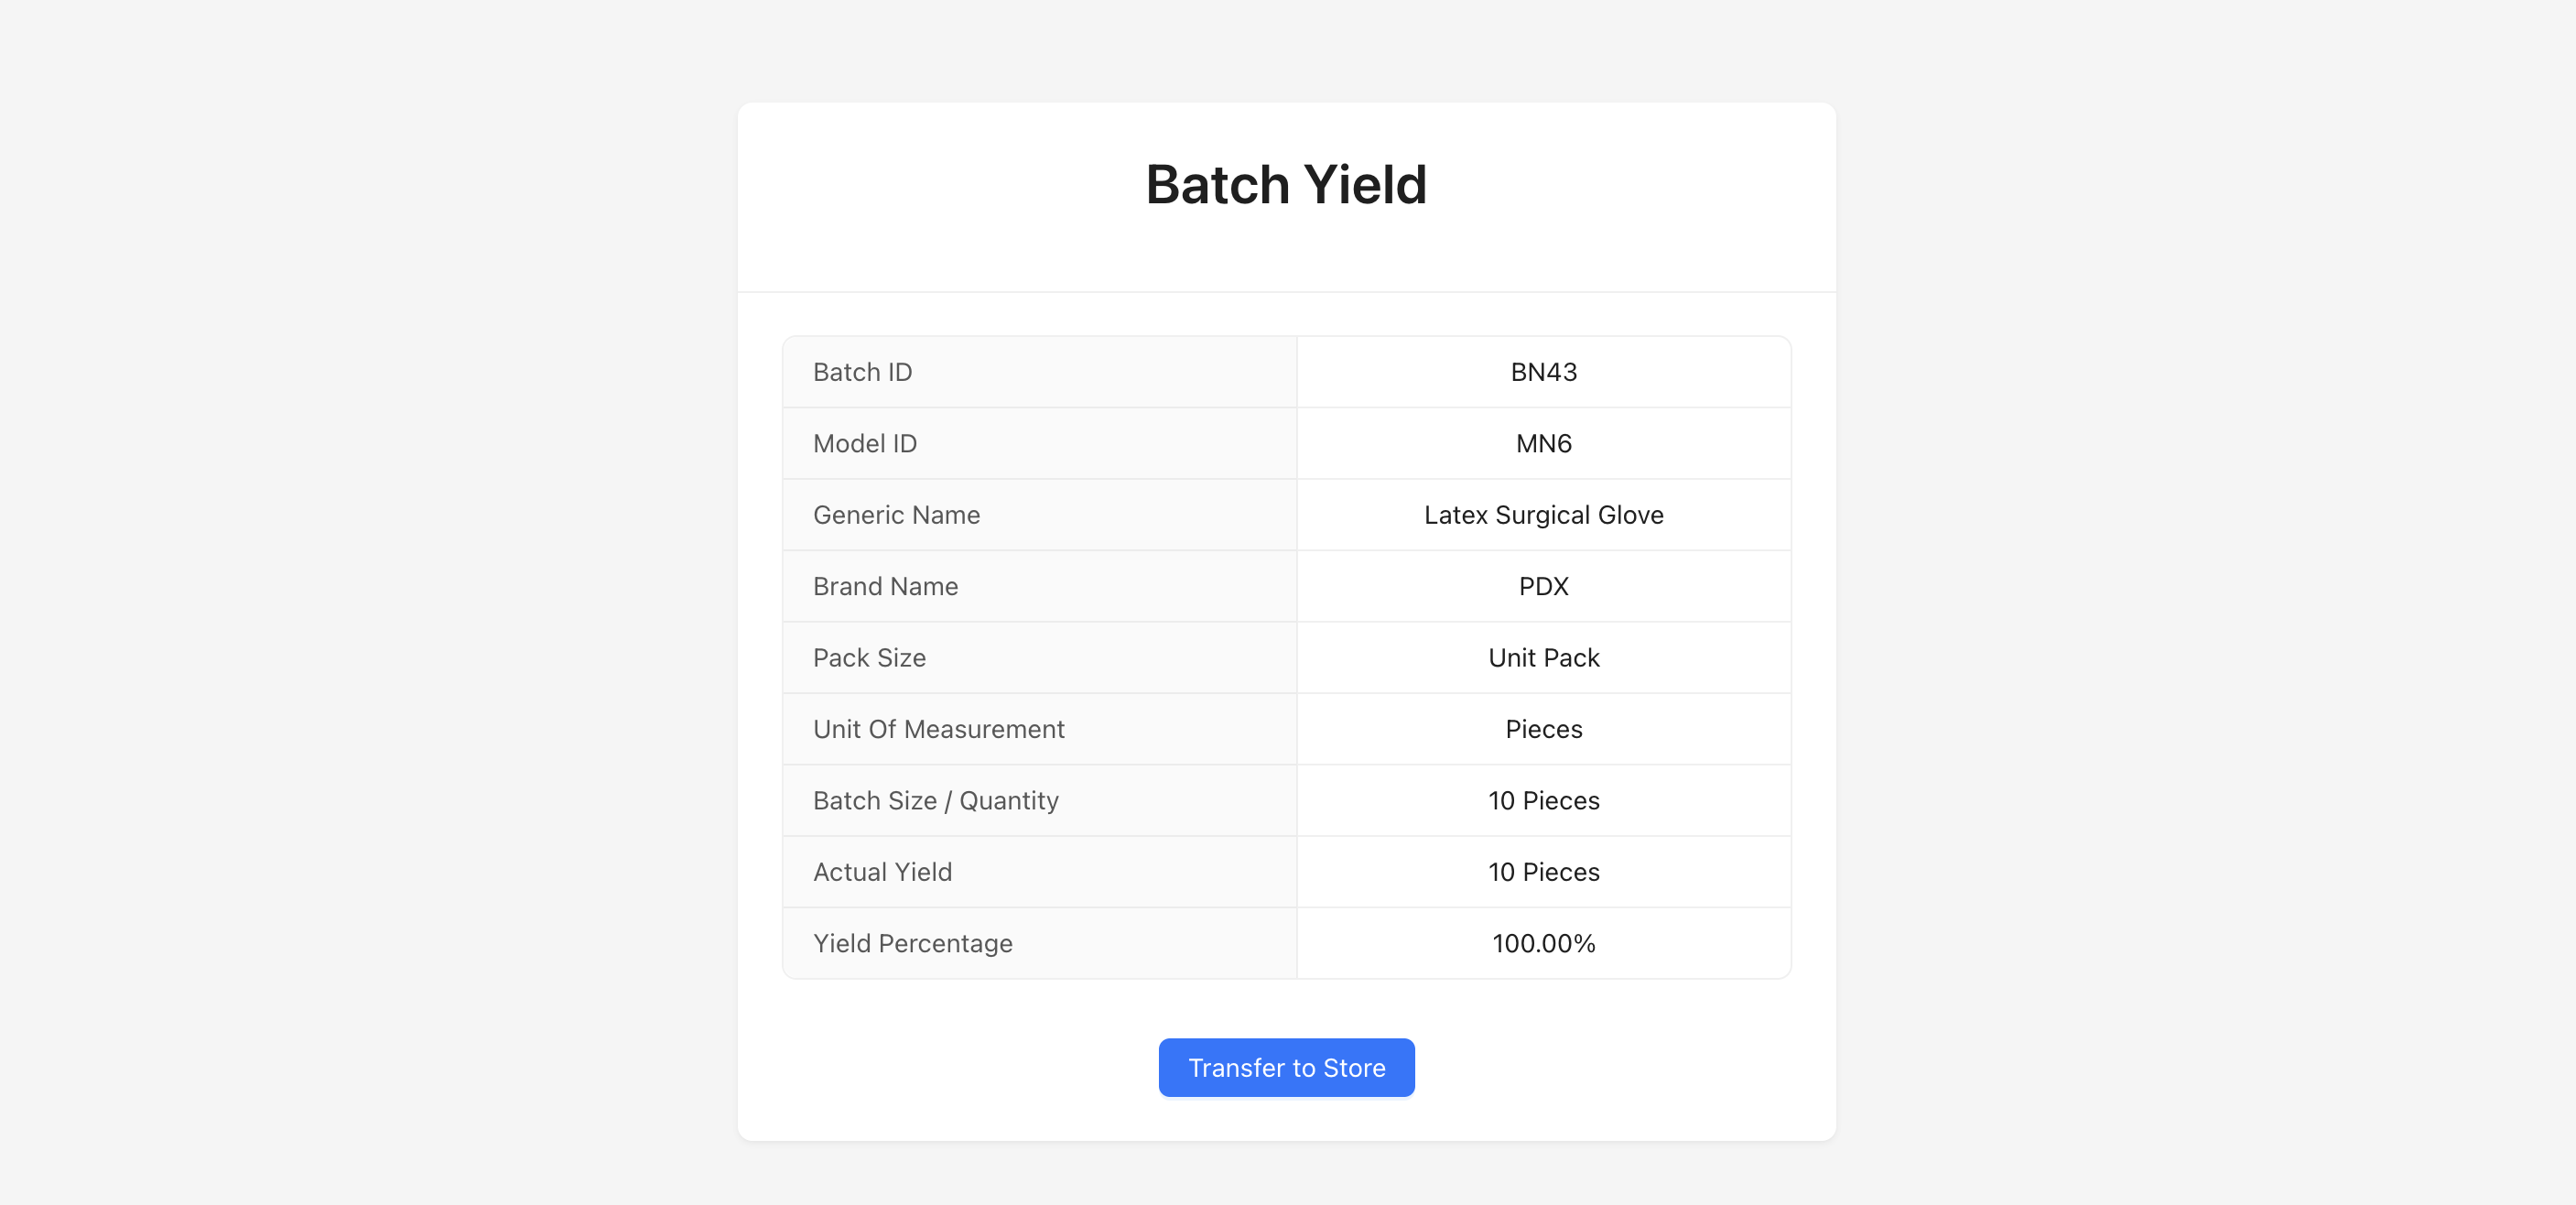
The transfer acceptance form will show:
- Batch Details: Complete batch information
- Transfer Request Details: Information about the transfer request
- Quantity: Quantity to be transferred
- Received Date: Select the date when goods were received in store

-
Review all batch and transfer details
-
Confirm the quantity received
-
Select the received date
-
Click Accept or Complete Transfer at the bottom of the form to finalize the store transfer
Note:
- After accepting the store transfer, the batch status will change to "FINISHED"
- The finished goods will be added to your inventory
- The batch is now complete and all materials, manufacturing steps, and quality records are maintained for traceability
Next Steps
After completing a batch:
- Inventory: Finished goods are now available in inventory
- Traceability: Complete batch history is maintained for regulatory compliance
- Reports: Generate batch reports and production registers
- Analytics: View batch analytics and production performance metrics
For more information on viewing batch details and reports, see the Batches section.